A Landing Zone is never the first thought when a project starts. When the pressure is on to deliver something fast in Azure (or any other cloud environment, the simplest path looks like this:
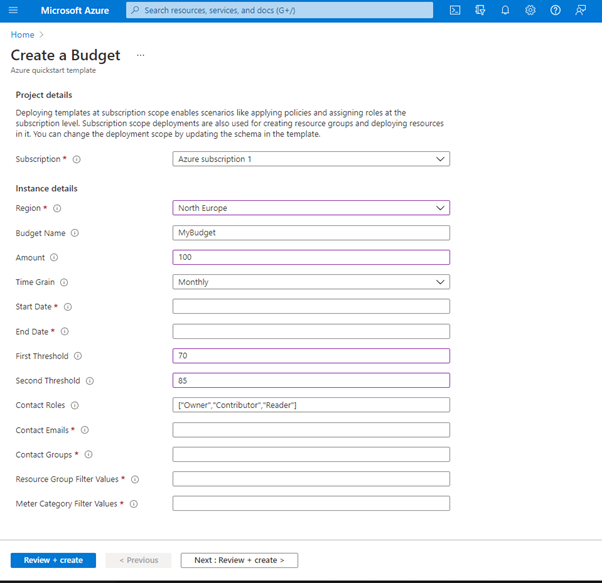
- Create a subscription
- Throw resources into a few Resource Groups
- Build a VNet (or two)
- Add some NSGs
- Ship it

Its a good approach ….. for a Proof Of Concept ….
Here’s the problem though: POC’s keep going and turn into Production environments. Because “we need to go fast….”.
What begins as speed often turns into sprawl, and this isn’t a problem until 30/60/180 days later, when you’ve got multiple teams, multiple environments, and everyone has been “needing to go fast”. And its all originated from that first POC …..
This post is about the pain points that appear when you skip foundations, and more importantly, how you can avoid them from day 1, using the Azure Landing Zone reference architectures as your guardrails and your blueprint.
This is always how it starts….
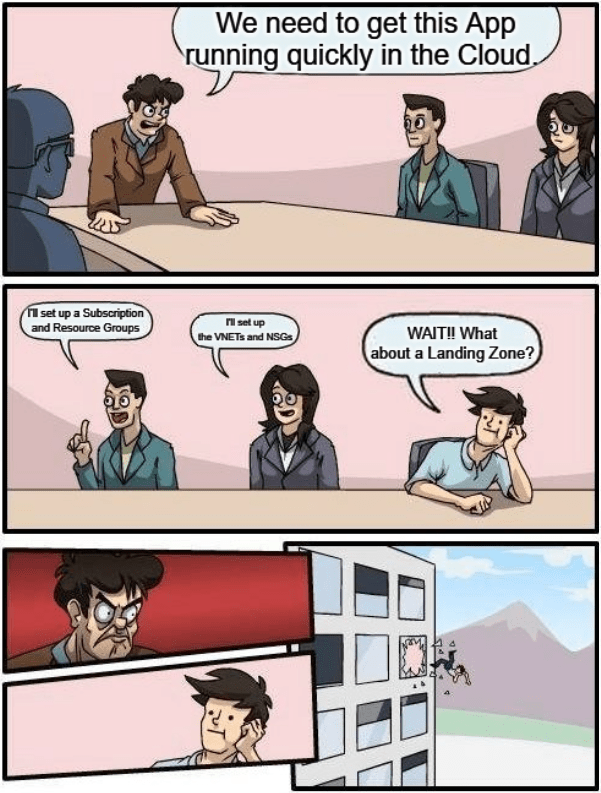
The business says:
“We need this workload live in Azure quickly.”
The delivery team says:
“No problem. We’ll deploy the services into a Resource Group, lock down the VNet with NSGs, and we’ll worry about the platform stuff later.”
Ops and Security quietly panic (or as per the above example, get thrown out the window….), but everyone’s under pressure, so you crack on.
At this point nobody is trying to build a mess. Everyone is “trying” to do the right thing. But the POC you build in those early days has a habit of becoming “the environment” — the one you’re still using a year later, except now it’s full of exceptions, one-off decisions, and “temporary” fixes that never got undone.
The myth: “Resource Groups + VNets + NSGs = foundation”
Resource Groups are useful. VNets are essential. NSGs absolutely have their place.
But if your “platform strategy” starts and ends there, you haven’t built a foundation — you’ve built a starting configuration.
Azure Landing Zones exist to give you that repeatable foundation: a scalable, modular architecture with consistent controls that can be applied across subscriptions as you grow.
The pain points that show up after the first few workloads
1) Governance drift (a.k.a. “every team invents their own standards”)
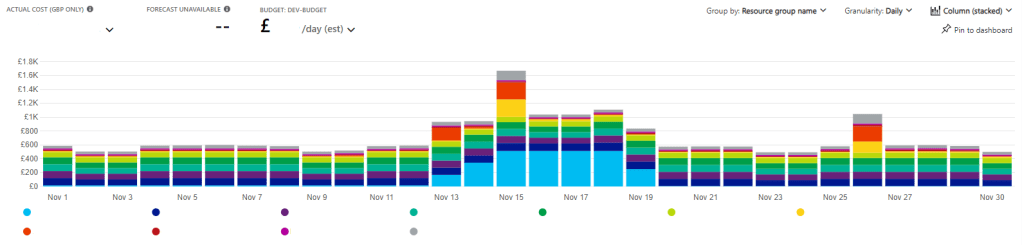
You start with one naming convention. Then a second team arrives and uses something else. Tags are optional, so they’re inconsistent. Ownership becomes unclear. Cost reporting turns into detective work.
Then you try to introduce standards later and discover:
- Hundreds of resources without tags
- Naming patterns that can’t be fixed without redeploying and breaking things
- “Environment” means different things depending on who you ask
The best time to enforce consistency is before you have 500 things deployed. Landing Zones bring governance forward. Not as a blocker, but as a baseline: policies, conventions, and scopes that make growth predictable.
2) RBAC sprawl (“temporary Owner” becomes permanent risk)
If you’ve ever inherited an Azure estate, environments tend to have patterns like:
- “Give them Owner, we’ll tighten it later.”
- “Add this service principal as Contributor everywhere just to get the pipeline working.”
- “We need to unblock the vendor… give them access for now.”
Fast-forward a few months and you have:
- Too many people with too much privilege
- No clean separation between platform access and workload access
- Audits and access reviews that are painful and slow
This is where Landing Zones help in a very simple way. The platform team owns the platform. Workload teams own their workloads. And the boundaries are designed into the management group and subscription model, not “managed” by tribal knowledge.
3) Network entropy (“just one more VNet”)
Networking is where improvisation becomes expensive. It starts with:
- a VNet for the first app
- a second VNet for the next one
- a peering here
- another peering there
- and then one day someone asks: “What can talk to what?”
And nobody can answer confidently without opening a diagram that looks like spaghetti.
The Azure guidance here is very clear: adopt a deliberate topology (commonly hub-and-spoke) so you centralise shared services, inspection, and connectivity patterns.
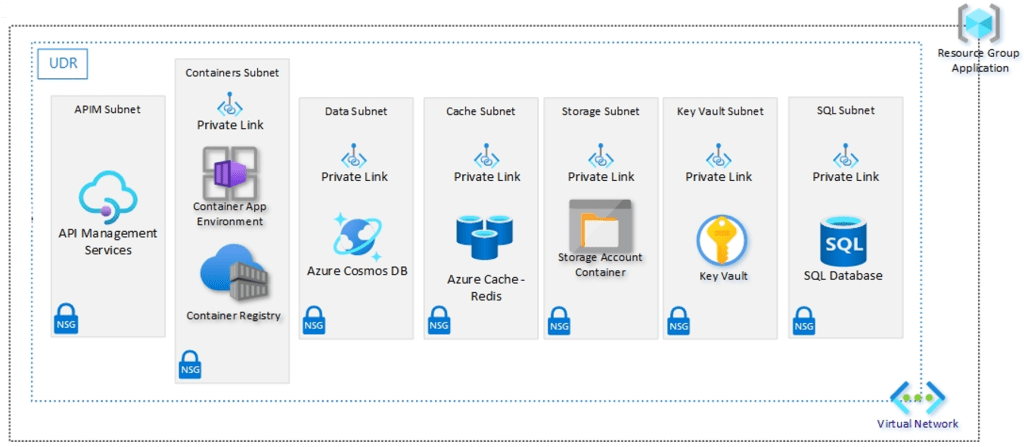
4) Subscription blast radius (“one subscription becomes the junk drawer”)
This is one of the biggest “resource group isn’t enough” realities. Resource Groups are not strong boundaries for:
- quotas and limits
- policy scope management at scale
- RBAC complexity
- cost separation across teams/products
- incident and breach containment
When everything lives in one subscription, one bad decision has a very wide blast radius. Landing Zones push you toward using subscriptions as a unit of scale, and setting up management groups so you can apply guardrails consistently across them.
So what is a Landing Zone, practically?
In a nutshell, a Landing Zone is the foundation to everything you will do in future in your cloud estate.
The platform team builds a standard, secure, repeatable environment. Application teams ship fast on top of it, without having to re-invent governance, networking, and security every time.
The Azure Landing Zone reference architecture is opinionated for a reason — it gives you a proven starting point that you tailor to your needs.
And it’s typically structured into two layers:
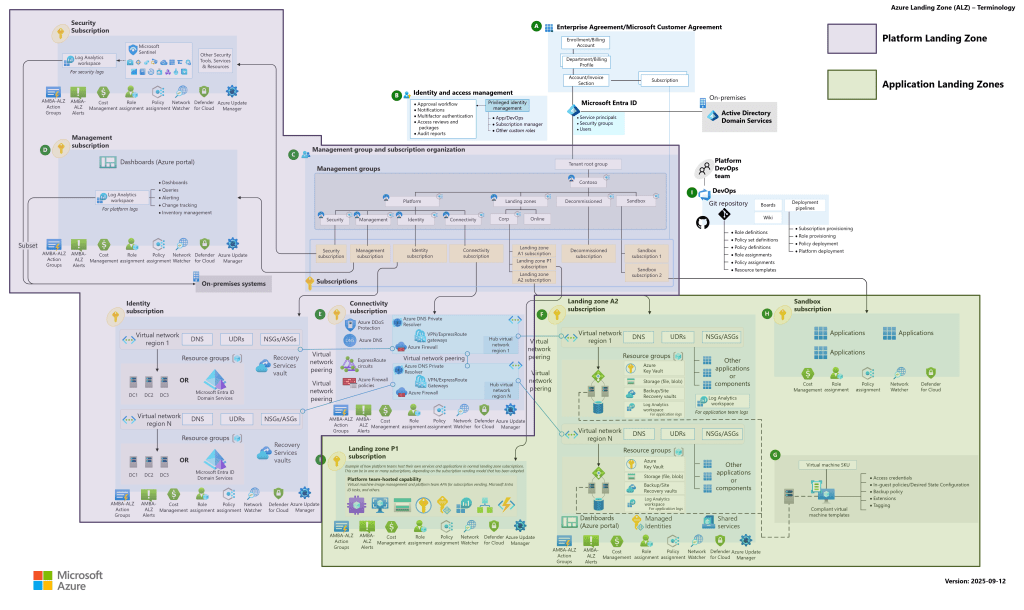
Platform landing zone
Shared services and controls, such as:
- identity and access foundations
- connectivity patterns
- management and monitoring
- security baselines
Application landing zones
Workload subscriptions where teams deploy their apps and services — with autonomy inside guardrails.
This separation is the secret sauce. The platform stays boring and consistent. The workloads move fast.
Avoiding sprawl from day 1: a simple blueprint
If you want the practical “do this first” guidance, here it is.
1) Don’t freestyle: use the design areas as your checklist
Microsoft’s Cloud Adoption Framework breaks landing zone design into clear design areas. Treat these as your “day-1 decisions” checklist.
Even if you don’t implement everything on day 1, you should decide:
- Identity and access: who owns what, where privilege lives
- Resource organisation: management group hierarchy and subscription model
- Network topology: hub-and-spoke / vWAN direction, IP plan, connectivity strategy
- Governance: policies, standards, and scope
- Management: logging, monitoring, operational ownership
The common failure mode is building workloads first, then trying to reverse-engineer these decisions later.
2) Make subscriptions your unit of scale (and stop treating “one sub” as a platform)
If you want to avoid a single subscription becoming a dumping ground, you need a repeatable way to create new workload subscriptions with the right baseline baked in.
This is where subscription vending comes in.
Subscription vending is basically: “new workload subscriptions are created in a consistent, governed way” — with baseline policies, RBAC, logging hooks, and network integration applied as part of the process.
If you can’t create a new compliant subscription easily, you will end up reusing the first one forever… and that’s how sprawl wins.
3) Choose a network pattern early (then standardise it)
Most of the time, the early win is adopting hub-and-spoke:
- spokes for workloads
- a hub for shared services and central control
- consistent ingress/egress and inspection patterns
The point isn’t that hub-and-spoke is “cool” – it gives you a consistent story for connectivity and control.
4) Guardrails that don’t kill speed
This is where people get nervous. They hear “Landing Zone” and think bureaucracy. But guardrails are only slow when they’re manual. Good guardrails are automated and predictable, like:
- policy baselines for common requirements
- naming/tagging standards that are enforced early
- RBAC patterns that avoid “Owner everywhere”
- logging and diagnostics expectations so ops isn’t blind
This is how you enable teams to move quickly without turning your subscription into a free-for-all.
How can you actually implement this?
Don’t build it from scratch. Use the Azure Landing Zone reference architecture as your baseline, then implement via an established approach (and put it in version control from the start). The landing zone architecture is designed to be modular for exactly this reason: you can start small and evolve without redesigning everything.
Treat it like a product:
- define what a “new workload environment” looks like
- automate the deployment of that baseline
- iterate over time
The goal is not to build the perfect enterprise platform on day 1; its to build something that won’t collapse under its own weight when you scale.
A “tomorrow morning” checklist
If you’re reading this and thinking “right, what do I actually do next?”, here are four actions that deliver disproportionate value:
- Decide your management group + subscription strategy
- Pick your network topology (and standardise it)
- Define day-1 guardrails (policy baseline, RBAC patterns, naming/tags, logging hooks)
- Set up subscription vending so new workloads start compliant by default
Do those four things, and you’ll avoid the worst kind of Azure sprawl before it starts.
Conclusion
Skipping a Landing Zone might feel like a quick win today.
But if you know the workload is going to grow — more teams, more environments, more services, more scrutiny — then the question isn’t “do we need a landing zone?”
The question is: do we want to pay for foundations now… or pay a lot more later when we (inevitably) lose control?
Hope you enjoyed this post – this is my contribution to this years Azure Spring Clean event organised by Joe Carlyle and Thomas Thornton. Check out the full schedule on the website!