100 Days of Cloud – Day 100: The End of the Beginning

Its Day 100 of my 100 Days of Cloud Journey.

Day 100….. I’ve made it! So its time to reflect on the journey, look back at what prompted me to do it, the original goals, how that changed over time and remind myself that this is definitely not the end!

Back before the Start…..

Before we start into the why’s of how “100 Days” came about, we need to go back to a different time for us all – March 2020, when none of us knew what was around the corner despite the reports that something wasn’t well in a part of China that none of us had ever heard of.

The story starts with me on my way home from my brothers’ wedding in Melbourne, and while waiting for the connection during the stopover in Dubai I came across an article informing me that Microsoft were retiring the MCSE certification for good in July 2020, and that there would be no 2019 version of the cert as it was all moving to Azure. I made note of the article and like most articles that interested me, I bookmarked it for future reading and probably emailed myself a copy to remind me to revisit it.

Damn you MCSE retirement!

And therein lies the problem – like most IT people, I have lots of great ideas and intentions and save them away for future reference. Its getting back to them and actually doing them thats the problem.

So anyway – 5 days after arriving home, the country went into lockdown and I was consigned to the makeshift desk in spare room. A few weeks went by, and having become Netflix-man and gotten bored with it, I was doom-scrolling through my emails late one night and came across the MCSE email I’d sent to myself.

It bothered me because I was using the technology on a daily basis,a nd also because I hadn’t pushed myself into doing an exam since I took one of the MCSE 2012 exams 3 years previously. So I have 3 months – I’ll at least get the MCSA portion done, right?

Not quite – I managed to clear the first 2 exams, but then Microsoft threw me a lifeline by extending the deadline to January 2021. Suddenly it was achievable again but I didn’t want to rest on my laurels and become complacent, so I pushed on. MCSA was achieved in July, and the MCSA duly completed by August. So goal achieved!

2 things happened in between MCSA and MCSE.

Firstly, I signed up to Cloudskills.io after seeing a Google Ad offering their Azure Admin Associate Course content for $7. I then signed up for the full platform after subscribing to their Podcast and realising that I needed to know the Fundamentals of Azure before diving deeper.

Secondly, I came across the 100 Days of Cloud website and Github hosted by people like Andrew Brown and Gwyneth Pena Siguenza. Wasn’t really ready for that jump yet, but did my usual bookmark and email to myself for future reference…..

2020 quickly became 2021, and by mid-2021 a number of things had happened:

  • I’d signed up for my free Azure Account and was experimenting with the services on offer.
  • Based on this I’d passed the Az-900 (Azure Fundamentals), AZ-104 (Azure Admin Associate), AZ-140 (Azure Virtual Desktop) and SC-300 (Identity and Access).
  • I’d gone deeper into CloudSkills.io, joined their Community, and started attending User Groups remotely.
  • I’d also changed job and started working for Ekco, a growing MSP based in Dublin.

The Driver behind 100 Days

So over the course of Summer 2021 I was attending user groups and getting involved in Cloudskills.io, and got the opportunity to meet Mike Pfeiffer on a call. I’ve always been a Mike Pfeiffer fan-boy, right back to the old days when he was blogging about Active Directory and Exchange right up to his Pluralsight content that I had used during my MCSE studies. During our conversation, Mike asked me 2 questions:

  • Are you producing any content?
  • Why not (response to answer provided)?

This introduced me to the concept of SODOTO, or:

  • See One – observe someone else teaching you about something.
  • Do One – can you do it yourself based on the teachings above.
  • Teach One – can you get a deep understanding of what you’ve learned and teach that back to an audience in either video or blog format so that they understand it.

This led me to start a blog and the original series on Monitoring Docker Containers with InfluxDB and Grafana. And that got me into the blogging bug for a few months – release a blog every week was the goal.

When that series finished, I wrote a few other smaller blogs, but eventually needed another goal – a longer term one that I could commit to. I’d always wanted to go deeper into Azure and learn more about all of the services that were offered. I played about in my own tenant and through Bootcamps had dived a bit deeper. But it was a big monster, how was I going to do it?

And during another one of my late night doom-scrolling sessions, I came across the 100 Days bookmark that I’d saved the previous year. And the lightbulb in my head turned on …

100 Days

And so I started. I knew I could transfer some of the skills I’d already learned across, so I started small and went for the basic IaaS stuff that I knew well.

At the start, the idea was that I would do 100 Days straight. It became very clear to me around Day 12 that is wasn’t going to be possible because I was doing this as a SODOTO model, and if I had tried to do it I was going to crash and burn quickly and regularly.

Thats the key, and a great piece of advice – learn at a pace that you are comfortable with and can sustain. Don’t rush it, it just won’t go in.

At the start, I was doing this for me – as a challenge that I wanted to finish, and doing it in the open held me accountable. It also meant that family, friends, work colleagues and social connections could enquire and joke about when the next blog was coming out. It wasn’t about likes or followers. It was about me learning and tying together components of the Azure and other cloud ecosystems and how they connect.

And at that point it evolves into being not just about me, but about the followers and giving something back to them and to the wider community.

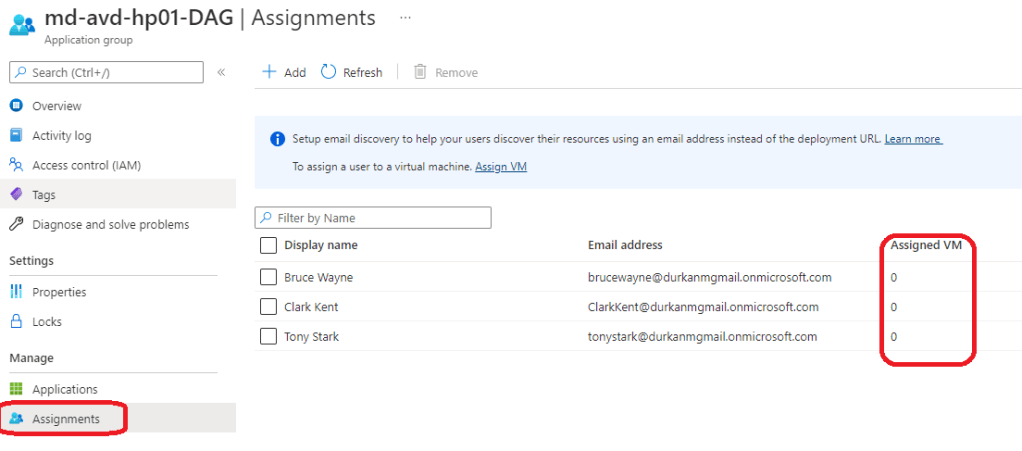
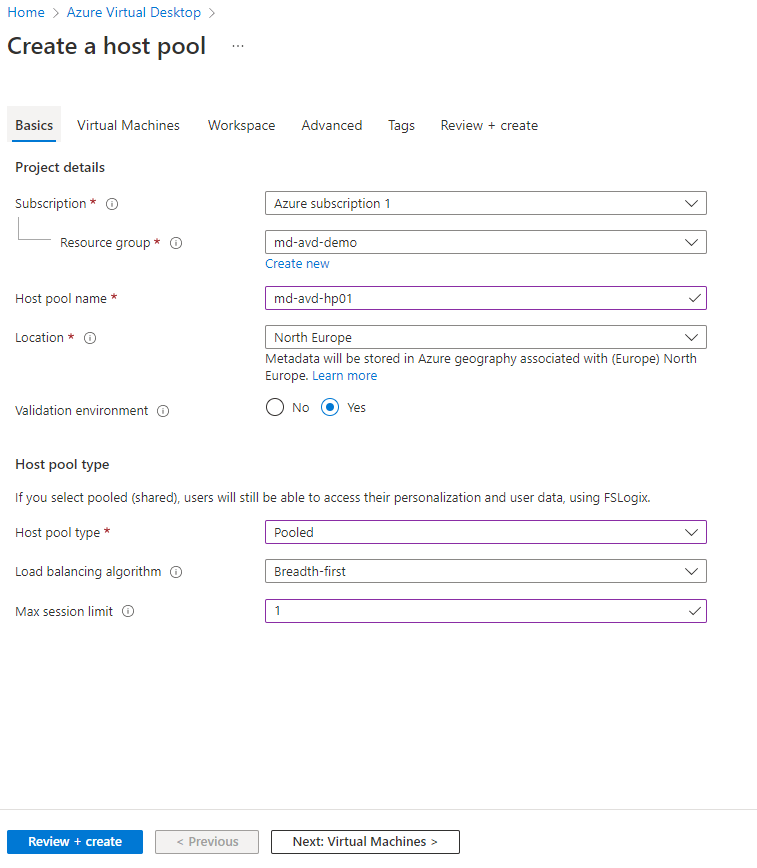
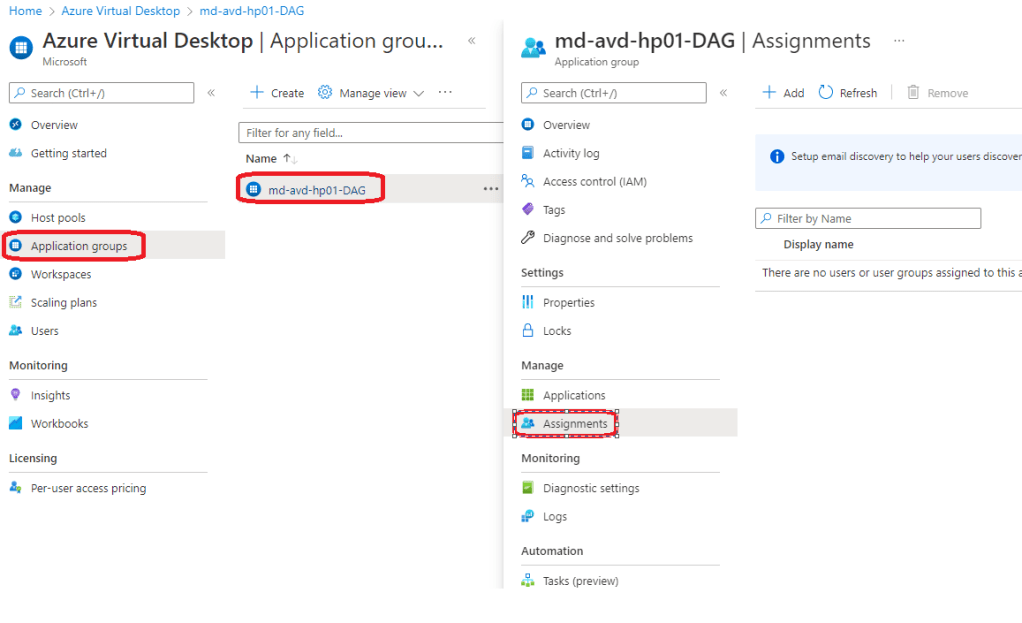
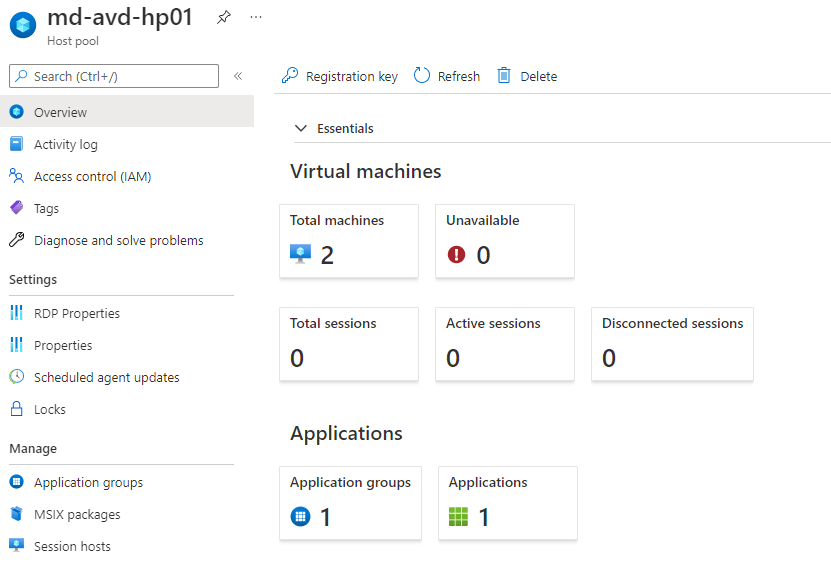
Lets take Azure Virtual Desktop as an example – I have experience of working with Citrix, so the concepts are pretty transferrable. But think about all of the underlying concepts you need to know:

  • Virtual Machines
  • Storage
  • Authentication
  • MFA
  • Identity
  • Desktop and App Management

You very quicky realize that although all of those are standalone service offerings in Azure, they are not just intertwined in Azure Virtual Desktop but in hundreds of other Azure services. And knowing them as a baseline will give you a better understanding when you go to learn the rest of the services!

Time to give Thanks!

There were times when I never thought I’d reach this goal and doubted myself, but I had some unbelievable support and encouragement along the way.

Firstly and most importantly my wife and family, who put up with me disappearing back to the laptop most evenings and tolerated the late nights where I screamed curses at deployments that had gone wrong. Also for giving me “the eye” every time I flopped down on the couch in the evenings and encouraged me to embrace the challenge and keep going.

To my friends and work colleagues who kept me going with their encouragement, banter and interest in the blog. I’m not going to name you all becasue I’m sure to forget someone, but you’ve all been brilliant.

To my mentors. The opportunity to get to know people like Mike Pfeiffer, Robin Smorenburg, Derek Smith and Kevin Evans, and to be able to pick their brains and get tips and encouragement from them has been mind-blowing. There are many more who I haven’t mentioned, particularly the gang over at Cloudskills.io. You guys are all awesome and you know it – any success I have is down to you.

To the community who have chipped in with words of encouragement and support along the way. To people like Michal Marchlewski, Karl Cooke, Gregor Suttie, Daniel McLoughlin,John Lunn and many more – thanks for reaching out and for the support guys, it really meant a lot.

Finally to everyone who has read the blog and gotten in contact with messages of support and telling me that the blog has helped them and been useful to them. Thank you from the bottom of my heart, even helping one person would have made it all worthwhile, but the response has been genuinely amazing.

Conclusion and What happens next!

What happens next is I’m going to take a break from blogging for a few weeks! I’m going to Scottish Summit on June 10th, so if you see me there please do come over and stay hello! Or please feel free to reach out to me on my social channels. Once I get back from Scotland, I’ll come up with the next challenge, whatever that may be!

I hope you’ve enjoyed the 100 Days as much as I have and have found it useful. As the title says, this is not the end, its just the end of the beginning of the journey.

Until next time!

100 Days of Cloud – Day 99: Microsoft Build 2022

Its Day 99 of my 100 Days of Cloud journey and in todays post we’ll take a quick look at some of the announcements coming out of Microsoft Build.

Microsoft Build is an annual event that is primarily focused on the development side of the Microsoft ecosystem, however like all Microsoft events there are normally some really cool announcements around new technologies and updates to existing technologies.

I’m going to focus particularly on updates to the technologies that I’ve blogged about over the last 99 days! In effect, I’m providing some updates to the blog posts so that if you’ve followed me on the journey this far, you’ll get to here and have the latest news and features!

Azure Container Apps

Azure Container Apps is now Generally Available. This enables you to run microservices and containerized apps on a serverless platform.

Common uses of Azure Container Apps include:

  • Deploying API endpoints
  • Hosting background processing applications
  • Handling event-driven processing
  • Running microservices

Applications built on Azure Container Apps can dynamically scale based on the following characteristics:

  • HTTP traffic
  • Event-driven processing
  • CPU or memory load

We looked at Azure Container instances on Day 82. The key differences between the 2 are:

  • If you need to spin up multiple container (e.g. front end / backend / database), Azure Container Apps is a better choice as it comes with Dapr (Distributed Application Runtime) and it will auto retry the requests and add some telemetry data.
  • If you just need long running jobs or you don’t need multiple containers to communicate with each other, you can go with Azure Container Instances.

You can check out the blog post announcement here, and the offical Microsoft Docs page here for more information.

Azure Cosmos DB

We looked at Azure Cosmos DB back on Day 64 and learned that it is a fully managed NoSQL database provides high availability, globally-distributed access to data with very low latency. There are a number of APIs to choose from that best meets the needs of your database requirements.

Some of the new featres announced for CosmosDB are:

  • Increased serverless capacity to 1 TB.
  • Shared throughput across database partitions.
  • Support for hierarchical partition keys.
  • An improved 30-day free trial experience, now generally available, and support for MongoDB data in the Azure Cosmos DB Linux desktop emulator.
  • A new, free, continuous backup and point-in-time restore capability enables seven-day data recovery and restoration from accidental deletes
  • Role-based access control support for Azure Cosmos DB API for MongoDB offers enhanced security.

You can find out more about the Cosmos DB enhancements here.

Azure Stack HCI

Its timely that we only looked at Azure Stack HCI on Day 95 and commented that your Azure Stack HCI Cluster can contain between 2 and 16 physical servers.

The new single node Azure Stack HCI, now generally available, fulfills the growing needs of customers in remote locations while maintaining the innovation of native integration with Azure Arc. It offers customers the flexibility to deploy the stack in smaller spaces and with less processing needs, optimizing resources while still delivering quality and consistency.

Additional benefits include:

  • Smaller Azure Stack HCI solutions for environments with physical space constraints or that do not require built-in resiliency, like retail stores and branch offices.
  • A smaller footprint to reduce hardware and operational costs.
  • The same scale applies, so you can start at 1 and scale up to 16 nodes if required.

You can find out more about the AZure Stack HCI announcement here.

Azure Migrate

On Day 18 we looked at Azure Migrate, which is an Azure technology which automates planning and migration of your on-premise servers from Hyper-V, VMware or Physical Server environments.

Enhancements to the service now streamline and simlify cloud migration and modernization:

  • Agentless discovery and grouping of dependent Hyper-V virtual machines (VMs) and physical servers to ensure all required components are identified and included during a move to Azure. This feature is generally available.
  • Azure SQL assessment improvements for better customer experience. Assessments now include recommendations for SQL Server on Azure VMs and support for Hyper-V VMs and physical stacks, along with already existing assessments for Azure SQL Managed Instance and Azure SQL Database. This feature is in preview.
  • Pause and resume of migration function has been included to provide control over the migration window. This mechanism can be used to schedule migrations during off-peak periods. This feature is in preview.
  • Discovery, assessment and modernization of ASP.NET web apps to native Azure Application Service. Customers can discover and modernize an ASP.NET web app to Azure Kubernetes Service (AKS) Application Service Container and discover Java apps running on Apache Tomcat.

Conclusion

So thats a quick rundown of the main updates from Microsoft Build. You can find information on all of the updates that were released here in the Microsoft Build Book of News, and its also not too late to register and watch some of the recorded and on-demand sessions from Microsoft Build by signing up here.

As with all Microsoft Conferences, there’s a CloudSkills Challenge and you have until June 21st to sign up and complete the modules from one of the 8 challenges are available. As always, you can earn a free certification exam pass if you complete the challenge! You can sign up here and the list of rules and exams eligible is here!

Hope you enjoyed this post, until next time!

100 Days of Cloud – Day 98: Azure Bicep

Its Day 98 of my 100 Days of Cloud journey and in todays post we’ll take a quick look at Azure Bicep.

Azure Bicep is a domain-specific language (DSL) that uses a declarative syntax to deploy Azure resources. In a Bicep file, you define the infrastructure you want to deploy to Azure, and then use that file throughout the development lifecycle to repeatedly deploy your infrastructure. Your resources are deployed in a consistent manner.

Bicep v JSON

We’ve seen Azure Resource Manager Templates and how they can be used to define your infrastructure based on JSON Templates. Bicep is part of the Azure Resource Managet Template family – the difference is that Bicep is a launguage that uses .bicep files instead of .json files.

If we take a look at the differences between the 2 – below is a JSON template where we want to deploy a Storage Account:

And here we have a Bicep file deploying the same storage account:

You can see the difference in file size and the simpler syntax in use with Bicep over JSON. However, when you build Bicep templates and perform a deployment operation, it will transpile into an ARM template, and then Resource Manager will go and deploy your resources to Azure. So effectively the runtime is unchanged; Bicep only provides an abstract layer and reduces the pain of working with JSON.

You can also use the Bicep Playground to view Bicep and equivalent JSON side by side. This will allow you can compare the implementations of the same infrastructure. You can also decompile an existing ARM template to Bicep, see Decompiling ARM template JSON to Bicep.

Benefits of Azure Bicep

  • Authoring experience: When you use the Bicep Extension for VS Code to create your Bicep files, you get a first-class authoring experience. The editor provides rich type-safety, intellisense, and syntax validation.
  • Repeatable results: Repeatedly deploy your infrastructure throughout the development lifecycle and have confidence your resources are deployed in a consistent manner. Bicep files are idempotent, which means you can deploy the same file many times and get the same resource types in the same state. You can develop one file that represents the desired state, rather than developing lots of separate files to represent updates.
  • Orchestration: You don’t have to worry about the complexities of ordering operations. Resource Manager orchestrates the deployment of interdependent resources so they’re created in the correct order. When possible, Resource Manager deploys resources in parallel so your deployments finish faster than serial deployments. You deploy the file through one command, rather than through multiple imperative commands.
  • Modularity: You can break your Bicep code into manageable parts by using modules. The module deploys a set of related resources. Modules enable you to reuse code and simplify development. Add the module to a Bicep file anytime you need to deploy those resources.
  • Integration with Azure services: Bicep is integrated with Azure services such as Azure Policy, template specs, and Blueprints.
  • Preview changes: You can use the what-if operation to get a preview of changes before deploying the Bicep file. With what-if, you see which resources will be created, updated, or deleted, and any resource properties that will be changed. The what-if operation checks the current state of your environment and eliminates the need to manage state.
  • No state or state files to manage: All state is stored in Azure. Users can collaborate and have confidence their updates are handled as expected.
  • No cost and open source: Bicep is completely free. You don’t have to pay for premium capabilities. It’s also supported by Microsoft support.

Limitations

  • Limited to Azure — Bicep isn’t going to fly if someone is using multi-cloud and wants to use the same language across multiple cloud providers. This where Terraform has the advantage in this space.
  • Learning Curve — Bicep is basically a new language that expects some learning and understanding in spite of being very simple. Most of the users can prefer to use JSON instead, and if you are familiar with traditional JSON ARM Templates you may decide to stick with that.

Conclusion

Azure Bicep is an exciting technology that promises to make deployments easier if you are using only Azure. There are some great resources out there to start your learning journey:

Hope you all enjoyed this post, until next time!

100 Days of Cloud – Day 97: Azure Terrafy

Its Day 97 of my 100 Days of Cloud journey and in todays post we’ll take a quick look at Azure Terrafy.

Azure Terrafy is a tool which you can use to bring your existing Azure resources into Terraform HCL and import it into Terraform state.

As we saw back on Day 36, Terraform state acts as a database to store information about what has been deployed in Azure. When running terraform plan, the tfstate file is refreshed to match what it can see in the environment. And if you use Terraform to manage resources, you should only use Terraform and not any other deployment tools as this can cause issues with your terraform configuration files and in turn issues with your Azure resources.

But if we’ve deployed infrastructure using means other than Terraform (such as ARM Templates, Bicep, PowerShell or manually using the Azure Portal), its difficult to keep those resources in a consistent state of configuration.

And thats where Azure Terrafy comes to the rescue!

So lets do a quick demo – on my local device I have the latest Terraform version installed and have also downloaded the Azure Terrafy binaries from GitHub. I also have Azure CLI installed and have authenticated to my subscription:

I’ve deployed a Resource Group in Azure and created a VM:

Let run aztfy.exe and see what options its giving us:

The main thing we see here is that we need to specify the resource group. So, we’ll run c:\aztfy\aztfy.exe md-aztfy-rg

Note – C:\aztfy is where I’ve downloaded the Azure Terrafy binary file to, the location C:\md-aztfy-rg that I’m running the command from is an empty directory where I want to store my terraform files once they get created.

Thats a good sign ….. so its initializing and is now interrogating the resource group to see what resources exist and if it can import them.

Once thats done, we get presented with this screen:

As we can see, the first line is the resource that has been identified, the second is the terraform provider that has been identified as being a match for the resource. As we can see, the majority have been identified except for one which is the virtual machine. If we scroll down using the controls listed at the bottom of the screen, there is an option to “show recommendation”.

For this one, its telling me no resource recommendation is available. Thats OK though, because we can hit enter and type in the correct resource:

Once thats done, we click enter to save that line, and then hit choose the option to import:

And as we can see thats started to import our configuration. And eventually we’ll get this screen:

And once thats finished we’ll see this:

So now lets open that directory from Visual Studio Code, and we’ll open the terraform.tfstate file:

Ok, so that looks great and everything looks to be good. But we need to test, so we’ll run terraform plan to see if its worked:

And its telling me my infrastructure matches the configuration! So we can now manage the resources using Terraform!

Conclusion

Azure Terrafy is in the early stages of its development, but we can see that its a massive step forward for those who want to manage their existing resources using Terraform.

There are some great resources out there on Azure Terrafy:

Hope you enjoyed this post, until next time!

100 Days of Cloud – Day 96: Azure Chaos Studio

Its Day 96 of my 100 Days of Cloud journey and in todays post we’ll take a quick look at Azure Chaos Studio and how it can test resiliency in your resources.

Before we delve into the capabilities of Azure Chaos Studio, lets take a step back and define Chaos Engineering and look at some examples of where this would have been useful traditionally.

Chaos Engineering

Chaos Engineering is one of the trending topics in the industry at present, and the ability to test resiliency in deployments is one of the most important steps you will take in ensuring that your Resources will scale correctly or recover from unforseen events such as high loads or unexpected loss of a cluster node.

I’m going to use one of my favourite examples to illustrate this, and thats an on-premises Exchange installation running in a highly available DAG configuration:

Image Credit – Microsoft

This is a standard DAG configuration with 2 Exchange Servers on each site, and a cloud Witness Server in Azure. There are also 2 Domain Controllers in each site and a DC located in Azure.

Lets assume that we have a mailbox database on each of the servers, and lets also assume that replication of the databases follow this pattern:

  • MBX1 replicates a copy to MBX3
  • MBX2 replicates a copy to MBX4
  • MBX4 replicates a copy to MBX1
  • MBX3 replicates a copy to MBX2

There are a number of scenarios here with the potential for failure, such as:

  • What if one of the Exchange Servers fails and the database fails over so that 2 Databases run on a single server, can that server manage the load?
  • What if one of the sites fails in it entirety? Will the single site handle both server load and network load?
  • What if the DAG Network fails and the sites can’t talk to each other so no replication occurs? Will the Witness Server handle the cluster communications?
  • What if the Site A network fails? Will the Witness Server bring up all of the databases on Site B. What happens when Site A comes back up and the servers on that site still think they are hold the “Live” databases?
  • What if the Domain Controllers fail? Will the users whose email is hosted on databases on the site where the DC’s have failed be able to authenticate?

All of the above are real scenarios that could happen. And thats where Chaos Engineering comes in. It is defined as:

the ability to deliberately inject faults that cause system components to fail. The goal is to observe, monitor, respond to, and improve your system’s reliability under adverse circumstances. For example, taking dependencies offline (stopping API apps, shutting down VMs, etc.), restricting access (enabling firewall rules, changing connection strings, etc.), or forcing failover (database level, Front Door, etc.), is a good way to validate that the application is able to handle faults gracefully.

High Availability is no guarantee that a service cannot fail, and designing your service to expect failure is a core approach to creating services and applications. Chaos Engineering strives to anticipate rare, unpredictable, and disruptive outcomes, so that you can minimize any potential impact on your customers.

Azure Chaos Studio

But all of that testing isn’t a problem for you though because you’ve moved to Azure! And you configured cool stuff like Geo-redundant Storage, Virtual Machine Scale Sets and Azure Site Recovery between regions! So all of your stuff is safe, right?

Wrong. And if you haven’t managed to fully test the resiliency of your cloud-based resources, thats where Azure Chaos Studio can help!

Chaos Studio enables you to orchestrate fault injection on your Azure resources in a safe and controlled way and this is done by using a chaos experiment, which describes the faults that should be run and the resources those faults should be run against.

Chaos Studio supports 2 types of faults:

  • Service-direct faults, which run directly against an Azure resource without any installation or instrumentation (for example, rebooting an Azure Cache for Redis cluster or adding network latency to AKS pods)
  • Agent-based faults, which run in virtual machines or virtual machine scale sets to perform in-guest failures (for example, applying virtual memory pressure or killing a process).

Each fault has specific parameters you can control. Lets take VM Scale Sets as an example – you have created an application that runs on VMs in a scale set and have configured this as follows:

  • Minimum of 2 VMs, Maximum of 10 in the scale set
  • Additional VM is created if:
    • CPU hits 90%
    • Memory hits 80%

But have you ever tested that this actually works? In Chaos Studio, you can import your Scale Set and then create an “Experiment” to apply specific faults to the scale set. We can see that there are a number of faults that are available to choose from:

We can also see that we have the concept of Steps and Branches. When you build an experiment:

  • You define one or more steps that execute sequentially, and each step containing one or more branches that run in parallel within the step.
  • Each branch contains one or more actions such as injecting a fault or waiting for a certain duration.
  • Finally, you organize the resources that each fault will be run against into groups called selectors.
Image Credit – Microsoft

When you run your expirement, you will see output around each fault and the results of each of the steps:

Image Credit – Microsoft

The benefits of Chaos Studio experiments on your infrastructure are:

  • Familiarize team members with monitoring tools.
  • Recognize outage patterns.
  • Learn how to assess the impact.
  • Determine the root cause and mitigate accordingly.
  • Practice log analysis.

Conclusion

So thats an overview of Chaos Engineering and how Azure Chaos Studio can help test for faults in your resources and build resiliency into your applications. You can find more details on Azure Chaos Studio here.

Hope you enjoyed this post, until next time!

100 Days of Cloud – Day 95: Azure Stack Edge, HCI and HUB

Its Day 95 of my 100 Days of Cloud journey and in todays post we’ll take a quick look at Azure Stack range of offerings, the differences between them and their capabilities.

Azure Stack HCI

I’m starting with Azure Stack HCI as its the one that going to be most familiar to anyone like me who’s coming from the on-premises Hyper-V and Failover Cluster world.

Azure Stack HCI is a hyperconvered infrastructure cluster solution that sits in your on-premises infrastructure. It hosts virtualized Windows and Linux workloads and their storage and networking in a hybrid environment that is registered with your Azure Tenant.

Azure Stack HCI has its own dedicated operating system, and you can run this on integrated systems from a Microsoft hardware partner with the Azure Stack HCI operating system pre-installed, or buy validated nodes from an approved manufacturer list and install the operating system yourself.

The Azure Stack HCI operating system contains built in Hyper-V, Storage Spaces Direct and Software-Defined Networking. This means the configuration is minimal and you are pretty much ready to go in getting your Clusters ready. A Azure Stack HCI Cluster can contain between 2 and 16 physical servers.

Image Credit – Microsoft

So its basically a traditional Hyper-V Failover Cluster with a new name, right? Wrong, its much more than that. Because it ships from Azure, the billing for your nodes and usage come as part of your Azure Subscription charges. You are also required to register your Azure Stack HCI cluster with Azure within 30 days of installation. This can be done by using Windows Admin Center or Azure PowerShell modules.

Why Azure Stack HCI?

There are lots of great reasons for choosing Azure Stack HCI:

  • Familiar tools and skillset for exsiting Hyper-V and server admins
  • Integration with existing tools such as Microsoft System Center, Active Directory, Group Policy, and PowerShell scripting.
  • Integration with majoriy of mainstream backup, security, and monitoring tools.
  • Wide range of vendor hardware choices allow customers to choose the vendor with the best service and support in their geography.
  • You get full integration with Azure Arc for managing your workloads centrally from Azure alongside other Azure services.

Use Cases

  • Branch office and edge – for branch office and edge workloads, you can minimize infrastructure costs by deploying two-node clusters with inexpensive witness options, such as Cloud Witness or a USB drive–based file share witness.
  • Virtual desktop infrastructure (VDI) – Azure Stack HCI clusters are well suited for large-scale VDI deployments with RDS or equivalent third-party offerings as the virtual desktop broker.
  • Highly performant SQL Server – Azure Stack HCI provides an additional layer of resiliency to highly available, mission-critical Always On availability groups-based deployments of SQL Server.
  • Trusted enterprise virtualization – Azure Stack HCI satisfies the trusted enterprise virtualization requirements through its built-in support for Virtualization-based Security (VBS).
  • Azure Kubernetes Service (AKS) – You can leverage Azure Stack HCI to host container-based deployments, which increases workload density and resource usage efficiency.
  • Scale-out storage – Using Storage Spaces Direct results in significant cost reductions compared with competing offers based on storage area network (SAN) or network-attached storage (NAS) technologies.
  • Disaster recovery for virtualized workloads- Stretched clustering provides automatic failover of virtualized workloads to a secondary site following a primary site failure. Synchronous replication ensures crash consistency of VM disks.
  • Data center consolidation and modernization – Refreshing and consolidating aging virtualization hosts with Azure Stack HCI can improve scalability and make your environment easier to manage and secure. It’s also an opportunity to retire legacy SAN storage to reduce footprint and total cost of ownership.
  • Run Azure services on-premises – Integration with Azure Arc allows you to run Azure services anywhere. This allows you to build consistent hybrid and multicloud application architectures by using Azure services that can run in Azure, on-premises, at the edge, or at other cloud providers.

Azure Stack Hub

Azure Stack Hub is similar to Azure stack HCI in that you install a cluster of between 4-16 physical servers from an approved Microsoft vendor hardware list in your on-premises environment. However, Azure Stack Hub is essentially an extension of the full Azure platform that brings the following services:

  • Azure VMs for Windows and Linux
  • Azure Web Apps and Functions
  • Azure Key Vault
  • Azure Resource Manager
  • Azure Marketplace
  • Containers
  • Admin tools (Plans, offers, RBAC, and so on)

All looks very familiar, but here’s where it gets interesting – Azure Stack Hub is used to provide Azure consistent services to an on-premises environment that is either connected to the internet (and Azure) or disconnected environments with no internet connectivity. When we look at the comparison below, we can see that while Azure Stack Hub contains all of the features offered by Azure Stack HCI, it also includes a full set of IaaS, PaaS and cloud platform admin tools:

Image Credit – Microsoft

The PaaS offering is optional because Azure Stack Hub isn’t operated by Microsoft, its operated by you when you deploy Azure Stack Hub in your environment. So lets say for example if you are a small MSP, you can use Azure Stack Hub to host a multi-tenant environment that services your own customers with a PaaS offering which abstracting away the underlying infrastructure and processes. These are some of the PaaS services you can offer:

  • App Service
  • SQL databases
  • MySQL databases
  • Service Fabric
  • Kubernetes Container Service
  • Ethereum Blockchain
  • Cloud Foundry

Azure Stack Edge

The last member of the family is Azure Stack Edge. This is a family of Azure -managed appliances and was originally a Data Box solution for importing data into Azure. It acted as a network storage gateway to performs high-speed transfers to Azure.

Now, Azure Stack Edge is used as a AI-enabled device that can be used on remote locations to enable data analytics and create machine learning models that can be integrated with Azure Machine Learning. The data all stays locally cached on the device in order for you to create and train your ML modelling before uploading the data to your Azure Subscription.

Image Credit – Neal Analytics

You can also use the full capabilities of VM and Containerized Compute workloads on these devices, and can run a maximum of 2 devices as a 2-node cluster with a Scale out file server option.

Conclusion

So thats a brief overview of the Azure Stack portfolio and some of the benefits it can bring to your on-premises and edge computing environments. You can find full details and documentation at the links below:

Hope you enjoyed this post, until next time!

100 Days of Cloud – Day 94: Azure VMware Solution

Its Day 94 of my 100 Days of Cloud journey and in todays post we’ll take a quick look at Azure VMware Solution.

For decades, VMware has dominated the Hypervisor market in the face of competition from vendors such as Microsoft, Citrix, Oracle and Red Hat. They’ve provided innovation with the launch of ESXi and vCenter, and continued that by branching out into products such as Horizon, vRealize, Cloud Foundation and NSX to name but a few.

Base Specifications

You can now provision VMware private clouds in Azure using Azure VMware Solution. A deployment contains VMware vSphere clusters built from dedicated bare-metal Azure infrastructure.

The minimum initial deployment is three hosts, but additional hosts can be added one at a time, up to a maximum of 16 hosts per cluster. All provisioned private clouds have:

  • VMware vCenter Server
  • VMware vSAN
  • VMware vSphere
  • VMware NSX-T Data Center

As a result, you can migrate workloads from your on-premises environments, deploy new virtual machines (VMs), and consume Azure services from your private clouds.

Each host contains:

  • 576GB RAM
  • Dual Intel 18 core, 2.3-GHz processors
  • Two vSAN disk groups with 15.36 TB (SSD) of raw vSAN capacity tier and a 3.2 TB (NVMe) vSAN cache tier.

Shared Responsibility Model

Like all services deployed in Azure, there is a Shared Responsibility model in place for what Microsoft manages versus what the Customer manages. The beauty of Azure VMware Solution is that the majority of the underlying VMware Components are managed by Microsoft. We can see from the diagram below where the responsibilities lie for each of the components:

Image Credit – Microsoft

When you think of the amount of time that is spent with on-premises deployments managing Physical Infrastructure, Networking, Identity and Security, you can see the benefits of hosting your VMware in Azure VMware Solution.

Interconnectivity to your On-Premises environments

You can connect your AVS and On-Premises deployments by using Express Route Connections and Express Route Global Reach to interconnect the environments.

Image Credit – Microsoft

Once the connection is in place, you can use VMware HCX to migrate your on-premises workloads into Azure VMware Solution.

Scenarios for Azure VMware Solution

Like all discussions around moving to Azure or any other Public Cloud provider from an on-premises environment, the scenario needs to be one best suitd to your business needs. Some examples are:

  • Migrate existing assets “as is” – Take the fast path to the cloud. Replicate existing IT systems, apps, and workloads natively in Azure (also known as a “lift and shift” migration) without needing to change them beforehand.
  • Reduce your datacenter footprint – If your enterprise wants to leave the datacenter business, you can use Azure as a way to enable decommissioning legacy infrastructure, after you’ve brought resources into the cloud.
  • Prepare for disaster recovery and business continuity – Move your apps to the cloud without disruption to your business. You can also deploy VMware resources on Azure for a primary or secondary on-demand recovery site to provide business continuity for your existing on-premises datacenter resources.
  • Modernize your workloads Provide a future path to innovate and expand on the value of cloud investments. At your speed and pace, take advantage of Azure tools and services to modernize your datacenter and applications.

Conclusion

So thats a quick intro to Azure VMware Solution. There are lots of great resources, such as the Microsoft Learn modules, the official Microsoft and VMware Documentation, and this great episode of Azure Friday where Shannon Kuehn gave Scott Hanselman a demo of Azure VMware Solution.

Hope you enjoyed this post, until next time!

100 Days of Cloud – Day 93: Azure Virtual Desktop – FSLogix and Custom Images

Its Day 93 of my 100 Days of Cloud journey and in todays post we’ll take a quick look at both FSLogix and creating your own Custom Images for your Azure Virtual Desktop environment!

So after yesterdays disappointing end to the demo build of the AVD environment, I’ve decided to tear down the entire environment and start again from scratch in the hope of finding either the solution or where I went wrong in the process.

I’ll update the Day 92 post and update my social channels once that happens, but for now lets move on to look at 2 of the more interesting concepts of Azure Virtual Desktop, and we’ll kick off with FSLogix.

FSLogix Overview

In its simplest form, FSLogix is designed to abstract the user profile from the underying operating system and provide roaming profiles in Azure Virtual Desktop and other remote computing environments. Its stores the complete user profile in a single container that is dynamically attached to the Session Host at user sign-in.

A remote or roaming user profile provides an abstraction between user data and the operating system, and allows the operating system to be replaced or changed without affecting the user data. This may happen for the following reasons:

  • An upgrade of the operating system
  • A replacement of an existing Session Host
  • A user being part of a pooled (non-persistent) AVD environment

So what is FSLogix – effectively its software that is installed on the Session Host to allow the profile data to be abstracted off to a file share that is hosted on an Azure Storage Account.

The steps involved in getting this set up are:

  • Create Storage Account with Private Endpoint
  • Create a File Share
  • Enable Active Directory authentication on the Storage account
  • Configure Storage account Access control (IAM)
  • Configure NTFS rights on the Azure File Share
  • Install FSLogix Profile Container in your WVD Host pool
  • Configure FSLogix Profile Container via GPO

Robin Hobo has written an excellent blog post on the process for implementing FSLogix and you can find that here.

There are a few best practises that are recommended to follow when implementing Azure Storage Accounts and Azure Files for FSLogix Containers:

  • Azure Files storage account must be in the same region as the session host VMs.
  • Azure Files permissions should match permissions described in Requirements – Profile Containers.
  • For optimal performance, the storage solution and the FSLogix profile container should be in the same data center location.

You can find full detail in the official FSLogix Documentation here.

Custom Images

For anyone who deploys images either on VDI or via SCCM or WSUS to Desktop/Laptop devices, a custom image is something that the majority of us have built on one platform or another over time.

The process is the same as its always been:

  • Create a base image using a VM.
  • Install all OS updates and require software.
  • Sysprep the image to generalize it for multi-deployment use.
  • Capture the image to your deployment software.

Creating a Custom Image for Azure Virtual Desktop is no different to the above, except for a few additional steps using a really cool script available on GitHub.

So the steps are as follows:

  • Create your VM in the Azure Portal – make sure the OS is Windows 10/11 Enterprise multi-session.
  • RDP to the VM and run all of your Windows Updates.
  • Now this is where things get interesting and cool! Shawn Meyer has created a customization script with a UI that allows you to quickly install the required applications, along with necessary policies and settings for and optimized user experience. The script and supporting folders can be downloaded via this link.
  • Once this is downloaded, extract the Customizations.Zip file, and then run .\Prepare-WVDImage.ps1 -DisplayForm which will display this:
  • As we can see, this contains all that we need to prepare our image. When you select your desired options and click “Execute”, this will run a PowerShell script.
  • Once the script completes, you can now run Sysprep to generalize the image. The command to run is sysprep.exe /oobe /generalize /shutdown.
  • Once the sysprep is complete, go back to the VM in the Portal, ensure it is stopped, and then click “Capture”
  • Ensure that the option “No, capture only a managed image” is selected, and this will create the image.

Now, when you go to create the Session Hosts in your Host Pool, you will have the option to select your image from the Gallery and browse to select the Custom Image you have just created.

Conclusion

So thats a brief rundown of how FSLogix works and also how you can create your own Custom Images for your Azure Virtual Desktop Session Hosts.

Hope you enjoyed this post, until next time!

100 Days of Cloud – Day 92: Azure Virtual Desktop Demo Part 2

Its Day 92 of my 100 Days of Cloud journey and in todays post we’ll continue our Demo build of an Azure Virtual Desktop environment!

In Part 1, we got through the following tasks:

  • Created our Log Analytics Workspace for logging our monitoring data
  • Created our Test Users in Azure AD
  • Created the Host Pool
  • Created the Assignments to allow users to access the desktops
  • Created the Service Hosts
  • Verified that Diagnostic Settings are working
  • Added our Session Hosts into Monitoring

Lets dive back in where we left off and configure our Application Groups.

Application Groups

An Application Group is a logical grouping of applications installed on session hosts in the host pool. They are of two types:

  • RemoteApp
  • Desktop

An application group of type ‘Desktop’ was created automatically while creating the Session Hosts.

Lets check to ensure our users are assigned to the Desktop application group. To do this, we click into the Desktop Group, choose the “Assignments” option under “Manage”.

We can see that the users are assigned, but do not have an “Assigned VM”. This is because for Personal Host Pools the users will be automatically assigned a VM when they try to launch the desktop, and their user session will be load-balanced to an available session host if they haven’t already connected to the host pool. There is an option to configure direct assignment – you can find more details and commands on how to do this in the article here.

Because we are using a Personal Host Pool and alreay have a Desktop pool assigned, it means we cannot add an RemoteApp Application Group to the same host pool – if we wanted to do that we would need to either use a Pooled Host Pool or else create a new Host Pool.

We can see if we try to create a new Application Group in the same Host Pool, we get an error when we select the existing Host Pool:

The official line in the Microsoft Docs article here states:

  • We don’t support assigning both the RemoteApp and desktop app groups in a single host pool to the same user. Doing so will cause a single user to have two user sessions in a single host pool. Users aren’t supposed to have two active user sessions at the same time, as this can cause the following things to happen:
    • The session hosts become overloaded
    • Users get stuck when trying to login
    • Connections won’t work
    • The screen turns black
    • The application crashes
    • Other negative effects on end-user experience and session performance

And this makes sense – its easier to have Desktop Sessions as part of one host pool and Application Sessions as part of another.

Lets move on to looking at the different methods for connecting our users to their Desktop Sessions.

Access the Published Desktop using Browser or Remote Desktop Client

Open the following URL in a new private mode browser tab (or incognito mode) in your own workstation/laptop. This URL will lead us to the Remote Desktop Web Client.

aka.ms/wvdarmweb

This will launch a logon screen – we’ll use the “Bruce Wayne” account to sign on:

And once we get signed on, we can see our Session Desktop available:

We’ll launch the session and this will ask to to allow access to local reesources. Choose your preferences here and click “Allow”

This will again ask for credentials, so we enter these and click Submit:

And it fails …..

Hmmm, why is that. Time to go off into the weeds to look into this.

So a few hours later and I’m still trying to get this working. And what I’ve found out in that time is as follows:

For Azure AD-Joined VMs, in order to access the session host the desktop you are connecting from must meet one of the following conditions:

  • The local PC is Azure AD-joined to the same Azure AD tenant as the session host.
  • The local PC is hybrid Azure AD-joined to the same Azure AD tenant as the session host.
  • The local PC is running Windows 11 or Windows 10, version 2004 or later, and is Azure AD registered to the same Azure AD tenant as the session host.

So, this was never going to work from my local PC across the internet.

So to get around that, I spun up a new Windows 10 VM in Azure and Azure AD-joined it in the same way as my session hosts are. And tried to access my Azure Virtual Desktop pool from there…..

And it failed with the same errors……

I’ve also checked and ensured the following:

  • The users are assigned the Virtual Machine User Login Role for both the Host Pool and the Resource Group where the Session Host VM’s are deployed.
  • The users are assigned the Virtual Machine Administrator Login Role for both the Host Pool and the Resource Group where the Session Host VM’s are deployed.

The funny thing (if we can call it funny…) is that although Log Analytics is reporting errors with signins, everything looks to be set up correctly. Johan Vanneuville has already written an excellent article about this, and advised that signin errors can be fixed by enabling PKU2U authentication in the Local Security Policy on each VM:

Thats been checked, its enabled but its still not allowing logins.

So as a last resort, I added a Public IP Address to each of the Session Hosts and tried to RDP and logon directly to them using both Bruce and Clark’s Azure AD logins. And they can both logon over RDP, but not using Azure Virtual Desktop!

So this hasn’t worked unfortunately 😦 ….. Sorry!

If it had, the virtual desktop would have launched and looked similar to the screenshot below:

To close off this section, I’m sure it does work, but I’m probably going to rip up the environment and start again. However, I’ve seen other threads such as this one and this one which have both included some excellent suggestions from the community, but there has yet to be a definitive answer or fix on what the issue is and how to resolve it.

Log Analytics

Lets close this post off by looking at Log Analytics and the data that was gathered from our Azure Virtual Desktop deployment. We’ll go to our Resource Group and click into our Log Analytics Workspace:

If we click on “Log” under the “General” menu, this gives is a splashscreen with a list of builtin queries available to run for a number of different Azure resources, and there is a full section for Azure Virtual Desktop:

If we run the “Connection Errors” query, this will paste a Kusto Query Language (KQL) query and will generate a set of results based on the query:

There are also a number of options to create alert rules based on queries or export the query results to CSV, Excel or Power BI.

Conclusion

So thats the end of this post, where we attempted (but ultimately failed for now) to get our Azure Virtual Desktop demo working. We did manage to capture all of the data in Log Analytics though, so maybe a bit more sifting through that will give the answer.

And here’s a chance for all you community memmbers to get involved – lets see if we can get this working! In the meantime, I’ll keep working on this and may rebuild the environment from scratch again to see if I’ve missed anything.

For those of you with any doubts, Azure Virtual Desktop does work! The Azure AD integration is a recent feature, and AVD is mostly deployed using synced AD DS identities.

Next time, I’ll give a run through of FSLogix and also how to create custom images for AVD.

Hope you enjoyed this post, until next time!

100 Days of Cloud – Day 91: Azure Virtual Desktop Demo Part 1

Its Day 91 of my 100 Days of Cloud journey and as promised in todays post we’ll start our Demo build of an Azure Virtual Desktop environment!

In the last post, we looked at a high-level overview of the benefits and concepts of Azure Virtual Desktop, and the management responsibilities of both Microsoft and the Customer.

Lets dive straight into the Demo and set up our sample Azure Virtual Desktop environment.

Prerequisites

We need to set up our prerequisites and in this case there are only 2 that we need. Firstly lets set up a Log Analytics workspace which we can send all of our log data to. So we log onto the Portal, click “Create a resource” and search for Log Analytics Workspace. And click Create:

We’ll select our Subscription and create a new Resource Group. We’ll also give our Workpace and name and select a region where it will be stored. Once thats done, click “Review and Create”:

As you can see, we default to a “Pay-as-you-go” pricing tier. Click “Create” to create ourLog Analytics Workspace:

Once thats created, the next thing we need is Authentication. To deploy Azure Virtual Desktop environment, we need either:

  • Azure Active Directory
  • Active Directory Domain Services

I’m going to use Azure AD for the purposes of the lab, and have created some users already. Its always great to see Bruce, Clark and Tony ready for action:

And thats the prerequisistes done – we are now ready to create the host pool.

Create Host Pool

A Host Pool is a collection of Azure virtual machines that register to Azure Virtual Desktop as session hosts when you run the Azure Virtual Desktop agent. All session host virtual machines in a host pool should be sourced from the same image for a consistent user experience.

So what we’ll do in this section is as follows:

  • Create a Host Pool named MD-AVD-HP01 of personal type.
  • Register the default desktop application group from this hostpool to a new workspace named MD-AVD-WS01.

Lets go to the Azure portal and search for Azure Virtual Desktop. This will bring us into the Azure Virtual Desktop management window:

Now select Host pools under Manage blade and then click on “Create” to add new Host Pool:

We will provide the details required to create a Host Pool.

  • Project Details – Defines the Host Pool environment
    • Subscription: Choose the default subscription.
    • Resource Group: Select md-avd-demo from the drop down.
    • Host Pool Name: MD-AVD-HP01
    • Location: North Europe (this should be same as the region of your resource group).
    • Validation environment: Yes (Validation host pools let you monitor service updates before rolling them out to your production environment. This needs to be set to Yes here as we are joining this to an Azure AD environment).
    • Host Pool Type: Personal (I need to choose Personal for the demo as I’m using Azure AD. This is not currently supported for Pooled desktops).

Note – when you select “Pooled” as the host pool type, you have additional options. I’ve included a screenshot of what this looks like:

  • Load Balancing Algorithm: there are two types:
    • Breadth-first load balancing allows you to evenly distribute user sessions across the session hosts in a host pool.
    • Depth-first load balancing allows you to saturate a session host with user sessions in a host pool.)
  • Max Session Limit: limits the simultaneous number of users on the same session host.

Now we click next and go the the the Virtual machines tab. I’m going to leave this at “No” for now – because I am using Azure AD for authentication I habve some additional steps to do before creating my Session Hosts.

We click next and move on to the Workspace tab. Once we select “Yes” to “Register desktop app group”, we need to create a workspace called MD-AVD-WS01:

Finally in the Diagnostics tab, we enable diagnostic settings and choose to send these to our Log Analytics Workspace. As you can see, we can also choose to archive to a storage account or send the events to an Event Hub:

Now we can click on “Review and Create” and review the details in the Validation screen:

Once we are happy click on “Create” to create our Host Pool and we’ll get a screen similar to below to tell us the Deployment is completed:

And we can see that we have a Host Pool created in our Azure Virtual Desktop console:

Configure Azure AD Authentication

Because I’m using Azure AD for the demo, I need to assign my users permissions to access the desktop. Firstly, I need to go to my DAG object in the Application Group of the Host Pool and go to “Assignments”:

We then click on “Add” and select our users:

Azure AD Role Assignments

To allow users to log on to the Virtual Machines, we also need to add Role Assignments. There are 2 we need to add:

  • Virtual Machine Administrator Login
  • Virtual Machine User Login

We can ensure that these roles are assigned automatically by assigning this at the IAM level of our Resource Group:

RDP Properties

In order for the Host Pool to know that the session hosts are Azure AD joined, we need to add an advanced RDP property. So we go back to my Host Pool, choose “RDP Properties” from the settings menu and under Advanced we add the following string:

targetisaadjoined:i:1

Click on “Save” to save the changes.

Create Session Hosts

We’re now ready to create our Session Hosts. So we’ll go back to our Host Pool, select “Session Hosts” from the “Manage” menu and click on “Add”:

The “Basics” tab is already pre-populated with the information from our Host Pool:

This will give us the options to provide details for the VMs we need to add:

  • Resource Group: Select md-avd-demo from the drop down.
  • Name prefix: md-avd-sh0
  • Virtual machine location: North Europe (location should be same as location of your resource group).
  • Availability options: Select No infrastructure redundancy required from the drop down (again, this is being used for the purposes of the demo).
  • Image type: Gallery
  • Image: Windows 10 Enterprise, version 21H2
  • Virtual machine size: Standard B2s. (You can click on Change Size, then select the size you require and click on Select to choose the size)
  • Number of VMs: 2
  • OS Disk Type: Standard HDD (you can choose based on your requirements)

Next we scroll down to the “Network and security” section and specify the Virtual Network and Subnet that we wish to use:

Finally on this screen, we scroll down and specify whether we wish to join an Active Directory or Azure Active Directory. We also specify admin accounts for the Session Host VM’s we are creating:

Finally, on the “Advanced” tab we need to enable Diagnostic Settings and send the logs to our Log Analytics Workspace:

Once all of the info is correct and has been validated, we click Create to create our Session Hosts. Once thats created, we should see our Virtual Machines

And if we drill down into “Session hosts”, we should see both hosts set as available:

Note – this step may take up to 30 minutes to complete, and you may see errors on the Session Hosts. Don’t panic! If you’ve followed the steps above, the errors will eventually clear and the hosts will show as available.

Diagnostic Features

We now need to check and ensure diagnostic features for both the host pool and workspace to allow us to analyse monitoring data. We set this up when creating the host pool and session hosts, but lets make sure its set up and also we can see what we’re going to monitor.

Lets go to our host pool first and we go to Diagnostic Settings in the Monitoring menu:

We do the same check for Workspace to ensure that this is configured correctly:

Lets also enable this for our Session Hosts – we need to do that directly on the VMs in the Resource Group. So we go to the Monitoring menu, select Insights, and then click on “Enable”:

We’ll get a prompt telling us that the VM is not connected to a workspace. We select the Subscription and Workspace that we wish and click “Enable”:

Give that a few minutes and you’ll then go back in and see some data in the Insights page:

Conclusion

Thats where we’ll pause for breath! Lots of information there, so just to recap:

  • We created our Log Analytics Workspace for logging our monitoring data
  • Created our Test Users in Azure AD
  • Created the Host Pool
  • Created the Assignments to allow users to access the desktops
  • Created the Service Hosts
  • Verified that Diagnostic Settings are working
  • Added our Session Hosts into Monitoring

We’ll continue the demo in the next post where we’ll create our Application Groups for both Desktop and Remote App, connect to our AVD resources using the different methods available. We’ll also look at our monitoring data that being collected.

Hope you enjoyed this post, until next time!