In the previous post From Containers to Kubernetes Architecture, we walked through the evolution from client/server to containers, and from Docker to Kubernetes. We looked at how orchestration became necessary once we stopped deploying single applications to single servers.
Now it’s time to move from history to design, and in this post we’re going to dive into the practical by focusing on:
How Azure Kubernetes Service (AKS) is actually structured — and what architectural decisions matter from day one.
Control Plane vs Data Plane – The First Architectural Boundary
In line with the core design of a vanilla Kubernetes cluster, every AKS cluster is split into two logical areas:
- The control plane (managed by Azure)
- The data plane (managed by you)
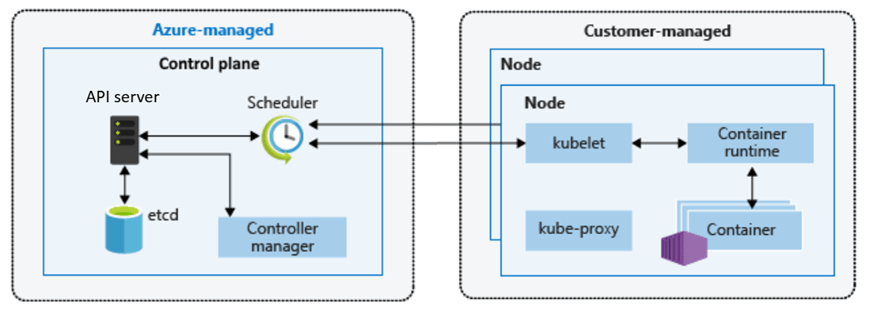
We looked at this in the last post, but lets remind ourselves of the components that make up each area.
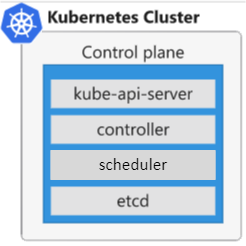
The Control Plane (Azure Managed)
When you create an AKS cluster, you do not deploy your own API server or etcd database. Microsoft runs the Kubernetes control plane for you.
That includes:
- The Kubernetes API server
- etcd (the cluster state store)
- The scheduler
- The controller manager
- Control plane patching and upgrades
This is not just convenience — it is risk reduction. Operating a highly available Kubernetes control plane is non‑trivial. It requires careful configuration, backup strategies, certificate management, and upgrade sequencing.
In AKS, that responsibility shifts to Azure. You interact with the cluster via the Kubernetes API (through kubectl, CI/CD pipelines, GitOps tools, or the Azure Portal), but you are not responsible for keeping the brain of the cluster alive.
That abstraction directly supports:
- Operational Excellence
- Reduced blast radius
- Consistent lifecycle management
It also empowers Operations to enable Development teams to start their cycles earlier in the project as opposed to waiting for the control plane to be stood up and functionally ready.
The Data Plane (Customer Managed)
The data plane is where your workloads run. This consists of:
- Virtual machine nodes
- Node pools
- Pods and workloads
- Networking configuration
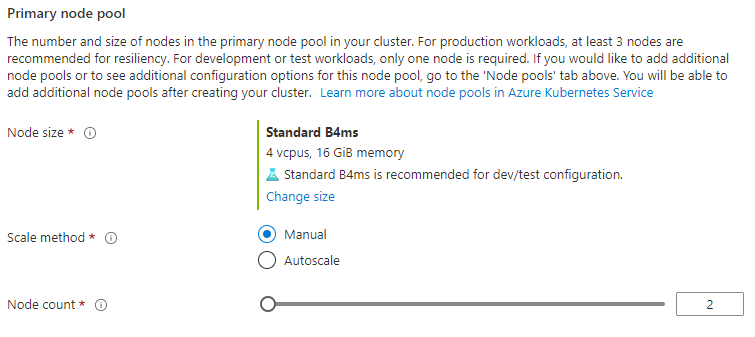
You choose:
- VM SKU
- Scaling behaviour
- Availability zones
- OS configuration (within supported boundaries)
This is intentional. Azure abstracts complexity where it makes sense, but retains control and flexibility where architecture matters.
Node Pools – Designing for Isolation and Scale
One of the most important AKS concepts is the node pool. A node pool is a group of VMs with the same configuration. At first glance, it may look like a scaling convenience feature. In production, it is an isolation and governance boundary.
There are 2 different types of node pool – System and User.
System Node Pool
Every AKS cluster requires at least one system node pool, which is a specialized group of nodes dedicated to hosting critical cluster components. While you can run application pods on them, their primary role is ensuring the stability of core services.
This pool runs:
- Core Kubernetes components
- Critical system pods
In production, this pool should be:
- Small but resilient
- Dedicated to system workloads
- Not used for business application pods
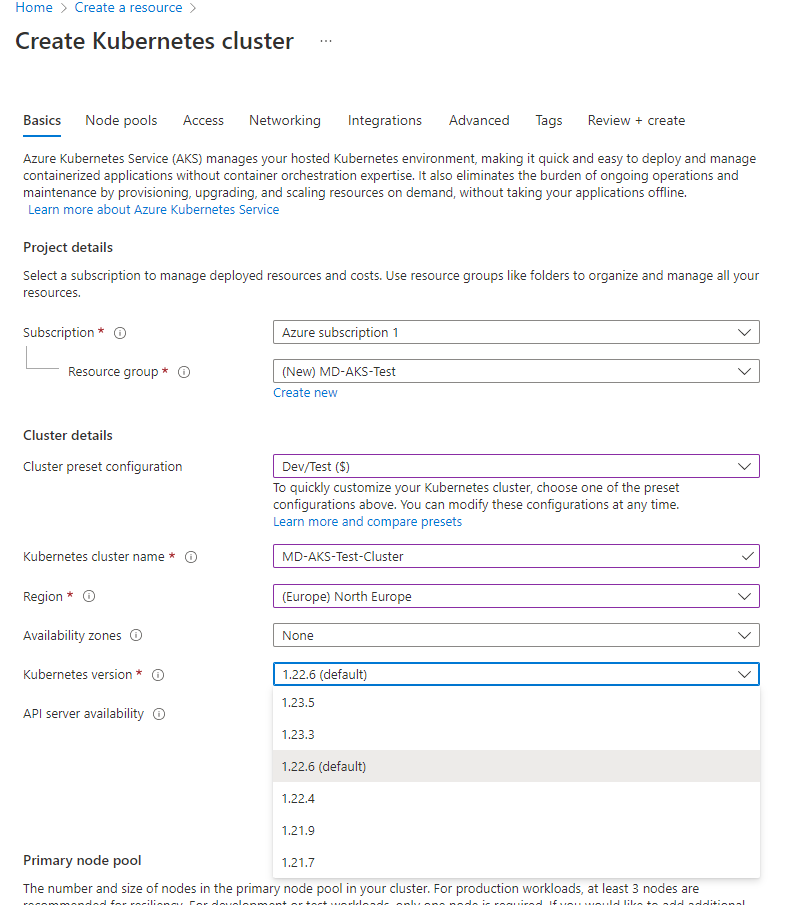
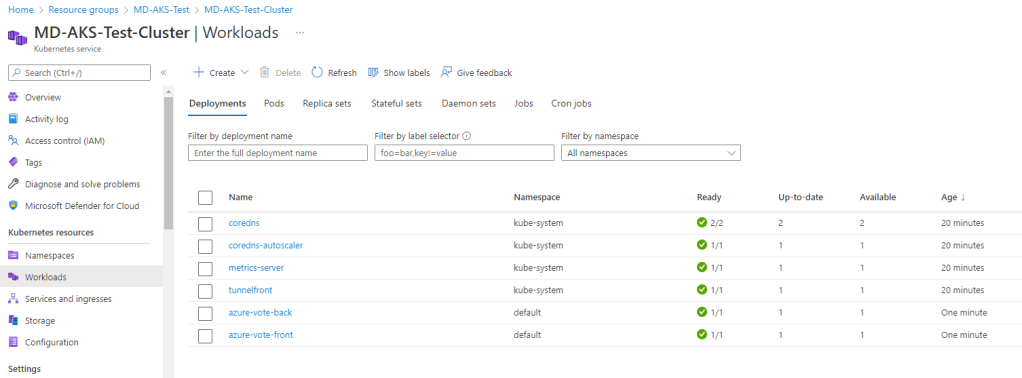
In our first post, we took the default “Node Pool” option – however you do have the option to add a dedicated system node pool:
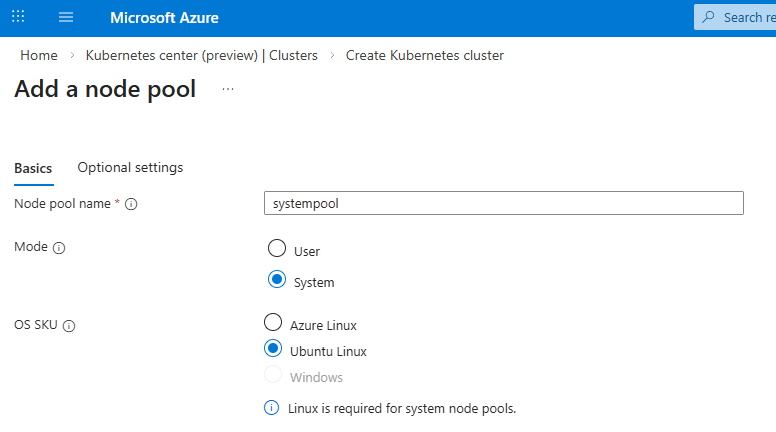
It is recommended that you create a dedicated system node pool to isolate critical system pods from your application pods to prevent misconfigured or rogue application pods from accidentally deleting system pods.
You don’t need the system node pool SKU size to be the same as your user node Pool SKU size – however its recommended that you make both highly available.
User Node Pools
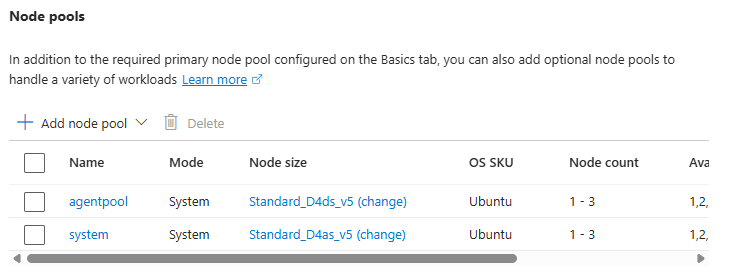
User node pools are where your applications and workloads run. You can create multiple pools for different purposes within the same AKS cluster:
- Compute‑intensive workloads
- GPU workloads
- Batch jobs
- Isolated environments
Looking at the list, traditionally these workloads would have lived on their own dedicated hardware or processing areas. The advantage of AKS is that this enables:
- Better scheduling control – the scheduler can control the assignment of resources to workloads in node pools.
- Resource isolation – resources are isolated in their own node pools.
- Cost optimisation – all of this runs on the same set of cluster VMs, so cost is predictive and stable.
In production, multiple node pools are not optional — they are architectural guardrails.
Regional Design and Availability Zones
Like all Azure resources, when you create an AKS cluster you choose a region. That decision impacts latency, compliance, resilience, and cost.
But production architecture requires a deeper question:
How does this cluster handle failure?
Azure supports availability zones in many regions. A production AKS cluster should at a bare minimum:
- Use zone‑aware node pools
- Distribute nodes across multiple availability zones
This ensures that a single data centre failure does not bring down your workloads. It’s important to understand that:
- The control plane is managed by Azure for high availability
- You are responsible for ensuring node pool zone distribution
Availability is shared responsibility.
Networking Considerations (At a High Level)
AKS integrates into an Azure Virtual Network. That means your cluster:
- Has IP address planning implications
- Participates in your broader network topology
- Must align with security boundaries
Production mistakes often start here:
- Overlapping address spaces
- Under‑sized subnets
- No separation between environments
Networking is not a post‑deployment tweak – its a day‑one design decision that you make with your wider cloud and architecture teams. We’ll go deep into networking in the next post, but even at the architecture stage, you need to make conscious choices.
Upgrade Strategy – Often Ignored, Always Critical
Kubernetes evolves quickly. AKS supports multiple Kubernetes versions, but older versions are eventually deprecated. The full list of supported AKS versions can be found at the AKS Release Status page
A production architecture must consider:
- Version lifecycle
- Upgrade cadence
- Node image updates
In AKS, control plane upgrades are managed by Azure — but you control when upgrades occur and how node pools are rolled. When you create your cluster, you can specify the upgrade option you wish to use:
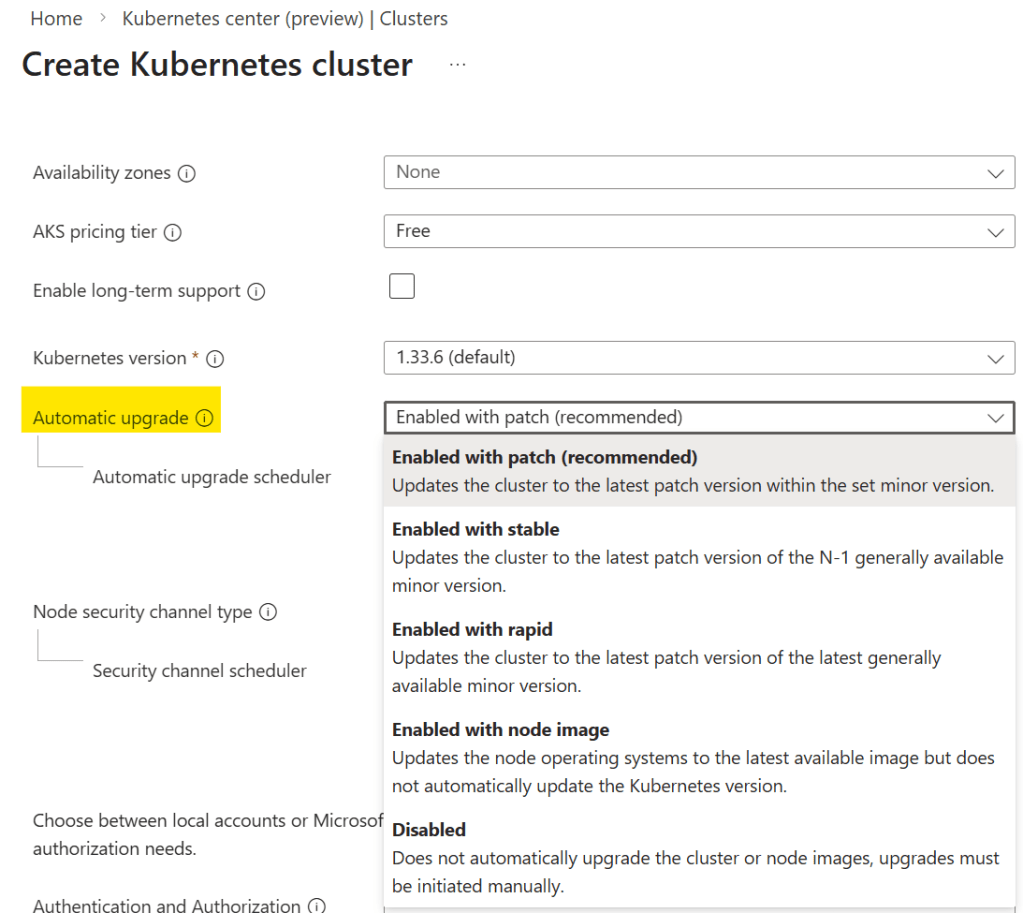
Its important to pay attention to this as it may affect your workloads. For example, starting in Kubernetes v1.35, Ubuntu 24.04 because the default OS SKU. What this means if you are upgrading from a lower version of Kubernetes, your node OS will be auto upgraded from Ubuntu 22.04 to 24.04.
Ignoring upgrade planning is one of the fastest ways to create technical debt in a cluster. This is why testing in lower environments to see how your workloads react to these upgrades is vital.
Mapping This to the Azure Well‑Architected Framework
Let’s anchor this back to the bigger picture and see how AKS maps to the Azure Well-Architected Framework.
Operational Excellence
- AKS’s managed control plane reduces operational complexity.
- Node pools introduce structured isolation.
- Availability zones improve resilience.
Designing with these in mind from the start prevents reactive firefighting later.
Reliability
Zone distribution, multiple node pools, and scaling configuration directly influence workload uptime. Reliability is not added later — it is designed at cluster creation.
Cost Optimisation
Right‑sizing node pools and separating workload types prevents over‑provisioning. Production clusters that mix everything into one large node pool almost always overspend.
Production Guardrails – Early Principles
Before we move into deeper topics in the next posts, let’s establish a few foundational guardrails:
- Separate system and user node pools
- Use availability zones where supported
- Plan IP addressing before deployment (again, we’ll dive into networking and how it affects workloads in more detail in the next post)
- Treat upgrades as part of operations, not emergencies
- Avoid “single giant node pool” design
These are not advanced optimisations. They are baseline expectations for production AKS.
What Comes Next
Now that we understand AKS architecture fundamentals, the next logical step is networking.
In the next post, we’ll go deep into:
- Azure CNI and networking models
- Ingress and traffic flow
- Internal vs external exposure
- Designing secure network boundaries
Because once architecture is clear, networking is what determines whether your cluster is merely functional or truly production ready.
See you on the next post!