

It’s Day 12 of 100 Days of Cloud, and as promised in the last post, I’m going to set up a Point-to-Site (P2S) VPN Gateway Connection.
In a later post I’ll deal with Site-to-Site (S2S) VPN’s. These are the most common type of VPN where you create a connection between your local site network and a remote network (such as Azure, AWS or another remote site in your organization).
Point-to-Site (P2S) Overview
As always, let’s get some concepts and scenarios first. A Point-to-Site VPN gateway connection let you create a secure connection to your Azure Virtual network from your individual client computer. This is useful in the following scenarios:
- Working from a remote location or from home where you need to access company resources.
- If you only have a small number of clients that need to connect to a specific resource and don’t want to set up a Site-to-Site (S2S) connection.
Traditional Examples of P2S VPN connections would be:
- SSL VPN Client (from vendors such as Cisco/Fortinet), where users would authenticate using RADIUS authentication with optional MFA.
- Direct Access, where a VPN Connection would automatically connect once internet connectivity is established on the client device.
P2S VPN’s use the following network protocols:
- OpenVPN — This is SSL/TLS based, and can be used with Windows, Android, iOS (v 11.0 and above), Linux and Mac (macOS 11.0 and above).
- Secure Socket Tunneling Protocol (SSTP) — this is a proprietary TLS-based VPN protocol, and is only supported on Windows Devices.
- IKEv2 VPN — a standards based IPSec VPN that can only be used to connect from Mac devices (macOS 11.0 and above)
So as we can see from the above, when planning a P2S deployment, you’ll need to know exactly what the Client Machines are that need to connect so you can use the correct protocols.
There are 3 ways that P2S VPN connections can authenticate:
- Azure Certificate Authentication — this uses a certificate that is present on the client device. You need 2 certificates — firstly, you can generate a self-signed certificate or use a root cert generated using an Enterprise solution which must be uploaded to Azure. Second, client certificates are generated from a Trusted Root CA and installed on the client devices. The certificate validation is done on the VPN Gateway.
- Azure AD Authentication — this allows users to use their Azure AD credentials to connect. This is only supported with OpenVPN protocol and Windows 10, and requires the use of the Azure VPN Client. This solution allows you to leverage Multi-Factor Authentication (MFA).
- On-Premise AD DS Authentication — this solution allows users to connect to Azure using their organization domain credentials. It requires a RADIUS server that integrates with the AD server. The RADIUS server can be in Azure or On-Premise, however in the On-Premise scenario, this requires a S2S VPN Connection between Azure and the On-Premise network. The diagram below shows the requirements for this scenario:

Finally, client requirements. Users use the native VPN clients on Windows and Mac devices for P2S. Azure provides a VPN client configuration zip file that contains settings required by these native clients to connect to Azure.
- For Windows devices, the VPN client configuration consists of an installer package that users install on their devices.
- For Mac devices, it consists of the mobileconfig file that users install on their devices.
The zip file also provides the values of some of the important settings on the Azure side that you can use to create your own profile for these devices. Some of the values include the VPN gateway address, configured tunnel types, routes, and the root certificate for gateway validation.
That’s the theory side out of the way, let’s do a quick Demo and get this set up. I’m going to use the Certificate Authentication method for the demo.
Point-to-Site (P2S) Overview
The pre-requisite requirements for setting up a P2S connection are quite simple. I need something to connect to. So I’ll use the following:
– Resource Group (I’ll use the Prod_VMs RG I set up previously)
– Virtual Network
– Virtual Machine, or some other resource that I can connect to over the VPN once the connection is established.
Now I need to create some resources for the P2S VPN to work. I’ll create the Virtual Network Gateway first:
Virtual Network Gateway

Give the gateway a name and define the VPN type. I’ll select gateway type VPN and VPN type Route-based. Choose SKU type. Select the virtual network (in our case ProdVM1) and create a new public IP address. Click Create.
VPN Gateway throughput and connection limit capabilities are defined by the VPN SKU type. I’m using “Basic” SKU for the demo purposes only. More information on VPN SKUs can be found here, and it’s important to refer to this when planning the deployment in a Production environment.
It may take up to 45 minutes to provision the virtual network gateway.
Generate a Root Certificate
The root certificate I generate is what I’ll to upload to Azure, as this will be used to authenticate the P2S Connection. After I create the root certificate, I’ll export the public certificate data (not the private key) as a Base64 encoded X.509 .cer file. Then, I’ll upload the public certificate data to the Azure.
I’ll open PowerShell ISE as an Administrator and run the following script:
$cert = New-SelfSignedCertificate -Type Custom -KeySpec Signature `
-Subject “CN=MDP2SRootCert” -KeyExportPolicy Exportable `
-HashAlgorithm sha256 -KeyLength 2048 `
-CertStoreLocation “Cert:\CurrentUser\My” -KeyUsageProperty Sign -KeyUsage CertSign

This creates the root cert and installs it under the current user cert store.
Generate a Client Certificate from the Root Certificate
Open PowerShell as an Administrator and run the following command:
Get-ChildItem -Path “Cert:\CurrentUser\My”
This should provide a thumbprint:

Next, run this command (Thumbprint should match to my Certificate):
$cert = Get-ChildItem -Path “Cert:\CurrentUser\My\8833EB3542CEA84339882232BB2C081D8926EDAF”

Finally, I want to run this script from PowerShell ISE to generate my client certificate
New-SelfSignedCertificate -Type Custom -KeySpec Signature `
-Subject “CN=MDP2SClientCert” -KeyExportPolicy Exportable -NotAfter (Get-Date).AddYears(1) `
-HashAlgorithm sha256 -KeyLength 2048 `
-CertStoreLocation “Cert:\CurrentUser\My” `
-Signer $cert -TextExtension @(“2.5.29.37={text}1.3.6.1.5.5.7.3.2”)

Now that I have certs in place, I need to export root certificate to upload it in Azure.
Export the root certificate public key (.cer)
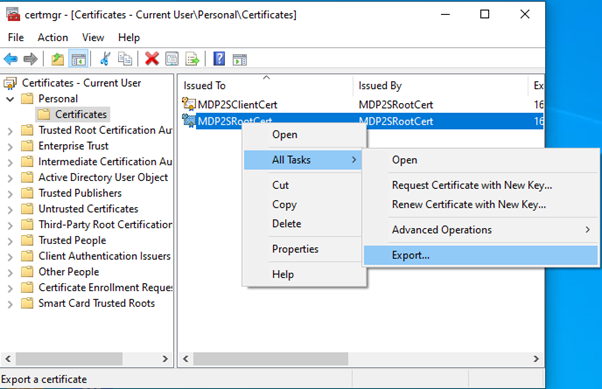
Hit the Windows Key + “R”, to bring up the run dialog box and type in “certmgr.msc”. When the management console opens, I can see my newly created certificates in “Current User\Personal\Certificates”. I’ll right-click on the root certificate, go to All Tasks > Export:
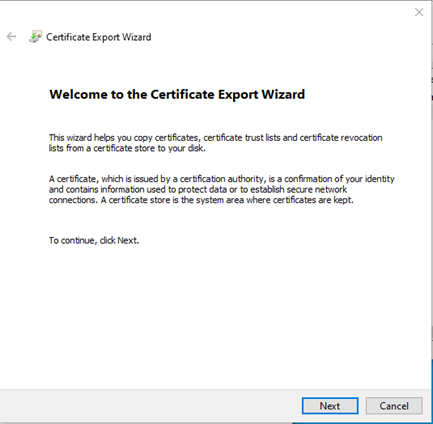
In the Wizard, click Next:
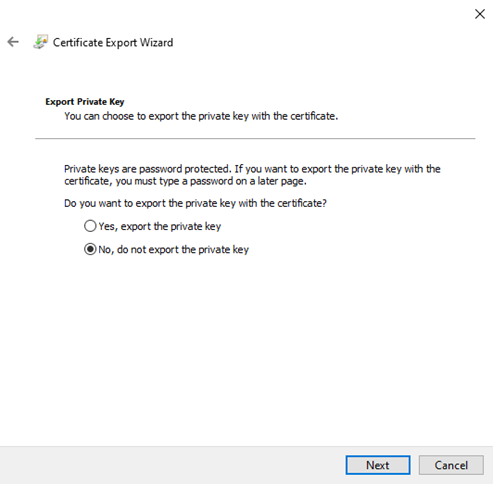
Select No, do not export the private key, and then click Next:
On the Export File Format page, select Base-64 encoded X.509 (.CER), and then click Next:

For File to Export, I’ll browse to the location to where I want to export the certificate. Give the file a name, and click Next:

Click Finish to export the certificate:
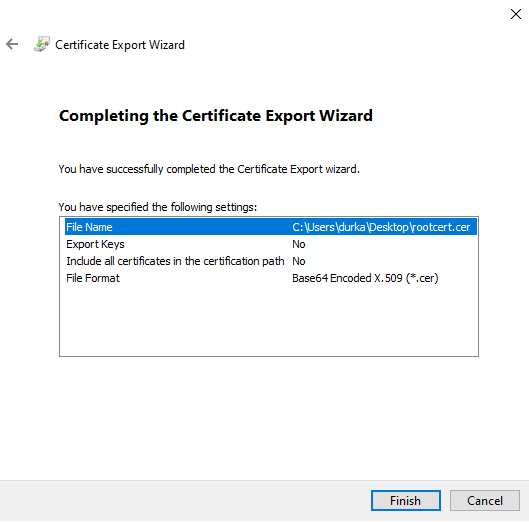
The certificate is successfully exported, and looks similar to this:

Now I’ll open the exported file in Notepad. The section in blue contains the information that is uploaded to Azure.

Configure Point-to-Site Connection
The next step is to configure the point-to-site connection. This where we define the client IP address pool the VPN Clients will use when connected, as well as importing the certificate.
Back in the Portal, I’ll go to my Virtual Network Gateway that I created above and select the option for “Point-to-site configuration” in the menu:

Click on Configure now:

In new window type IP address range for VPN address pool. In this demo, I will be using 20.20.20.0/24.
In the same window, there is a place to define a root certificate. Under root certificate name type the cert name and under public certificate data, paste the root certificate data (you can open the cert in notepad to get data).

Then click on Save to complete the process.
Note: when you paste certificate data, do not copy — –BEGIN CERTIFICATE — — & — –END CERTIFICATE — — text.
Testing VPN connection
Once that’s completed, it’s time to test and see if it works!
From the “Point-to-site configuration” page, I’ll click on “Download VPN Client”:

This downloads a ZIP file where I have both x86 and x64 Clients. When I double click on the VPN client setup, it asks if I wish to install a VPN client for my Virtual Network:

Once this finishes, I can see a new connection under windows 10 VPN page:

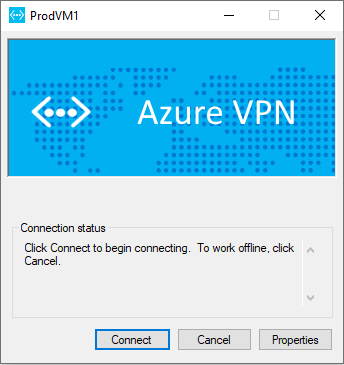
Click on connect to VPN. Then it will open up this new window. Click on Connect:
Then run ipconfig to verify IP allocation from VPN address pool:

Now, I can check if I can ping my “ProdVM1” Virtual machine across the VPN:

And can I RDP to it?:


Yes I can …..
And that’s how to set up a Point-to-Site (P2S) VPN Connection.
Hope you enjoyed this post, until next time!!
