
It’s Day 13 (unlucky for some….) of 100 Days of Cloud, and today it’s a brief post on Azure Site-to-Site VPN Connectivity back to your on-premise network.
In the last post, I looked at Point-to-Site VPN, how to set that up in simple steps to connect your endpoints to an Azure Virtual Network using a VPN Client.
There is little difference in the 2 setups, and for that reason (along with the fact that I don’t have any supported hardware or sites to test this from) I’m not going to run through the demo in this post.
A brief history of Site to Site VPN
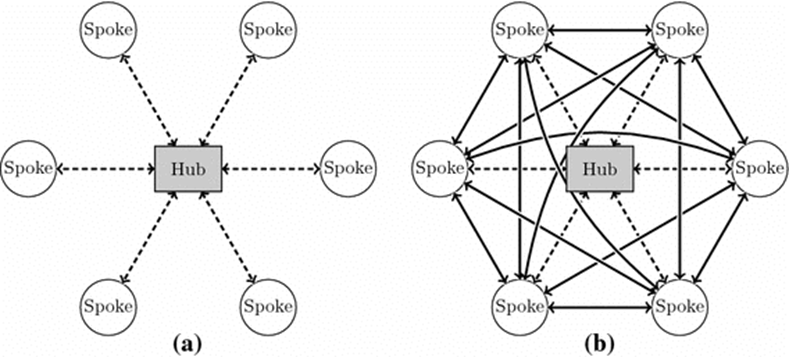
As its name states, a Site-to-Site VPN is a means of connecting multiple sites together so that can exist as part of the same Network. In companies with Sites across multiple geographic locations, Site-to-Site VPN’s connected these sites together to enable users to access resources across those multi-site environments, there site became part of the organization’s WAN (Wide Area Network). The WAN could exist in 2 different architectures:
- Hub and Spoke, where all “remote” sites connected back to a single head office hub
- Mesh, where all sites connected to each other
Azure Site to Site VPN
A Site-to-Site VPN tunnel is great for when you need a persistent connection from many on-premise devices or an entire site to your Azure network. This is an ideal option for creating hybrid cloud solutions where you need to be able to connect to your Azure resources seamlessly.
On the Azure side, you’ll need to create your virtual network just like you did with P2S, but this time you are also going to need to define your on-prem network. This is where using this solution is going to take a little more thought and planning. Just like any Site-to-Site VPN, both sides need to know what IP address range should be sent over the tunnel. This means that in Azure you are going to need to configure each on-prem network that you want Azure to be connected to and the subnets that it should be able to communicate with.
Let’s do a quick comparison of exactly what’s required for a S2S VPN:
– A Virtual Network
– A VPN Gateway
– A Local Network Gateway (this is the subnet on your local)
– Local Hardware that has a valid static Public IPv4 Address
Local Network Gateway
The local network gateway is a specific object that represents your on-premises location (the site) for routing purposes. You give the site a name by which Azure can refer to it, then specify the IP address of the on-premises VPN device to which you will create a connection.
You also specify the IP address prefixes that will be routed through the VPN gateway to the VPN device. The address prefixes you specify are the prefixes located on your on-premises network. If your on-premises network changes or you need to change the public IP address for the VPN device, you can easily update the values later.

Supported Local Hardware
Microsoft has defined a list of supported devices that support VPN Connections, which can be found here. It also provides setup scripts for major vendors such as Cisco, Juniper and Ubiquity. Not all devices are listed, and even of not listed may still work.
Authentication
Another difference between S2S and P2S is that S2S is authenticated using a pre-shared key (PSK) instead of certificates because it uses Internet Protocol Security (IPsec) rather than Secure Socket Tunneling Protocol (SSTP). You can have the Azure tools generate a PSK for you, or you can manually configure one that you have generated yourself. This means that the networking equipment will handle maintaining the encryption of the tunnel itself, and the computers and devices communicating over the tunnel don’t each need an individual certificate to identify themselves and encrypt their own connections.
Conclusion
And that’s S2S VPN Connections in a nutshell!
Hope you enjoyed this post, until next time!!

One thought on “100 Days of Cloud – Day 13: Azure Site-to-Site (S2S) VPN Connectivity”