
Its Day 36 of 100 Days of Cloud, and I’m continuing my learning journey on Infrastructure as Code (IaC) by using Terraform.

In the previous post, we started working with Terraform on Azure Cloud Shell, created and described the function of the Terraform configuration files, and finally deployed an Azure Resource Group. Lets jump back in and start by looking at Terraform State.
Terraform State
Back in the Cloud Shell, and if we go to our directory where the files are located and do an ll, we can see the config files and also our .tfplan file that we outputted is also in place. We also see that we now have a terraform.tfstate file present:

Lets run cat terraform.tfstate to see whats in the file:

We can see that the file is in JSON format, and contains the information that we used to create our resource group, including the Terraform version, providers used, location and name.
Important Note #1 – We can also see that the tfstate file contains sensitive metadata such as id and other attributes. – this is why it important to never save the tfstate file in a public respository. So as a best practice on Github for example, if you are storing your Terraform config on Github, make sure to add the terraform.tfstate to the list of files to ignore when making a commit – you can find the details on how to do this here.
And thats what tfstate is doing – its acting as a database to store information about what has been deployed in Azure. When running terraform plan, the tfstate file is refreshed to match what it can see in the environment.
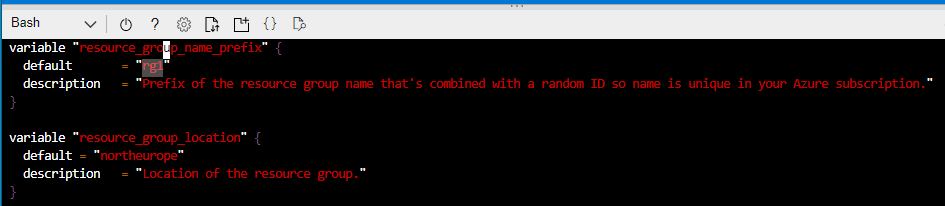
But what happens if we make changes to Azure or indeed our Terraform configuration files – let see that in action. If you recall, we used the variables.tf file in conjunction with main.tf to use varibales to deploy the resource group. So what I’ll do here is go into the variables.tf file and change the prefix of the resource group name to rg1:
So we’ll save that and run terraform plan again:

The first thing we see on the output is that its doing a refresh to check for the state of resources in Azure and compare them against the terraform.tfstate file. And immediately, its seeing a discrepancy and telling us that objects have changed (these are the changes made to the variables.tf file). And if we scroll down further:
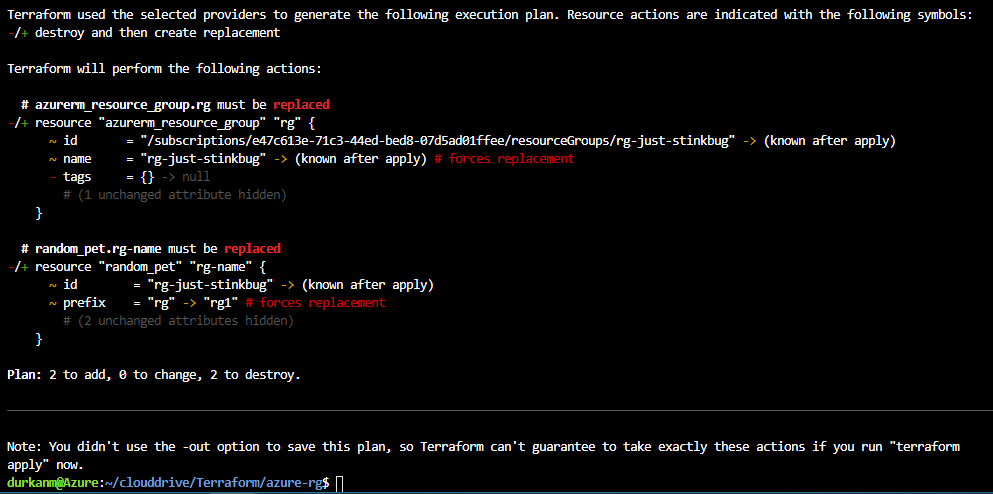
Its telling me that the resources need to be replaced, so its going to destroy them and create new ones based on the changes.
Important Note #2 – We need to look carefully and understand what this is doing – this is going to destroy existing resources. In this case, I only have a resource group deployed. But what if I had other resources deployed in that resource group, such as a Virtual Machine, Cosmos DB or a Web instance. Yep, they would be blown away as well and replaced by new ones in the new resource group that gets deployed. Thats all very well in a test environment, but in production this could have disastrous consequences.
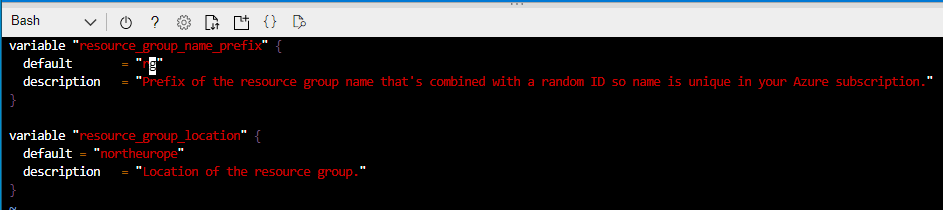
So lets reverse the changes and put my variables.tf file back the way it was:
And lets run terraform plan again just to be sure:

So again, its telling me that there has been a change to config files, but its now reporting that the infrastructure matches the configuration, so no changes need to be made.
So thats Terraform State, lets move on to adding more resources to our Terraform deployment.
Interpolation
We want to add resources to our existing resource group, so we’ll go back in and modify our main.tf file and add the code to do that. If we go to https://registry.terraform.io/, we can search and find details for all of the modules we want to add.
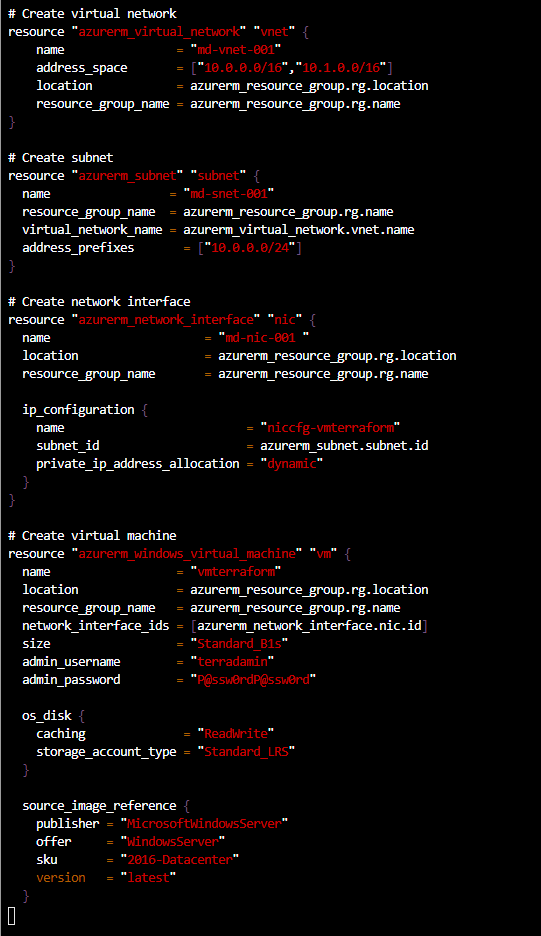
What we’ll add is a virtual network, a subnet, a network interface and a windows virtual machine into our resource group. to do this, we’ll add the following code to our main.tf file:
Important Note #3 – As this is a test, I’m putting the passwords into my config file in plain text. You would never do this in production, and I’ll go through how to do this in a later post.
If we study each of the sections, we can see that we are referencing the resources we need to deploy each of the new resources into. So for example, when deploying the virtual network, we are referencing the resource group higher in the configuration file by the resource type, not directly using the resource group name:

Same happens when we create the subnet, we reference the virtual network configuration, not the name directly:

And in a nutshell, thats how Interpolation works in Terraform. Instead of having to hard code names of dependencies when creating infra, Terraform can reference other sections of the config file for references instead. Whats important about this is you can see how it can easily make your infrastructure scalable very quickly.
So now lets run terraform plan -out md101.tfplan and see what happens:

And we can see that we have the resources to add. So lets run terraform apply md101.tfplan to deploy the infrastructure:
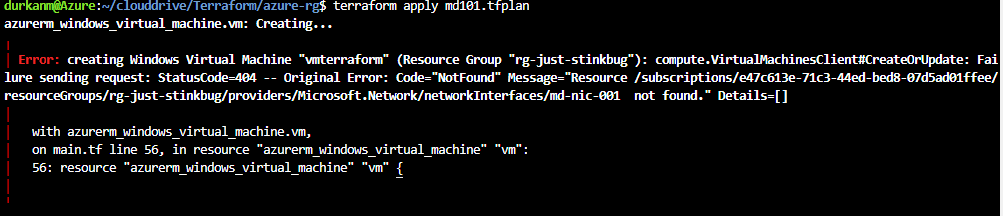
Bah, error! Its complining about the NIC not being found. When I look in the portal, its there, so need to look back at my code. And I find the problem – I’ve left a trailing space in the name of the NIC, hence Terraform is saying it can’t find it:

So lets tidy that up and run the plan and apply again:

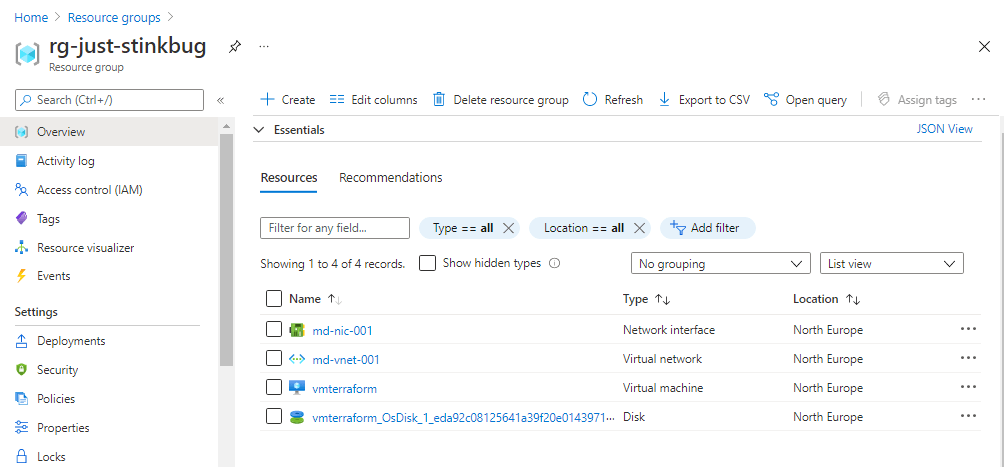
Looking much better now! And a quick check of the portal shows me the resources are created:
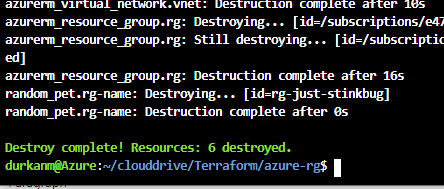
And now last but certainly not least, because I’ve not used best security practises in creating this, I’m immediately going to run terraform destroy to tear down the infrastructure:

I type “yes” and its bye-bye “rg-just-stinkbug” …… 😦
And thats all for today! In the next post, we’ll dive further into variables, and how to securely store items like passwords when using Terraform. Until next time!

2 thoughts on “100 Days of Cloud – Day 36: Terraform on Azure Cloud Shell Part 2”