
Its Day 43 of my 100 Days of Cloud Journey, and today I’m looking at Just-In-Time (JIT) VM access and how it can provide further security for your VMs.
JIT is part of Microsoft Defender for Cloud – during the Autumn Ignite 2021, it was announced that Azure Security Center and Azure Defender would be rebranded as Microsoft Defender for Cloud.
There are 3 important points you need to know before configuring JIT:
- JIT does not support VMs protected by Azure Firewalls which are controlled by Azure Firewall Manager (at time of writing). You must use Rules and cannot use Firewall policies.
- JIT only supports VMs that have deployed using Azure Resource Manager – Classic deployments are not supported.
- You need to have Defender for Servers enabled in your subscription.
JIT enables you to lock down inbound traffic to your Azure VMs, which reduces exposure to attacks while also providing easy access if you need to connect to a VM.
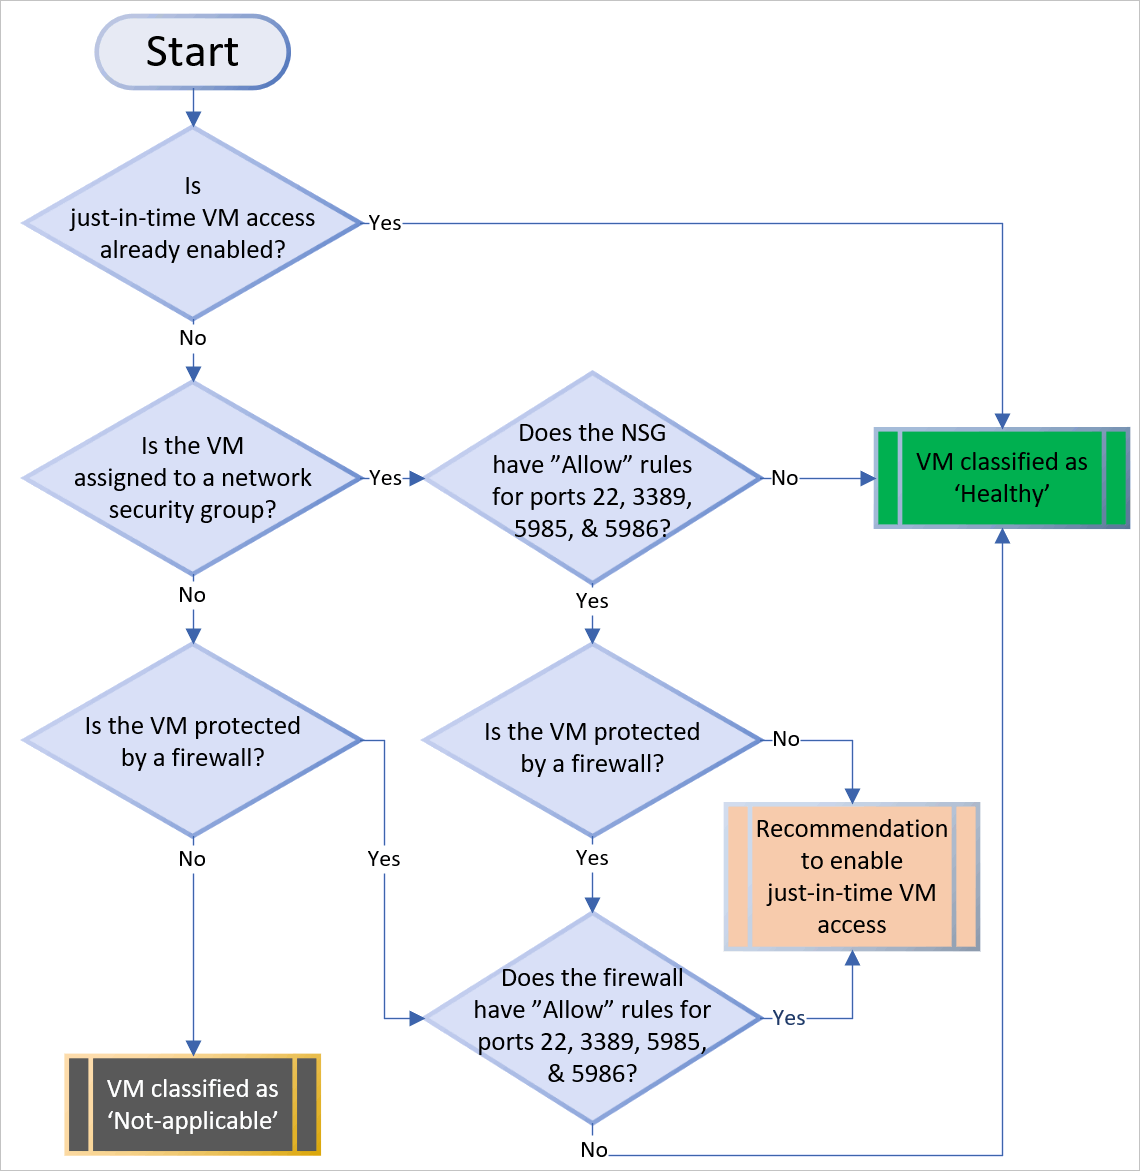
Defender for Cloud uses the following flow to decide how to categorize VMs:
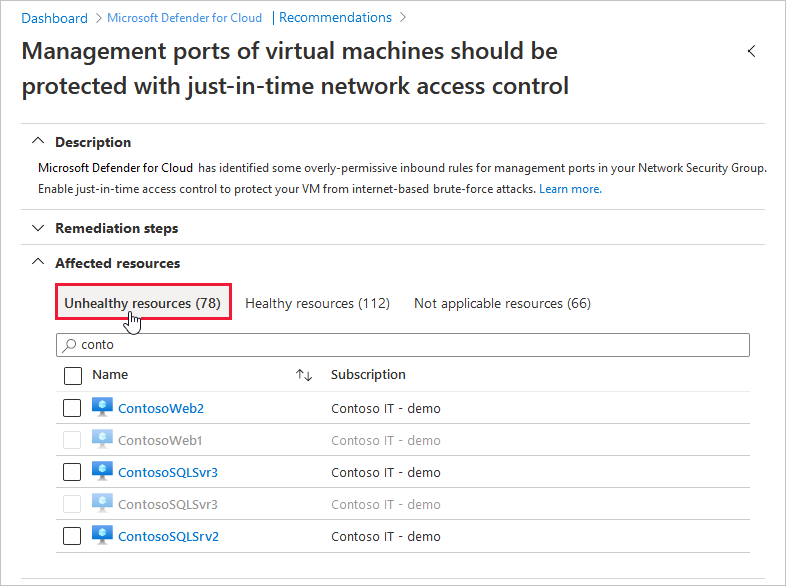
Once Defender for Cloud finds a VM that can benefit from JIT, its add the VM to the “Unhealthy resources” tab under Recommendations:
You can use the steps below to enable JIT:
- From the list of VMs displaying on the Unhealthy resources tab, select any that you want to enable for JIT, and then select Remediate.
- On the JIT VM access configuration blade, for each of the ports listed:
- Select and configure the port using one of the following ports:
- 22
- 3389
- 5985
- 5986
- Configure the protocol Port, which is the protocol number.
- Configure the Protocol:
- Any
- TCP
- UDP
- Configure the Allowed source IPs by choosing between:
- Per request
- Classless Interdomain Routing (CIDR) block
- Choose the Max request time. The default duration is 3 hours.
- Select and configure the port using one of the following ports:
- If you made changes, select OK.
- When you’ve finished configuring all ports, select Save.
- On the JIT VM access configuration blade, for each of the ports listed:
When a user requests access to a VM, Defender for Cloud checks if the user has the correct Azure RBAC permissions for the VM. If approved, Defender for Cloud configures the Azure Firewall and Network Security Groups with the specified ports in order to give the user access for the time period requested, and from the source IP that the user makes the request from.
You can request this access through either Defender for Cloud, the Virtual Machine blade in the Azure Portal, or by using PowerShell or REST API. You can also audit JIT VM access in Defender for Cloud.
For a full understanding of JIT and its benefits, you can check out this article, and also this article shows how to manage JIT VM access. To test out JIT yourself, this link brings you to the official Microsoft Learn exercise to create a VM and enable JIT.
Hope you enjoyed this post, until next time!
