MFA and Conditional Access alone won’t save us from Threat Actors

In the end of a week where we have had 2 very different incidents at high profile organisations across the globe, its interesting to look at these and compare them from the perspective of incident response and the “What we could have done to prevent this from happening” question.

Image Credit – PinClipart

Lets analyze that very question – in the aftermath of the majority of cases, the “What could we have done to prevent this from happening” question invariably leads in to the next question of “What measures can we put in place to prevent this from happening in the future”.

The problem with the 2 questions is that they are reactive and come about only because the incident has happened. And it seems that in both incidents, the required security systems were in place.

Or were they?

A brief analysis of the attacks

  • Holiday Inn

If we take the Holiday Inn attack, the hackers (TeaPea) have said in a statement that:

"Our attack was originally planned to be a ransomware but the company's IT team kept isolating servers before we had a chance to deploy it, so we thought to have some funny [sic]. We did a wiper attack instead," one of the hackers said.

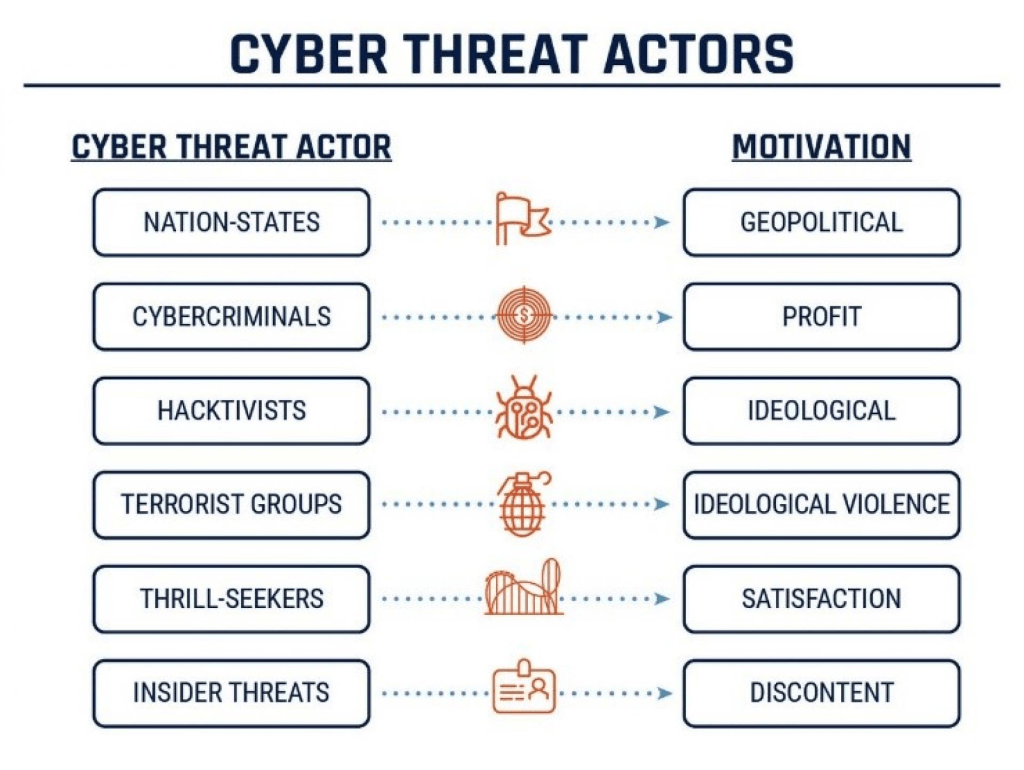
This is interesting because it suggests that the Holiday Inn IT team had a mechanism to isolate the servers in an attempt to contain the attack. The problem was that once the attackers were inside their systems and they realized that the initial scope that their attack was based on wasn’t going to work, their focus changed from Cybercriminals who were trying to make a profit to Terrorism, where they decided to just destroy as much data as they could.

Image Credit – Northern Ireland Cyber Security Centre

Essentially, the problem here is two-fold – firstly, you can have a Data Loss Prevention system in place but its not going to report on or block “Delete” actions until its too late or in some cases not at all.

Second, they managed to access the systems using a weak password. So (am I’m making assumptions here), while the necessary defences and intrusion-detection technologies may have been in place, that single crack in the foundations was all it took.

So the how did they get in? The 2 part of their statement shown below explains it all:

TeaPea say they gained access to IHG's internal IT network by tricking an employee into downloading a malicious piece of software through a booby-trapped email attachment.

The criminals then say they accessed the most sensitive parts of IHG's computer system after finding login details for the company's internal password vault. The password was Qwerty1234.

Ouch ….. so the attack originated as a Social Engineering attack.

  • Uber

We know a lot more about the Uber hack and again this is a case of an attack that originated with Social Engineering. Here’s what we know at this point:

  1. The attack started with a social engineering campaign on Uber employees, which yielded access to a VPN, in turn granting access to Uber’s internal network *.corp.uber.com.
  2. Once on the network, the attacker found some PowerShell scripts, one of which contained hardcoded credentials for a domain admin account for Uber’s Privileged Access Management (PAM) solution.
  3. Using admin access, the attacker was able to log in and take over multiple services and internal tools used at Uber: AWS, GCP, Google Drive, Slack workspace, SentinelOne, HackerOne admin console, Uber’s internal employee dashboards, and a few code repositories.

Again, we’re going to work off the assumption (and we need to make this assumption as Uber had been targeted in both 2014 and 2016) that the necessary defences and intrusion detection was in place.

Once the attackers gained access, the big problem here is the one thats highlighted above – hardcoded domain admin credentials. Once they had those, they could then move across the network doing whatever they pleased. And undetected as well, as its not unusual for a domain admin account to have multiple access across the network. And it looks like Uber haven’t learned from their previous mistakes, because as Mackenzie Jackson of GitGuardian reported:

“There have been three reported breaches involving Uber in 2014, 2016, and now 2022. It appears that all three incidents critically involve hardcoded credentials (secrets) inside code and scripts”

So what can we learn?

What these attacks teach us is that we can put as much technology, intrusion and anomaly detection into our ecosystem as we like, but the human element is always going to be the one that fails us. Because as humans, we are fallible. Its not a stick to beat us with (and like most, I do have a lot of sympathy for those users in Uber, Holiday Inn and all of the other companies who have been victim to attakcs that began with Social Engineering).

Do we need constant training and CyberSecurity programmes in our organisations to ensure that our users are aware of these sorts of attacks? Well, they do now at Uber and Holiday Inn but as I said at the start of the article, this will be a reactive measure for these companies.

The thing is though, most of these programmes are put in as “one-offs” in response to an audit where a checkbox is required to say that such user training has been put in place. And once the box has been checked, they’re forgotten about until the next audit is needed.

We can also say that the priveleged account management processes failed in both companies (weak passwords in one, hardcoded credentials in another).

Conclusion

Multi-Factor Authentication. Conditional Access. Microsoft Defender. Anomaly Detection. EDR and XDR. Information Protection. SOC. SIEM. Priveleged Identity Management. Strong Password Policies.

We can tech the absolute sh*t out of our systems and processes, but don’t forget to train and protect the humans in the chain. Because ultimately when they break, the whole system breaks down.

And the Threat Actors out there know this all too well. They know the systems are there, but they need a human to get them past those walls. MFA and Conditional Access can only save us for so long.

100 Days of Cloud – Day 71: Microsoft Sentinel

Its Day 71 of my 100 Days of Cloud journey, and todays post is all about Microsoft Sentinel. This is the new name for Azure Sentinel, following on from the rebranding of a number of Microsoft Azure services at Ignite 2021.

Image Credit: Microsoft

Microsoft Sentinel is a cloud-native Security Information and Event Management (SIEM) and Security Orchestration, Automation, and Response (SOAR) solution. It provides intelligent security analytics and threat intelligence across the enterprise, providing a single solution for attack detection, threat visibility, proactive hunting, and threat response.

SIEM and SOAR

We briefly touched on SIEM and SOAR in the previous post on Microsoft Defender for Cloud. Before we go further, lets note what the definition of SIEM and SOAR is according to Gartner:

  • Security information and event management (SIEM) technology supports threat detection, compliance and security incident management through the collection and analysis (both near real time and historical) of security events, as well as a wide variety of other event and contextual data sources. The core capabilities are a broad scope of log event collection and management, the ability to analyze log events and other data across disparate sources, and operational capabilities (such as incident management, dashboards and reporting).
  • SOAR refers to technologies that enable organizations to collect inputs monitored by the security operations team. For example, alerts from the SIEM system and other security technologies — where incident analysis and triage can be performed by leveraging a combination of human and machine power — help define, prioritize and drive standardized incident response activities. SOAR tools allow an organization to define incident analysis and response procedures in a digital workflow format.

Overview of Sentinel Functionality

Microsoft Sentinel gives a single view of your entire estate across multiple devices, users, applications and infrastructure across both on-premise and multiple cloud environments. The key features are:

  • Collect data at cloud scale across all users, devices, applications, and infrastructure, both on-premises and in multiple clouds.
  • Detect previously undetected threats, and minimize false positives using Microsoft’s analytics and unparalleled threat intelligence.
  • Investigate threats with artificial intelligence, and hunt for suspicious activities at scale, tapping into years of cyber security work at Microsoft.
  • Respond to incidents rapidly with built-in orchestration and automation of common tasks.

Sentinel can ingest alerts from not just Microsoft solutions such as Defender, Office365 and Azure AD, but from a multitude of 3rd-party and multi cloud providers such as Akamai, Amazon, Barracuda, Cisco, Fortinet, Google, Qualys and Sophos (and thats just to name a few – you can find a full list here). These are whats known as Data Sources and the data is ingested using the wide range of built-in connectors that are available:

Image Credit: Microsoft

Once your data sources are connected, the data is monitored using Sentinel integration with Azure Monitor Workbooks, which allows you to visualize your data:

Image Credit: Microsoft

Once the data and workbooks are in place, Sentinel uses analytics and machine learning rules to map your network behaviour and to combine multiple related alerts into incidents which you can view as a group to investigate and resolve possible threats. The benefit here is that Sentinel lowers the noise that is created by multiple alerts and reduces the number of alerts that you need to react to:

Image Credit: Microsoft

Sentinel’s autotmation and orchestration playbooks are built on Azure Logic Apps, and there is growing gallery of built-in playbooks to choose from. These are based on standard and repeatable events, and in the same way as standard Logic Apps are triggered by a particular action or event:

Image Credit: Microsoft

Last but not least, Sentinel has investigation tools that go deep to find the root cause and scope of a potential security threat, and hunting tools based on the MITRE Framework which enable you to hunt for threats across your organization’s data sources before an event is triggered.

Do I need both Defender for Cloud and Sentinel?

My advice on this is yes – because they are 2 different products that integrate and complement each other

Sentinel has the ability to detect, investigate and remediate threats. In order for Sentinel to do this, it needs a stream of data from Defender for Cloud or other 3rd party solutions.

Conclusion

We’ve seen how powerful Microsoft Sentinel can be as a tool to protect your entire infrastructure across multiple providers and platforms. You can find more in-depth details on Microsoft Sentinel here.

Hope you enjoyed this post, until next time!

100 Days of Cloud – Day 70: Microsoft Defender for Cloud

Its Day 70 of my 100 Days of Cloud journey, and todays post is all about Azure Security Center! There’s one problem though, its not called that anymore ….

At Ignite 2021 Fall edition, Microsoft announced that the Azure Security Center and Azure Defender products were being rebranded and merged into Microsoft Defender for Cloud.

Overview

Defender for Cloud is a cloud-based tool for managing the security of your multi-vendor cloud and on-premises infrastructure. With Defender for Cloud, you can:

  • Assess: Understand your current security posture using Secure score which tells you your current security situation: the higher the score, the lower the identified risk level.
  • Secure: Harden all connected resources and services using either detailed remediation steps or an automated “Fix” button.
  • Defend: Detect and resolve threats to those resources and services, which can be sent as email alerts or streamed to SIEM (Security, Information and Event Management), SOAR (Security Orchestration, Automation, and Response) or IT Service Management solutions as required.
Image Credit: Microsoft

Pillars

Microsoft Defender for Cloud’s features cover the two broad pillars of cloud security:

  • Cloud security posture management

CSPM provides visibility to help you understand your current security situation, and hardening guidance to help improve your security.

Central to this is Secure Score, which continuously assesses your subscriptions and resources for security issues. It then presents the findings into a single score and provides recommended actions for improvement.

The guidance in Secure Score is provided by the Azure Security Benchmark, and you can also add other standards such as CIS, NIST or custom organization-specific requirements.

  • Cloud workload protection

Defender for Cloud offers security alerts that are powered by Microsoft Threat Intelligence. It also includes a range of advanced, intelligent, protections for your workloads. The workload protections are provided through Microsoft Defender plans specific to the types of resources in your subscriptions.

The Defender plans page of Microsoft Defender for Cloud offers the following plans for comprehensive defenses for the compute, data, and service layers of your environment:

Microsoft Defender for servers

Microsoft Defender for Storage

Microsoft Defender for SQL

Microsoft Defender for Containers

Microsoft Defender for App Service

Microsoft Defender for Key Vault

Microsoft Defender for Resource Manager

Microsoft Defender for DNS

Microsoft Defender for open-source relational databases

Microsoft Defender for Azure Cosmos DB (Preview)

Azure, Hybrid and Multi-Cloud Protection

Defender for Cloud is an Azure-native service, so many Azure services are monitored and protected without the need for agent deployment. If agent deployment is needed, Defender for Cloud can deploy Log Analytics agent to gather data. Azure-native protections include:

  • Azure PAAS: Detect threats targeting Azure services including Azure App Service, Azure SQL, Azure Storage Account, and more data services.
  • Azure Data Services: automatically classify your data in Azure SQL, and get assessments for potential vulnerabilities across Azure SQL and Storage services.
  • Networks: reducing access to virtual machine ports, using the just-in-time VM access, you can harden your network by preventing unnecessary access.

For hybrid environments and to protect your on-premise machines, these devices are registered with Azure Arc (which we touched on back on Day 44) and use Defender for Cloud’s advanced security features.

For other cloud providers such as AWS and GCP:

  • Defender for Cloud CSPM features assesses resources according to AWS or GCP’s according to their specific security requirements, and these are reflected in your secure score recommendations.
  • Microsoft Defender for servers brings threat detection and advanced defenses to your Windows and Linux EC2 instances. This plan includes the integrated license for Microsoft Defender for Endpoint amongst other features.
  • Microsoft Defender for Containers brings threat detection and advanced defenses to your Amazon EKS and Google’s Kubernetes Engine (GKE) clusters.

We can see in the screenshot below how the Defender for Cloud overview page in the Azure Portal gives a full view of resources across Azure and multi cloud sunscriptions, including combined Secure score, Workload protections, Regulatory compliance, Firewall manager and Inventory.

Image Credit: Microsoft

Conclusion

You can find more in-depth details on how Microsoft Defender for Cloud can protect your Azure, Hybrid and Multi-Cloud Workloads here.

Hope you enjoyed this post, until next time!

100 Days of Cloud – Day 43: Azure JIT VM Access using Microsoft Defender for Cloud

Its Day 43 of my 100 Days of Cloud Journey, and today I’m looking at Just-In-Time (JIT) VM access and how it can provide further security for your VMs.

JIT is part of Microsoft Defender for Cloud – during the Autumn Ignite 2021, it was announced that Azure Security Center and Azure Defender would be rebranded as Microsoft Defender for Cloud.

There are 3 important points you need to know before configuring JIT:

  • JIT does not support VMs protected by Azure Firewalls which are controlled by Azure Firewall Manager (at time of writing). You must use Rules and cannot use Firewall policies.
  • JIT only supports VMs that have deployed using Azure Resource Manager – Classic deployments are not supported.
  • You need to have Defender for Servers enabled in your subscription.

JIT enables you to lock down inbound traffic to your Azure VMs, which reduces exposure to attacks while also providing easy access if you need to connect to a VM.

Defender for Cloud uses the following flow to decide how to categorize VMs:

Just-in-time (JIT) virtual machine (VM) logic flow.
Image Credit: Microsoft

Once Defender for Cloud finds a VM that can benefit from JIT, its add the VM to the “Unhealthy resources” tab under Recommendations:

Just-in-time (JIT) virtual machine (VM) access recommendation.
Image Credit: Microsoft

You can use the steps below to enable JIT:

  • From the list of VMs displaying on the Unhealthy resources tab, select any that you want to enable for JIT, and then select Remediate.
    • On the JIT VM access configuration blade, for each of the ports listed:
      • Select and configure the port using one of the following ports:
        • 22
        • 3389
        • 5985
        • 5986
      • Configure the protocol Port, which is the protocol number.
      • Configure the Protocol:
        • Any
        • TCP
        • UDP
      • Configure the Allowed source IPs by choosing between:
        • Per request
        • Classless Interdomain Routing (CIDR) block
      • Choose the Max request time. The default duration is 3 hours.
    • If you made changes, select OK.
    • When you’ve finished configuring all ports, select Save.

When a user requests access to a VM, Defender for Cloud checks if the user has the correct Azure RBAC permissions for the VM. If approved, Defender for Cloud configures the Azure Firewall and Network Security Groups with the specified ports in order to give the user access for the time period requested, and from the source IP that the user makes the request from.

You can request this access through either Defender for Cloud, the Virtual Machine blade in the Azure Portal, or by using PowerShell or REST API. You can also audit JIT VM access in Defender for Cloud.

For a full understanding of JIT and its benefits, you can check out this article, and also this article shows how to manage JIT VM access. To test out JIT yourself, this link brings you to the official Microsoft Learn exercise to create a VM and enable JIT.

Hope you enjoyed this post, until next time!