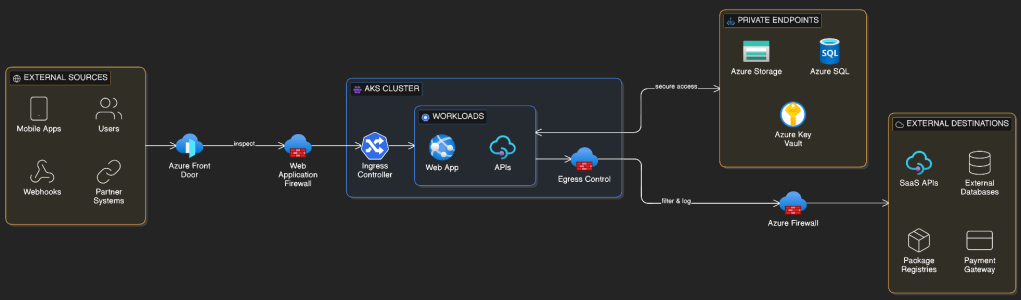
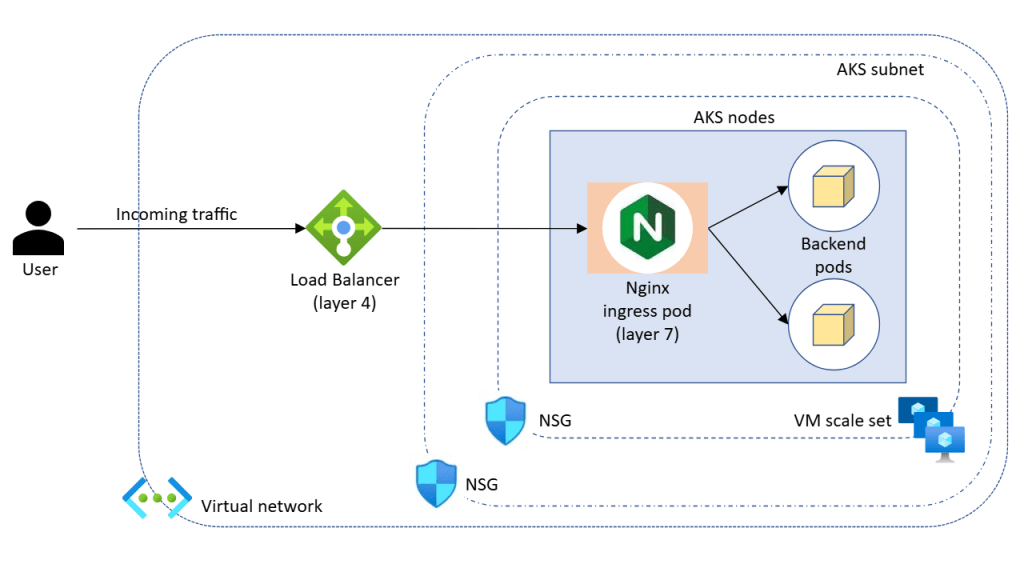
In the previous post on AKS Networking, we defined how traffic flows into, through, and out of an AKS cluster. We designed ingress entry points, internal service communication patterns, and controlled egress paths.
Now we turn to identity and access control. Because networking defines connectivity, traffic design defines flow — and identity defines trust.

A well-networked cluster with weak identity controls is still a security liability. In this post we cover the full identity and access control surface of AKS: choosing the right Authentication and Authorisation model, Entra ID integration, RBAC, Workload Identity, secrets management, and Zero Trust principles.
Why Identity Is the New Perimeter
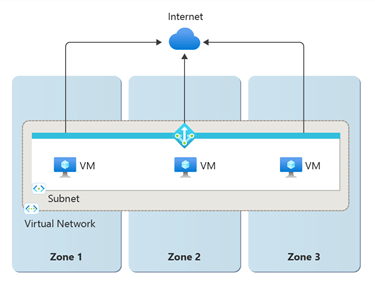
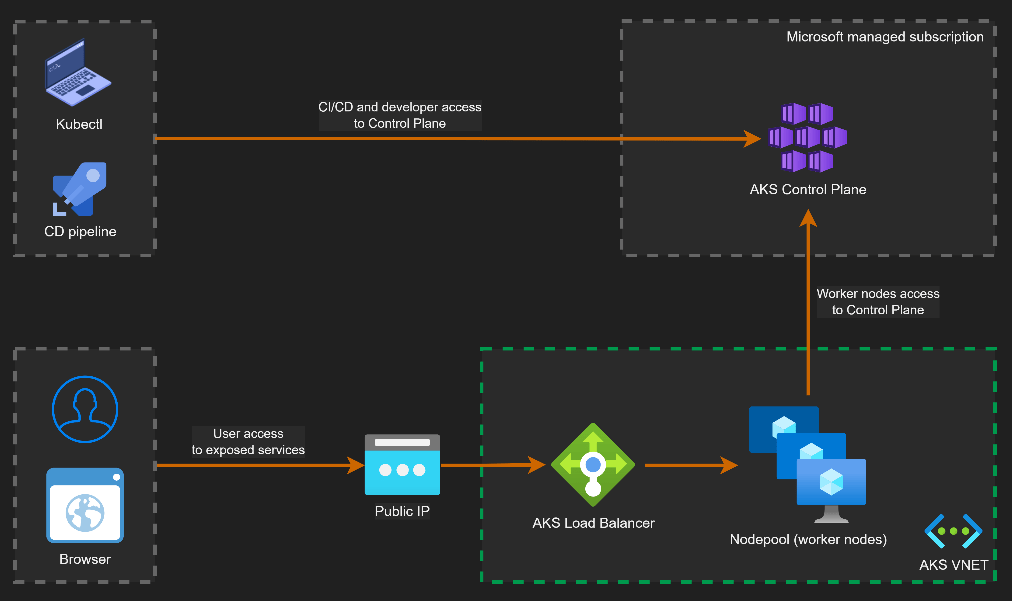
Traditional security models relied on network perimeters, and in its simplest form used to look something like this:
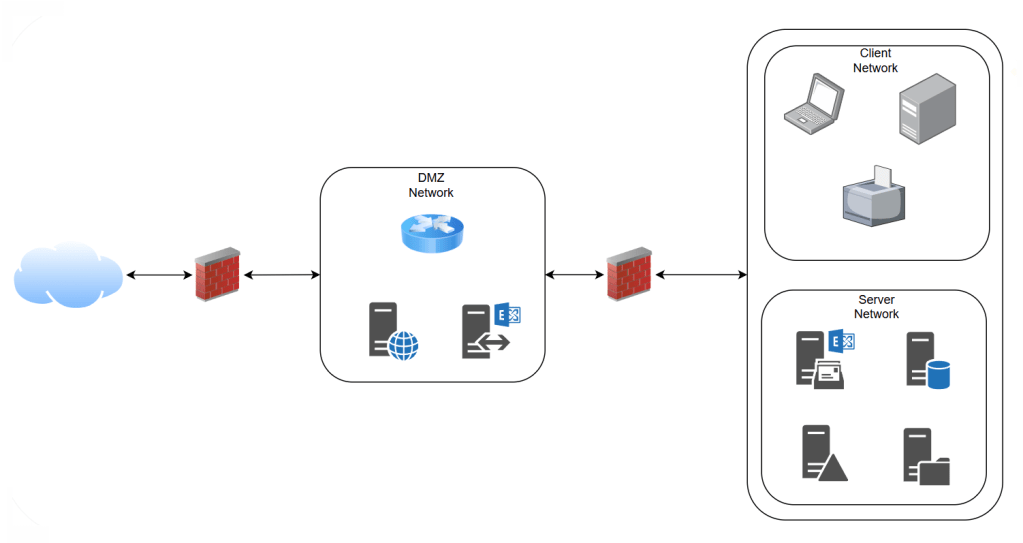
If you were inside the network, you were trusted. That model has broken down. Cloud environments, remote access, and microservice architectures have dissolved those traditional perimeters entirely.
Zero Trust redefines the security model: never trust, always verify. Every access request — from a human, a service, a device, or a workload — must be authenticated and authorised explicitly, regardless of where it originates.
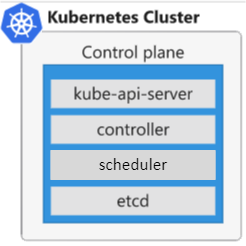
For AKS, this means identity must be applied at every layer:
- Who can access the cluster control plane?
- What can users and operators do once inside?
- How do pods authenticate to Azure services?
- Where are secrets stored and how are they retrieved?
Getting these controls right from the start is far easier than retrofitting them later. And the first decision you make when you create the cluster sets the foundation for everything that follows.
Choosing Your Authentication and Authorization Model
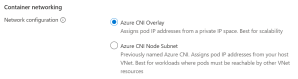
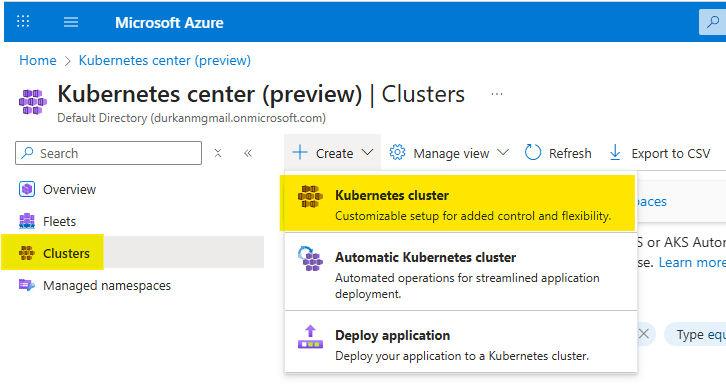
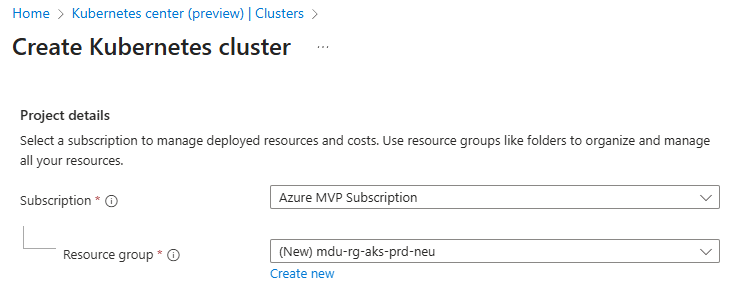
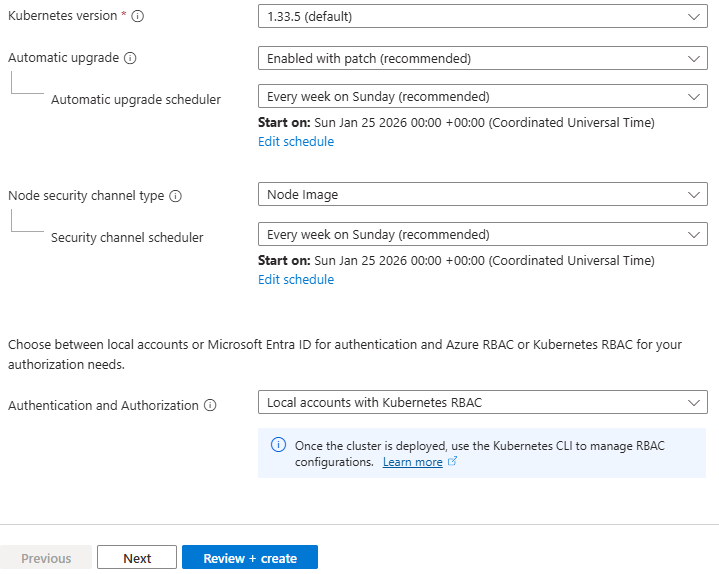
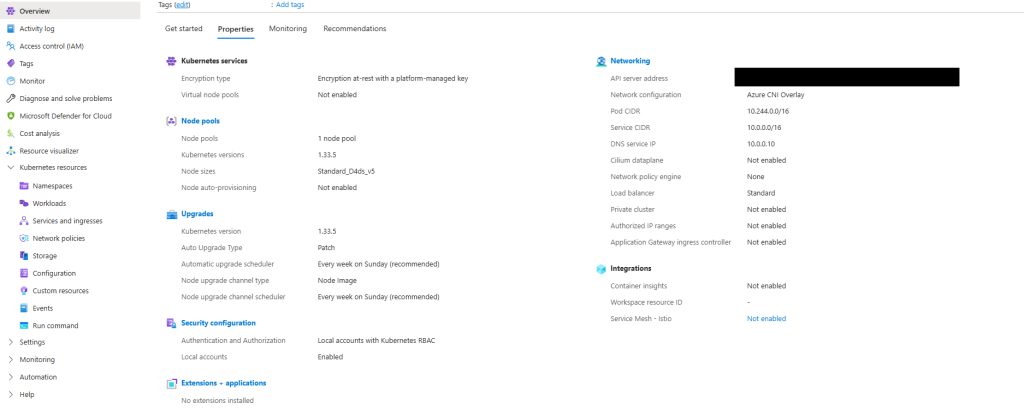
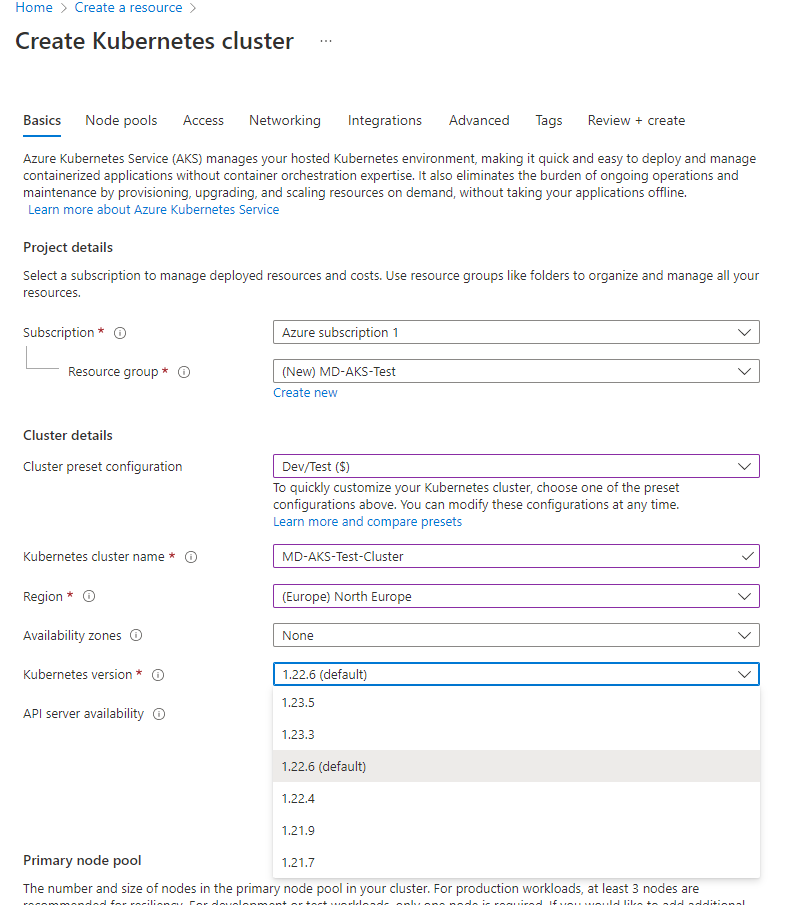
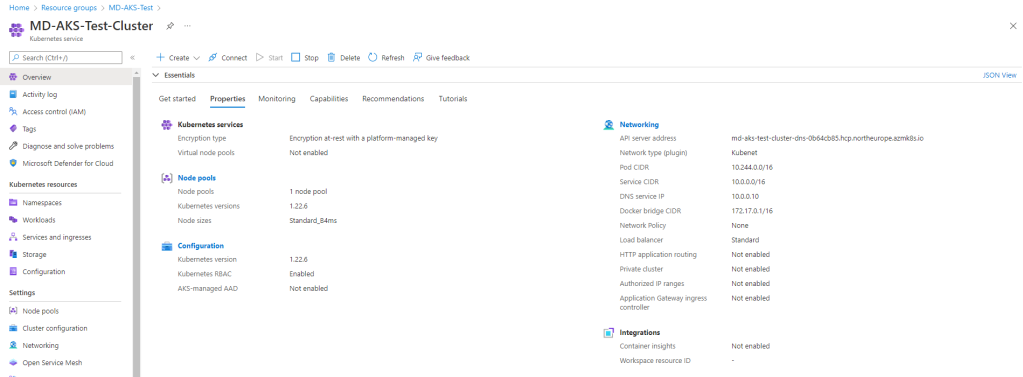
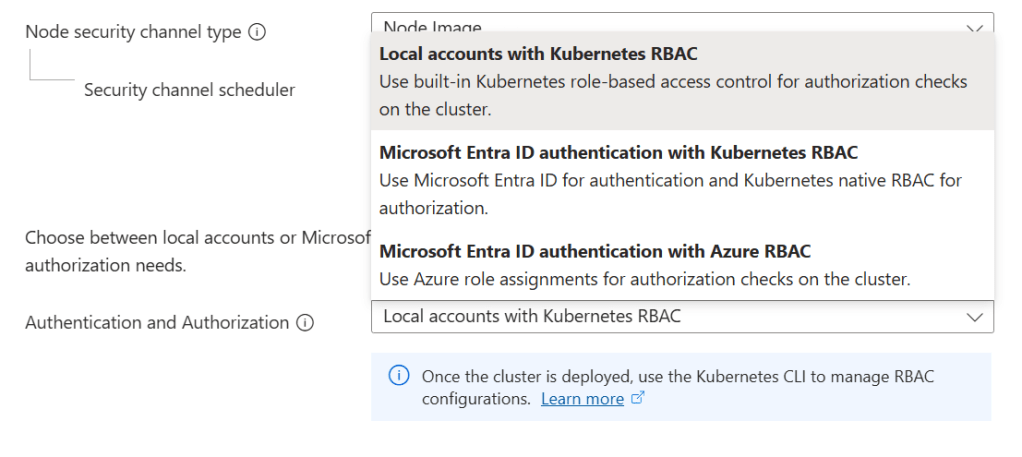
When creating an AKS cluster, the single most important security decision is the Authentication and Authorisation mode under Security configuration in the Azure Portal. There are three options:
• Local accounts with Kubernetes RBAC
• Microsoft Entra ID authentication with Kubernetes RBAC
• Microsoft Entra ID authentication with Azure RBAC
The choice you make here shapes the entire identity posture of your cluster — not just who can log in, but how access is reviewed, audited, and governed over time.
Option 1: Local Accounts with Kubernetes RBAC
This is what you get if you click through the portal without changing the default. Users authenticate using static credentials retrieved with:
az aks get-credentials --admin
These credentials are certificate-based, do not expire by default, and are not tied to any individual identity. There is no integration with any external identity provider. Access control inside the cluster uses native Kubernetes RBAC objects, configured manually.
Pros
- Zero external dependencies — works in air-gapped or disconnected environments
- Simplest setup, fastest to get running
- Full compatibility with all Kubernetes tooling
- Useful for short-lived development or test clusters
Cons
- Static credentials: the admin kubeconfig never expires by default and cannot be scoped to an individual user
- No audit trail of who accessed the cluster — only that something with the credential did
- No integration with your organisation’s identity provider, MFA, or Conditional Access
- Credential rotation is manual and operationally demanding
- Shared credentials violate least-privilege: every administrator has the same level of access
- Cannot disable local accounts while this mode is selected
| Capability | Available? |
| Entra ID / SSO integration | ❌ No |
| MFA enforcement | ❌ No |
| Conditional Access policies | ❌ No |
| Per-user audit trail | ❌ No |
| Kubernetes RBAC | ✅ Yes |
| Azure RBAC | ❌ No |
| Credential rotation required | ⚠️ Manual |
| ❌ Production Warning This option should not be used for production clusters. It is appropriate only for development, testing, or fully isolated environments where Entra ID integration is not possible. |
Option 2: Microsoft Entra ID Authentication with Kubernetes RBAC
Users authenticate via their Entra ID identity using the Azure CLI or kubelogin. What they can do inside the cluster is controlled by Kubernetes RBAC objects — Roles, ClusterRoles, and RoleBindings — which reference Entra users and groups as subjects.
Entra ID groups can be used as RBAC subjects directly, so access can be managed centrally through group membership rather than per-user bindings. Local accounts can be fully disabled, removing the static credential backdoor.
Pros
- Full Entra ID authentication — users log in with their corporate identity
- MFA and Conditional Access policies apply to cluster access automatically
- Audit trail in Entra ID sign-in logs and Kubernetes audit logs
- Group-based access: manage cluster permissions via Entra ID group membership
- Local admin accounts can be disabled, removing static credentials entirely
- GitOps-friendly: RBAC manifests can be stored and managed in version control
- Fine-grained namespace-level permissions via Kubernetes RBAC
Cons
- RBAC manifests must be managed inside the cluster — they are not visible in Azure IAM
- Access reviews require checking both Entra ID group membership and Kubernetes manifests
- Kubernetes RBAC does not natively support time-limited or just-in-time role assignments
- More setup required than Option 1 — Entra ID groups need to be created and maintained
| Capability | Available? |
| Entra ID / SSO integration | ✅ Yes |
| MFA enforcement | ✅ Yes |
| Conditional Access policies | ✅ Yes |
| Per-user audit trail | ✅ Yes |
| Kubernetes RBAC | ✅ Yes |
| Azure RBAC | ❌ No |
| Access visible in Azure IAM | ❌ No — managed in cluster |
| GitOps-friendly RBAC | ✅ Yes |
| ✅ Good Fit For Teams that want centralised identity through Entra ID but prefer managing access control via Kubernetes-native manifests and GitOps workflows. Commonly chosen by platform engineering teams that already manage cluster configuration through code. |
Option 3: Microsoft Entra ID Authentication with Azure RBAC
Authentication flows through Entra ID as in Option 2, but authorisation is handled by Azure RBAC rather than Kubernetes RBAC bindings. Access is assigned via role assignments on the AKS resource itself — the same model used for any other Azure resource. This means cluster access is visible in Azure IAM, participates in access reviews, and can integrate with Privileged Identity Management for just-in-time elevation. Four built-in roles are provided:
| Azure Built-In Role | Scope | What It Grants |
| Azure Kubernetes Service RBAC Cluster Admin | Cluster-wide | Full access to all Kubernetes objects across all namespaces |
| Azure Kubernetes Service RBAC Admin | Namespace | Full admin access within a specific namespace, including RBAC management |
| Azure Kubernetes Service RBAC Writer | Namespace | Read/write to most objects; can access Secrets. Cannot view or modify roles or role bindings. ⚠️ Can access Secrets and impersonate any ServiceAccount in the namespace — use with caution. |
| Azure Kubernetes Service RBAC Reader | Cluster or NS | Read-only access to most objects. Cannot view Secrets, roles, or role bindings. ⚠️ Secrets are intentionally excluded to prevent ServiceAccount credential access and privilege escalation. |
Role assignments can be scoped to the entire cluster or to a specific namespace by appending /namespaces/ to the AKS resource ID in the scope.
Pros
- Access assignments are fully visible in Azure IAM alongside all other Azure resources
- Single plane of glass for access management and access reviews across your Azure estate
- Integrates with Azure Privileged Identity Management (PIM) for just-in-time and time-limited access
- Full Entra ID authentication including MFA and Conditional Access
- Subscription-scoped role assignments can apply to all clusters in a subscription
- Audit trail in Azure Activity Log — not just Kubernetes audit logs
- Simplified onboarding: no cluster-internal manifest changes required to grant access
Cons
- Fine-grained, custom permission sets require creating custom Azure role definitions — more complex than writing a Kubernetes Role manifest
- Custom Resource Definitions (CRDs) have limited support: CRD-level permissions require the wildcard Microsoft.ContainerService/managedClusters/*/read action
- Less GitOps-native: Azure role assignments are imperative Azure ARM operations rather than declarative Kubernetes manifests
- Teams unfamiliar with Azure RBAC may find the permission model less intuitive than Kubernetes-native RBAC
| Capability | Available? |
| Entra ID / SSO integration | ✅ Yes |
| MFA enforcement | ✅ Yes |
| Conditional Access policies | ✅ Yes |
| Per-user audit trail | ✅ Yes (Azure Activity Log) |
| Kubernetes RBAC | ⚠️ Coexists, but Azure RBAC is authoritative |
| Azure RBAC | ✅ Yes |
| Access visible in Azure IAM | ✅ Yes |
| Just-in-time access via PIM | ✅ Yes |
| Subscription-scoped role assignments | ✅ Yes |
| ✅ Recommended for Most Production Environments Microsoft recommends this option for production AKS clusters where governance, access reviews, and integration with enterprise Azure IAM processes are priorities. PIM integration makes it particularly strong for privileged access management. |
Side-by-Side Comparison
Option 2 is the right choice when your team manages cluster access through GitOps and Kubernetes manifests. Option 3 is the right choice when your organisation’s governance processes are built around Azure IAM, access reviews, and PIM.
Both Option 2 and 3 are production-appropriate — Option 1 is not.
| Consideration | Option 1: Local + K8s RBAC | Option 2: Entra + K8s RBAC | Option 3: Entra + Azure RBAC |
| Authentication | Static credentials | Entra ID (OIDC) | Entra ID (OIDC) |
| Authorization | Kubernetes RBAC | Kubernetes RBAC | Azure RBAC |
| MFA / Conditional Access | ❌ No | ✅ Yes | ✅ Yes |
| Audit trail | ❌ Limited | ✅ K8s audit logs | ✅ Azure Activity Log |
| Azure IAM visibility | ❌ No | ❌ No | ✅ Yes |
| PIM / JIT access | ❌ No | ❌ No | ✅ Yes |
| GitOps RBAC | ✅ Yes | ✅ Yes | ⚠️ Partial |
| Production ready? | ❌ No | ✅ Yes | ✅ Yes (recommended) |
Azure AD Integration, Conditional Access & Disabling Local Accounts
Whether you choose Option 2 or 3, AKS-managed Entra ID integration handles the underlying configuration automatically — no manual app registration or service principal setup is required. AKS uses OpenID Connect to authenticate users, with the Azure CLI or kubelogin handling the token exchange transparently.
In production, always set –disable-local-accounts when creating or updating the cluster. Even with Entra ID integration enabled, the static admin kubeconfig remains available by default. Disabling local accounts removes that backdoor entirely, ensuring every access request is authenticated through Entra ID and appears in audit logs.
Entra ID Conditional Access policies can be applied to AKS cluster access. This allows organisations to enforce controls such as:
- Requiring MFA for cluster access
- Restricting access to compliant devices
- Blocking access from specific locations or risk levels
Because AKS authentication flows through Entra ID, the full power of Conditional Access is available without any additional tooling.
Workload Identity: Pod-Level Authentication
User access to the cluster is one side of the identity problem. The other is how pods themselves authenticate to Azure services — Key Vault, Storage, Service Bus, SQL, and more. Storing credentials in environment variables or Kubernetes Secrets is the wrong answer: they require manual rotation, provide no audit trail, and a single breach grants indefinite access.
Microsoft Entra Workload ID solves this using OIDC federation. AKS acts as an OIDC issuer, and pods are given a cryptographically signed token that they exchange with Entra ID for a short-lived Azure access token. No secrets are stored anywhere.
How Workload Identity Works
AKS Workload Identity uses the OpenID Connect (OIDC) federation standard. Here is how the flow works:
- Enable –enable-oidc-issuer and –enable-workload-identity on the cluster
- Create a user-assigned managed identity in Azure to represent the workload
- Create a Federated Identity Credential on that managed identity, trusting tokens from the AKS OIDC issuer for a specific namespace and service account name
- Annotate the Kubernetes Service Account with azure.workload.identity/client-id pointing to the managed identity’s client ID
- Pods using that service account automatically receive a signed OIDC token, exchange it with Entra ID, and receive an Azure access token — no secrets in the pod spec
Secrets Management in AKS
Kubernetes Secrets are base64-encoded and stored in etcd. While AKS encrypts etcd with a platform-managed key by default, any user or workload with RBAC read access to the Secret object can retrieve the value. For sensitive credentials, this is insufficient — Azure Key Vault provides the required isolation.
Azure Key Vault Integration with the Secrets Store CSI Driver
The recommended pattern for secrets management in AKS is to store secrets in Azure Key Vault and mount them into pods using the Secrets Store CSI Driver with the Azure Key Vault provider.
In this pattern:
- Secrets, certificates, and keys live in Azure Key Vault
- Workload Identity provides the pod with access to Key Vault
- The CSI Driver mounts the secret values into the pod as files or environment variables at runtime
- Pods never see static credentials — they receive the current value at mount time
Secrets Rotation and Expiry
Azure Key Vault supports versioning, rotation policies, and expiry for all secret types. Combined with the CSI Driver’s auto-rotation capability, secrets can be rotated without redeployment.
For certificates specifically, integration with Azure Certificate Authority or Let’s Encrypt allows automated renewal and rotation within Key Vault.
Encryption at Rest
AKS supports configuring Azure Key Vault as the KMS provider for Kubernetes secret encryption. This encrypts the secret data stored in etcd using a Key Vault-managed key, adding a layer of protection even for native Kubernetes Secrets.
For environments with strict compliance requirements, this is an important control to enable.
Zero Trust in AKS: Layered Controls
Zero Trust is not a single product or feature — it is a design philosophy applied consistently across every layer. The controls in this post work together to form that layered posture. The table below maps each layer to the appropriate control and its implementation.
| Layer | Control | Implementation |
| Auth & Authz Mode | Which model at cluster creation? | Option 3 (Entra + Azure RBAC) for most; Option 2 for GitOps-first teams |
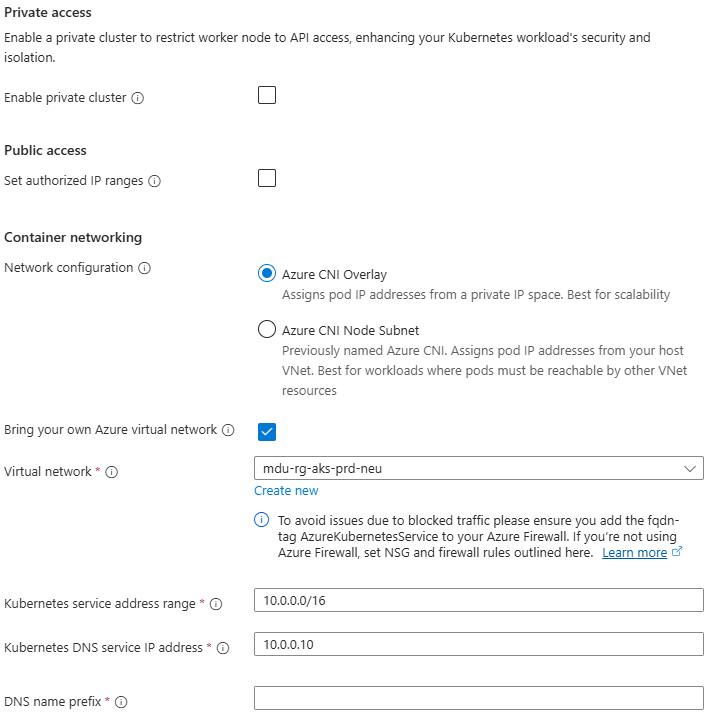
| Control Plane | Who can reach the API server? | Private cluster + Entra ID + Conditional Access + local accounts disabled |
| Workload Identity | How do pods auth to Azure? | User-assigned managed identity + Federated Credential + Workload Identity |
| Secrets | Where are secrets stored? | Azure Key Vault + Secrets Store CSI Driver + autorotation |
| East–West Traffic | Can all pods talk to all pods? | Network Policies scoped by label selectors |
| Runtime Security | Detection and response | Defender for Containers — eBPF sensor, 60+ analytics, Defender XDR |
Microsoft Defender for Containers
Microsoft Defender for Containers provides runtime threat detection across the AKS cluster. It monitors for suspicious activity at the container and host level, including:
- Privilege escalation attempts
- Container escape activity
- Unexpected network connections
- Anomalous process execution
Defender for Containers integrates with Microsoft Sentinel for centralised alerting and investigation, supporting a complete detection and response workflow.
Aligning with the Azure Well-Architected Framework
The identity and security controls in this post align directly with the Azure Well-Architected Framework pillars:
- Security: Entra ID, Workload Identity with managed identities, Key Vault, and Zero Trust controls reduce the attack surface and remove static credentials from every layer of the cluster.
- Operational Excellence: Azure RBAC and Entra groups centralise access management. Assignments are visible and auditable in Azure Activity Logs, simplifying access reviews and reducing administrative overhead.
- Reliability: Removing static credentials eliminates a class of failures caused by expired or unrotated secrets. CSI Driver autorotation further reduces the operational risk of secrets management.
- Cost Optimisation: Managed identity controls reduce credential-rotation overhead and lower the risk of costly security incidents and the compliance consequences that can follow them.
What Comes Next
At this point in the series, we have designed the AKS architecture, networking models, control plane connectivity, traffic flow, and now identity and access control. The cluster is well-networked, well-secured, and access controlled.
In the next post we turn to observability and monitoring — because a secure, well-networked cluster that you cannot see into is a cluster you cannot operate confidently in production.
See you on the next post!