
Its Day 82 of my 100 Days of Cloud journey, and in todays post I’m going to look at options for managing Containers in Azure.

In the last post, we looked at the comparison between Bare Metal or Physical Servers, Virtual Servers and Containers and the pros and cons of each.
We also introducted Docker, which is the best known method of managing containers using the Docker Engine and built-in Docker CLI for command management.
The one thing we didn’t show was how to install Docker or use any of the commands to manage our containers. This is because I’ve previously blogged about this and you can find all of the details as part of my series about Monitoring with Grafana and InfluxDB using Docker Containers. Part 1 shows how you can create your Docker Host running on an Ubuntu Server VM (this could also run on a Bare Metal Physical Server), and Part 2 shows the setup and configuration of Docker Containers that have been pulled from Docker Hub. So head over there and check that out, but don’t forget to come back here!
Docker Context
By default when running any Docker commands from the CLI, Docker automatically assumes that you wish to use the local Docker Host for storing and running your containers. However, you can manage multiple Docker or Kubernetes hosts or nodes by specifying contexts. A single Docker CLI can have multiple contexts. Each context contains all of the endpoint and security information required to manage a different cluster or node. The docker context command makes it easy to configure these contexts and switch between them.
In short, this means that you can manage container instances that are installed on multiple hosts and/or multiple cloud providers from a single Docker CLI.
Let take a look at the different options for managing containers in Azure.
The Docker CLI Method
In order to use containers in Azure using Docker, we first need to log on to Azure using the docker login azure command, which will prompt us for Azure credentials. Once entered, this will return “login succeeded”:

We then need to create a context by running the docker context create aci command. This will associate Docker with an Azure subscription and resource group that you can use to create and manage container instances. So we would run docker context create aci myacicontext to create a context called myacicontext.

This will select your Azure subscription ID, then prompt to select an existing resource group or create a new resource group. If you choose a new resource group, it’s created with a system-generated name. Like all Azure resources, Azure container instances must be deployed into a resource group
Once thats completed, we then run docker context use myacicontext – this ensures that any subsequent commands will run in this context. We can now use docker run to deploy containers into our Azure resource group and manage these using the Azure CLI. So lets run the following command to deploy a quickstart container runing Node.js that will give us a static website:
docker run -p 80:80 mcr.microsoft.com/azuredocs/aci-helloworld

We can now run docker ps to see the running container and get the Public IP that we can use to browse to it:


And if we log onto the Portal, we can see our running container:

So as we’ve always done, lets remember to remove the container by running docker stop sweet-chatterjee, and then docker rm sweet-chatterjee. These commands stops and deletes the Azure Container Instance:

Finally, run docker ps to ensure the container has stopped and is no longer running.
The Azure Portal Method
There are multiple ways to create and manage containers natively in Azure. We’ll look at the portal method in this post, and reference the remaining options at the end of the page.
To create the container, log on to the Portal and select Container Instances from the Marketplace:
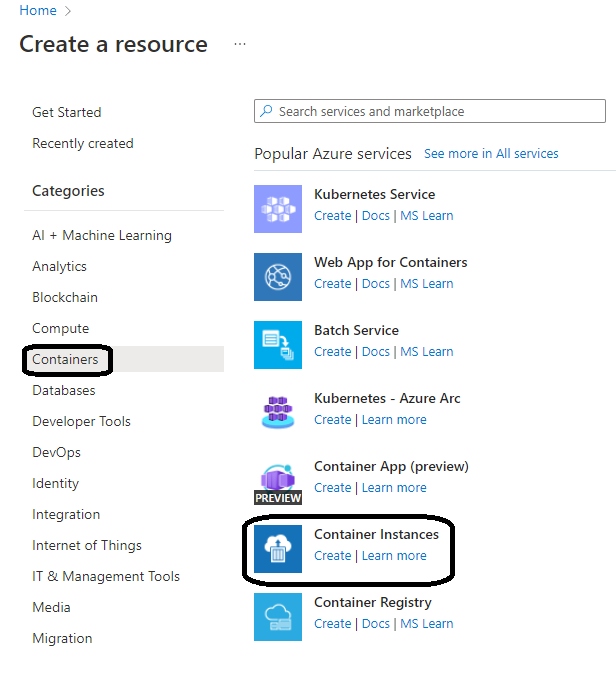
Once we select create, we are brought into the now familiar screen for creating resources in Azure:

One important thing to note on this screen is the “Image Source” option – we can select container images from either:
- The quickstarts that are available in Azure.
- Images stored in your Azure Container Registry.
- Other registry – this can be Docker or other public or private container registry.
On the “Networking” screen, we need to specify a public DNS name for our container, and also the ports we wish to expose across the Public Internet

And once thats done, we click “Review and Create” to deploy our container:

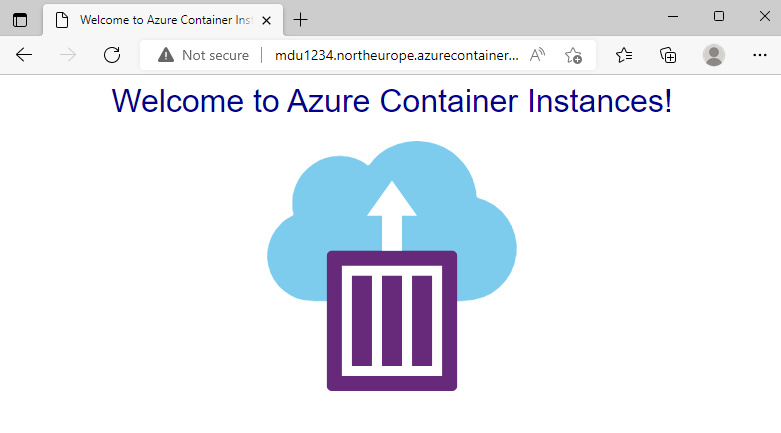
Once thats done, we can see the FQDN or Public IP that we can use to browse to the container:
As always, make sure to stop and delete the container instance once finished if you are running these in a test environment.

There are a total of four other options in Azuire for creating and managing containers:
Conclusion
So thats a look at how we can create and manage Azure Container Instances using both Docker CLI and the wide range of options available in Azure.
Azure Container Instances is a great solution for any scenario that can operate in isolated containers, including simple applications, task automation, and build jobs. You can find all of the documentation on Azure Container Instances here.
Hope you enjoyed this post, until next time!

One thought on “100 Days of Cloud – Day 82: Options for Managing Containers in Azure”