Its Day 38 of 100 Days of Cloud, and I’m continuing my learning journey on Infrastructure as Code (IaC) by using Terraform.

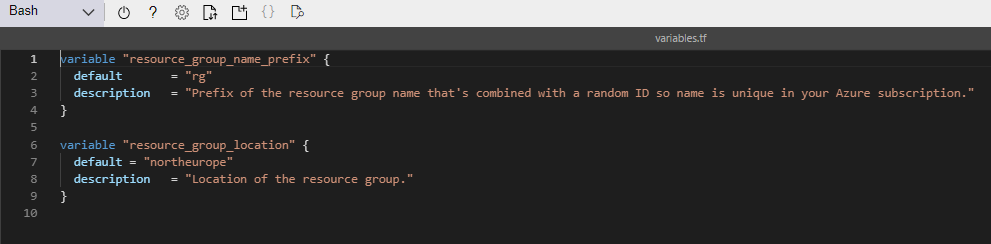
In the previous post, we looked at the different types of variables we can use in Terraform, how we reference them across across terraform config files, and how powerful they can be in helping to make our code reusable.
Todays post is all about modules, which are used to break our terraform deployments up into multiple segments that are much easier to manage. Lets dive in and take a look.
Modules
Modules are a way to split your Terraform code into multiple segments that they can be managed more easily and by cross functional teams.
Lets go back to our traditional setup, which will have the following components:
- Operating System
- Network Connectivity
- Database
- Web Application
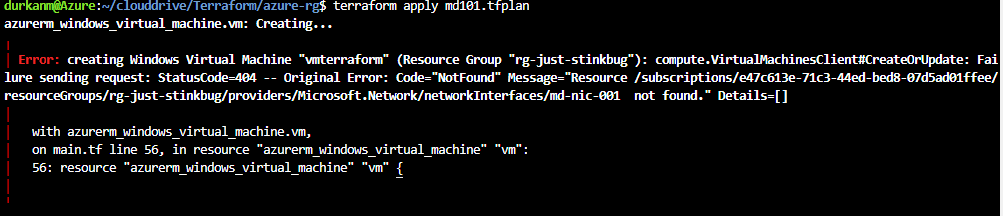
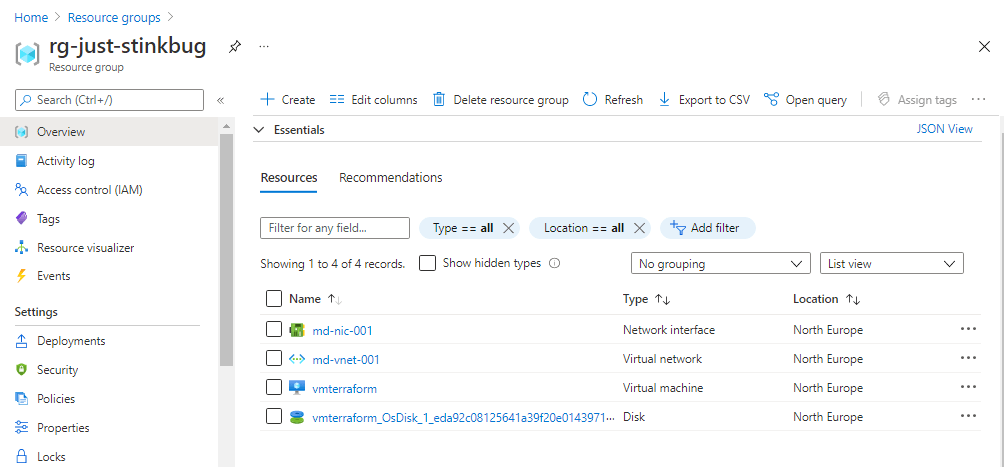
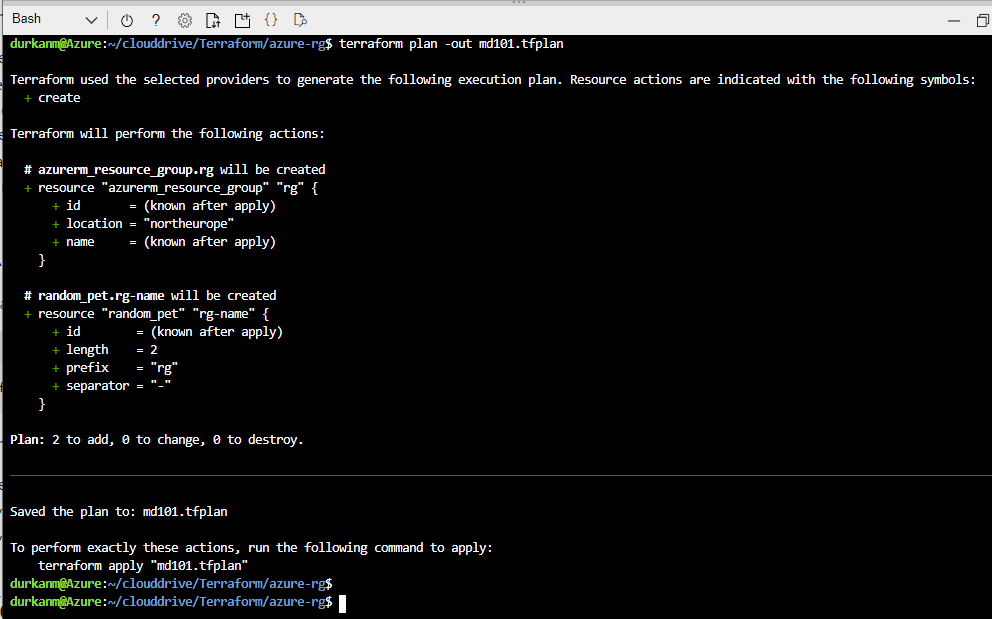
In our first post on Terraform back on Day 35, we had all of these bundled into a single main.tf file. As our infrastructure footprint in Azure or other Cloud Services grows, this single file will grow exponentially and will make management very dificult, particularly if multiple teams are accessing. There is also the risk that mistakes can be made that could take down the entire infrastructure.
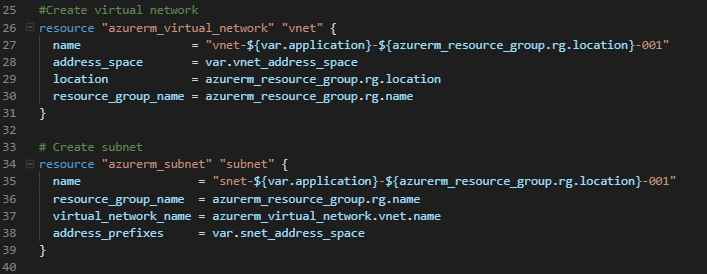
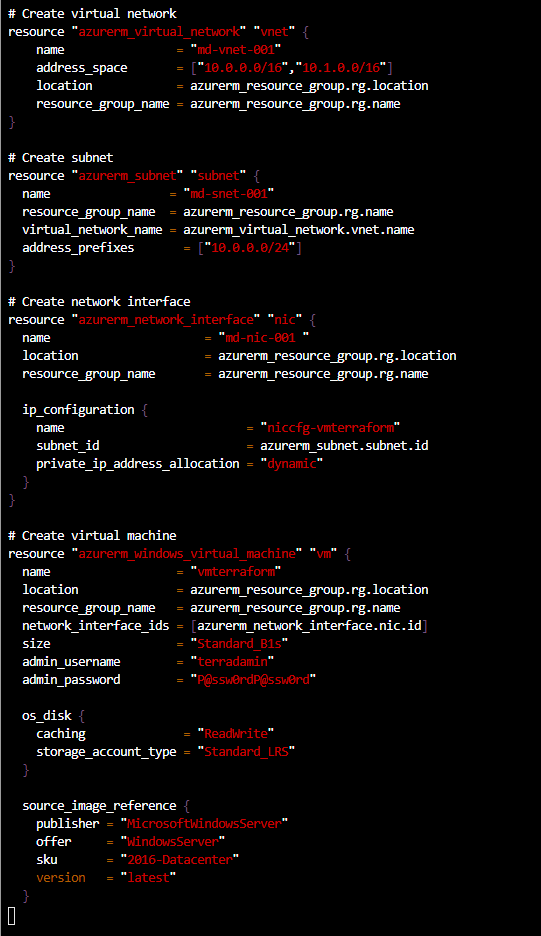
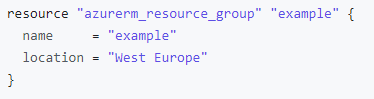
Modules effectively sit in their own file structure, and are called from the main.tf file. If we look at the example below, the root or parent main.tf file sits at the top of the directory structure, and we then have the directory for the storage-account module sitting below that with its own main.tf and variables.tf configuration files :

If we look at the main.tf file, we can see that the resource group code is there as normal, however when we get down to create the storage account, we’re calling the module from the underlying directory structure. If we look the main.tf file within the module, we can see that it contains the basic information required to create the storage account:

What’s missing here is the Terraform source/version and provider code blocks, however in a modules configuration all of that happens in the parent main.tf file. So when we run terraform apply on the parent directory, all providers for the child modules are initialised also.
So why bother break it all up into modules? It goes back to what we said at the start about managing our code effectively, and breaking each of the components out to be managed individually. This also helps from a source repository perspective: instead of having all elements in a single file managed by multiple users or departments, each module can have its own source repository (in Github for example) managed by a teamthat can then be pulled from the repository whenever changes are made. This whats known as “Mono Repo” versus “Multi Repo”.

In the module block, we can also directly reference a Github repository to get the most up to date version of our code. There are multiple sources that can be referenced directly in the code, and full details can be found here.
Learning Resources
Lets wrap this up by looking the learning resources that are available. There are loads of excellent Terraform leaning resources out there. The best place to start is at HashiCorp Learn, which has full tutorials for all of the major cloud providers. Terraform Registry is the place to go for all providers and modules you need to deploy infrastructure.
You then need to look at courses – the aforementioned Luke Orrelana does an excellent Terraform on Azure course over at Cloudskills.io, and Michael Levan has a Terraform for All course on his YouTube Channel. Both Luke and Michael are HashiCorp Ambassadors which is teh HashiCorp equivalent of an MVP, so if you see these guys producing content you know its going to be good (and definitely doing a better job than me of trying to explain how this works!).
Conclusion
And thats all for today! I hope you’ve enjoyed the last few posts on Terraform and learning how powerful a tool it can be. Until next time!