


Welcome to Day 5 of 100 Days of Cloud. It’s the one you’ve all been waiting for! Yes, that’s right, today I’M ACTUALLY GOING TO DEPLOY SOMETHING!!! The prep work was important, but now it’s time to get down to the nuts and bolts and deploy some resources.
What I’ve tried to do up to now has to show the multiple different ways we can manage Azure (Portal/PowerShell/CLI). I haven’t touched on ARM Templates yes, but that’s going to be Day 6. Today, I’m going to deploy a virtual machine in the Azure Portal only. While the Portal is the more long-winded, clickety-click way of doing things, it’s also the most informative way to start off deploying in Azure, as you go through the Steps one-by-one and can see exactly what’s happening from both an options and a Cost Perspective.
I hope to be able to demonstrate over the coming days how to deploy a number of Virtual Machines to our Resource Groups that we created in Day 2 using all of the methods available, be able to see how this affects both Actual and Forecasted budgets that were set up in Day 3 (and hopefully get some alerts to generate), and to then apply some different types of RBAC Assignments that we talked about in Day 4 to see how the different assignments affect the rights users have over the Resource Groups and Resources.
Let’s jump into the Azure Portal and get started. Search for “Virtual Machines” in the search bar, and click to open the Virtual Machines window:
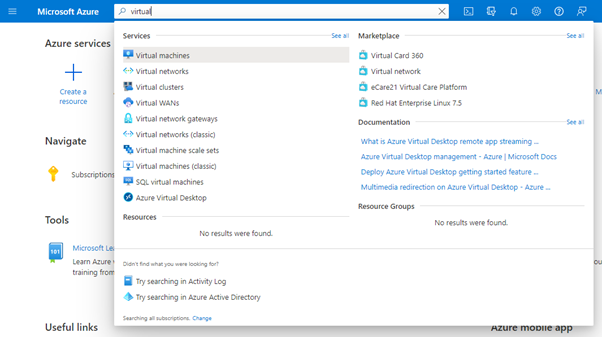
I can see that there are no Virtual Machines active in my Subscription. Click on the “Create” button and select “Virtual Machine” to get started:

Basics
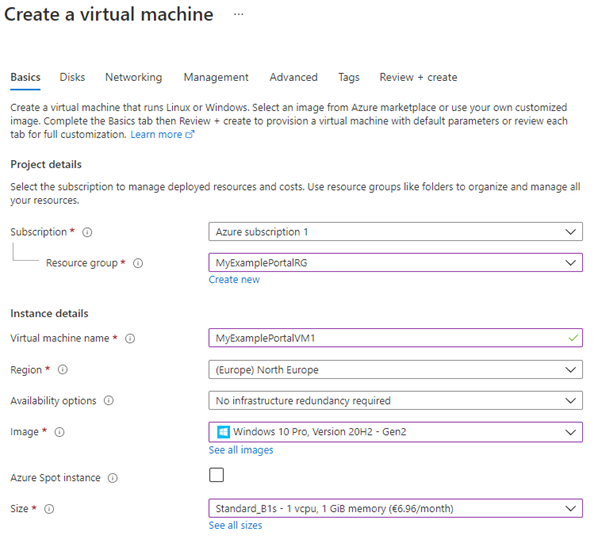
This opens the “Basics” tab. Here under “Project Details”, I’ll select the Resource Group where I want the Virtual Machine to be created in. I created the “MyExamplePortalRG” during Day 2.
Next in the “Instance Details” section, I need to provide the following:
- Virtual Machine Name — this can be anything, but needs to be both authentic in your subscription and easily identifiable.
- Region — The VM is automatically placed in North Europe as this is where the Resource Group is located.
- Availability Options — there are 3 options we can select here:
- No infrastructure redundancy required — this will be a standalone VM with no redundancy
2. Availability Zone — you can have replicated copies of the VM running in different datacenters within the same Azure region
3. Availability Set — This is a logical grouping of 2 or more VMs that allows Azure to understand how your application is built for redundancy. The VMs are isolated across different Fault Domains (Racks/Data Center/Storage/Network) and Update Domains (Updates are staged to occur at different times across the set, thus ensuring the availability of the Application/VM).

- Image — this is the Operating System I want to run. I need to have a license for the OS I want to use if required
- Azure Spot Instance — this is unused Azure Instances that can be used at a discounted rate. Not suitable for Production workloads
- Size — this is the Size of the VM. As we can see, there are multiple options with different price ranges available (and even more if we click “See all sizes”), all based on the amount of vCPUs and Memory we need

By the end of this section, I now have these options:
In the next sections, we need to fill in the following:
- Administrator Username and Password
- Inbound ports that we want to have open to the machine — in an ideal world, we would have an Azure Bastion host to use a jump box to connect to your VMs. For now, we’ll leave RDP (3389) open.
- Licensing — this asked you to confirm that you have a license for your OS of choice.
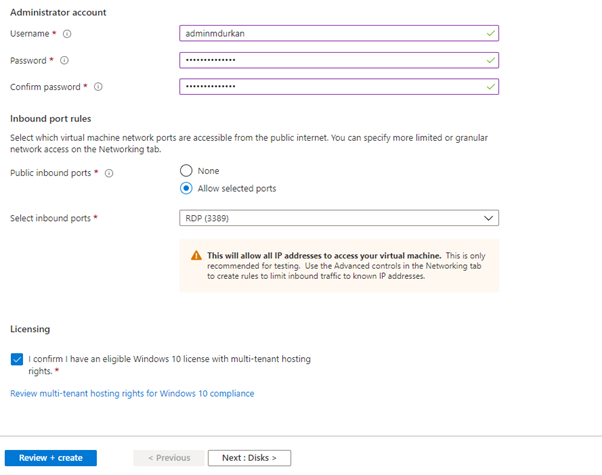
Now click on the “Next: Disks >” button and we’ll move on to Disks!
Disks
There are just 2 options on the Disks Page:
- OS Disk Type — this can be a HDD or SSD, and can also be Locally or Zone redundant. We can see all types and explanations when we hit the drop-down:

- Encryption Type — Azure encrypts all Storage by default. We can choose to use the Default Azure Provided Encryption, our own managed key or a mixture of both:

We can also select additional disks if required by your VM. Now we have the required options selected, we can move on to Networking:

Networking
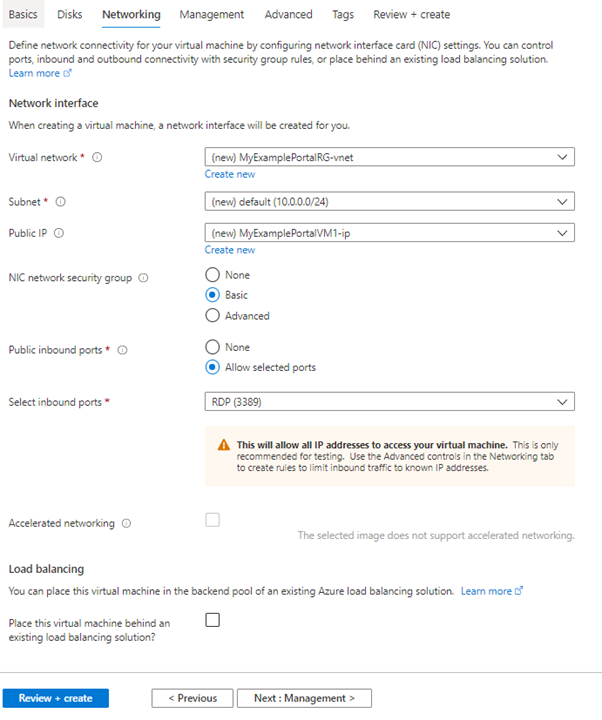
On the Networking Tab, we define Virtual Networks, subnets and IP’s for use with our Virtual Machine. As we can see, Azure will create a new Virtual Network, Subnet and Public IP Address based on the name of our resource group. We can also define Public Inbound Ports, Network Security Groups and Load Balancing. I’m going to deal with this in future posts on Networking and Security.
For now, we’re just going to take the defaults here and move on to Management.
Management
Management allows us to configure management and monitoring options for our VM, such as:
- Boot Diagnostics — used to diagnose boot failures
- Identity — used to grant RBAC permissions to System-Managed Identities using Credentials stored in Azure KeyVault
- Azure AD Authentication — used on-prem AD credentials to log in, enforce MFA, or enable RBAC Roles
- Auto-Shutdown — configures the VM to automatically shut down daily.
- Patching
As this is a test VM, I’m going to keep the default options (which doesn’t use any of these features apart from patching), but it’s useful to know these options are available.

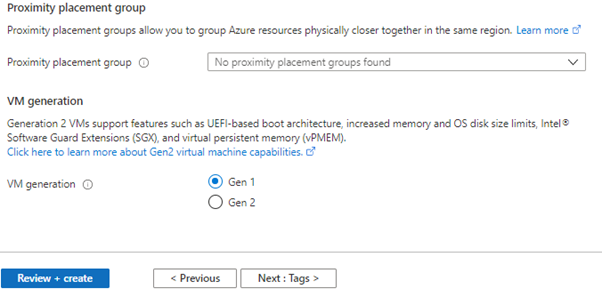
Advanced
The Advanced tab allows us to specify scripts, agents or applications to add to the VM automatically. We can also specify the VM Generation to use:

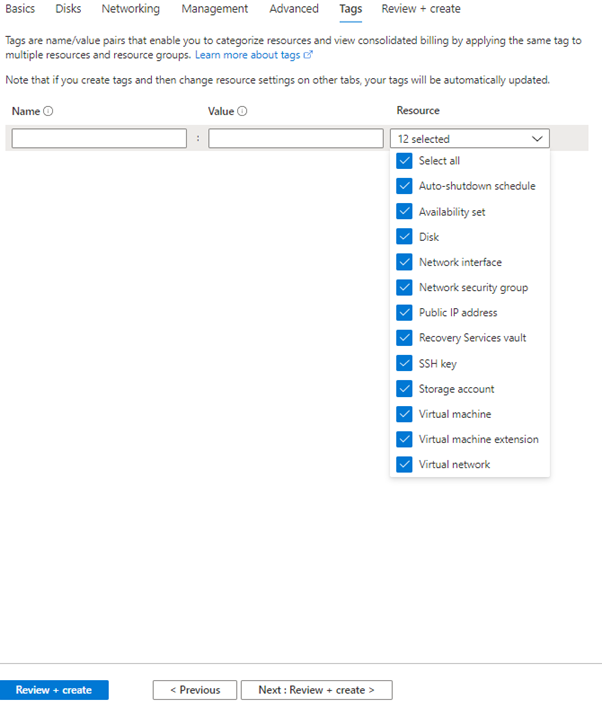
Tags
The Tags tab allows us to apply Name/Value Pair Tags to specific resources within the VM. This may be used for the likes of billing to apply different tags to different groups of resources. For example, I could add tags to the following:
- Tag VMNetGRP could be applied to Network Interface, Public IP Address and Virtual Network
- Tag VMTagGRP could be applied to Auto-Shutdown and Virtual machine
- Tag VMStrGRP could be applied to Disk and Storage Account
We’re finished all of our options here, so now lets move on to Review + Create.
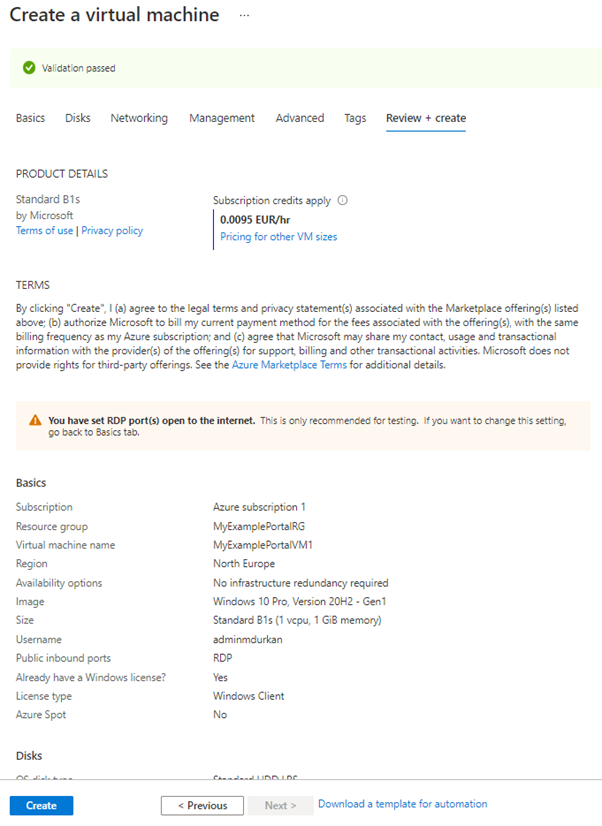
Review + Create
This page gives me a final list of all the options I selected throughout the process, including pricing. Note that at the bottom of the page, it also gives us an option to “Download a template for automation”. This is important and is absolutely something you should do, as it does exactly what it says — provides us with a JSON template for automating the deploying of this exact same type of VM if we wish to deploy another one:
Lets click Create and see what happens:

We can see that Azure creates each component of the Virtual Machine (Storage, Virtual Network, IP, and the VM itself) one by one. We’ll eventually get an alert to say when it’s completed. If you had forgotten to download the automation template on the previous page, no problem — click on the Template menu which gives us the template in JSON format for download:
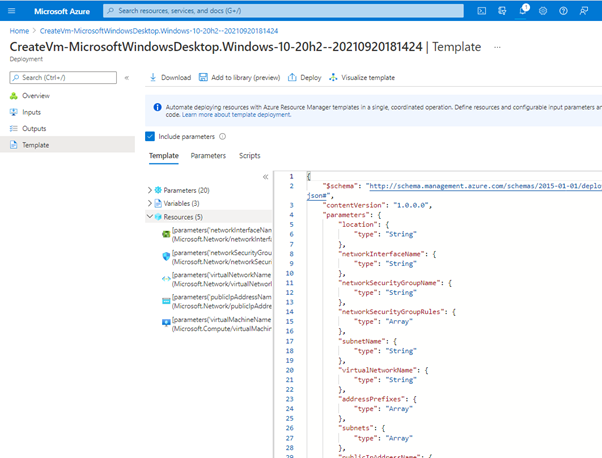
We’ll look more at JSON in the next post, where we’ll use Visual Studio Code to view this and make changes if required.
The Finished Product!
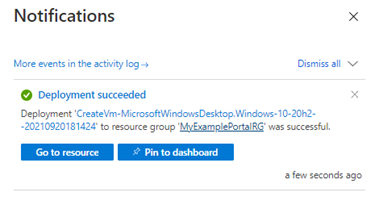
Finally, an alert to say the deployment succeeded:
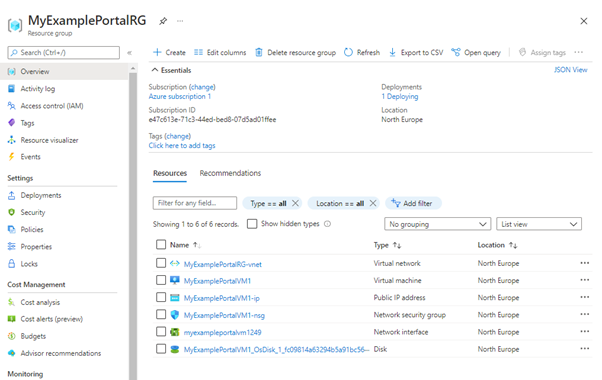
Now, let’s jump into our Resource Group, and we can see all of our resources are available:
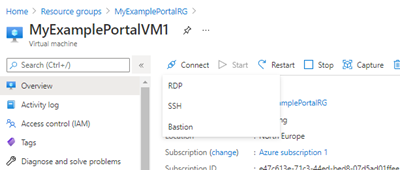
We click into the VM to look at the settings:

Let’s click on the “Connect” button — this will give us the option to use RDP, SSH or Bastion. I’ll choose RDP:
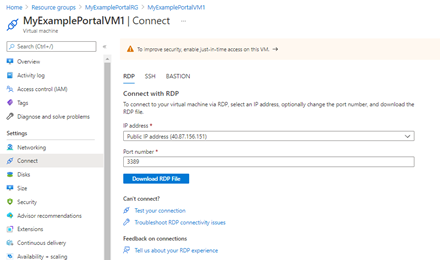
And this will give us a link to download an RDP File:
Click Connect:

I get prompted for credentials:
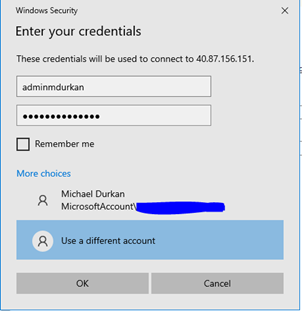
And I’m in!!

Final thing to do here — because this is a Test-VM, I’m going to disable RDP for Security reasons. So in the portal, I go back into the Virtual Machine. On the Menu at the side, I click “Networking”. This brings me into the Network Security Group for the VM:

I can see that RDP is set to Allow, so I’m going to click on “Allow” in the Action Column, and set the RDP policy to “Deny”:

Now, I’ll try to connect to the VM again:

Exactly what I wanted to see.
Conclusion
And that is how we create a Virtual Machine in the Azure Portal. Next time, I’m going to do this all again, but this time using Azure PowerShell, and the JSON template that I downloaded. I’ll also come back into Cost Management to see how this VM affects my Budget.
Hope you enjoyed this post, until next time!!

2 thoughts on “100 Days of Cloud — Day 5: Deploy a Virtual Machine using the Azure Portal”