Its Day 45 of my 100 Days of Cloud Journey, and today I’m looking at Azure Spot Instances and Reserved Instances.
During previous posts where I deployed virtual machines, the deployments were based on a Pay-As-You-Go pricing model, this is one of the 3 pricing models available to us in Azure. While this type of pricing is good for the likes of what I’m doing here (ie quickly spinning up VMs for a demo and then deleting them immediately), its not considered cost effective for organisations who have a Cloud Migration strategy, a long term plan to host a large number of VMs in Azure, and also need the flexibility to use low costs VMs for development or batch processing.
Lets take a look at the other 2 pricing models, starting with Azure Spot Instances.
Azure Spot Instances
Azure Spot instances allow you to utilize any unused Azure Capacity in your region at the fraction of the cost. However, at any point in time when Azure needs the capacity back, the Spot Instances will be evicted and removed from service at 30 seconds notice.
Because of this there is no SLA on Azure Spot instances, so they are not suitable for running production workloads. They are best suited for workloads that can handle interruptions, such as batch processing jobs, Dev/Test environments or Large compute workloads.
There is no availability guarantees, and availablity can vary based on size required, available capacity in your region, time of day etc. Azure will allocate the VM if there is available capacity, however there is no High Availability guarantees.
When the VMs are evicted, they can be either deallocated or deleted based on the policy you set when creating the VMs. Deallocate (this is the default) stops the VM and makes it available to redeploy (however this is not guaranteed and is based on capacity). You will also be charged for the underlying Storage Disk costs. Delete on the other hand will shut down and destroy the VMs and underlying storage.
You can see the full savings you can achieve by using Spot Instance VMs in the Azure Spot VMs Pricing Table here.
Azure Reserved Instances
Azure Reserved Instances is a way to reserve your compute capacity for a period of 1, 3 or 5 years at savings of over 70% when compared to Pay-As-You-Go pricing. This is best suited to Production workloads that need to have 24/7 runtime and high availability.
As we can see in the image from the Reservations blade in the Azure Portal above, you can purchase Azure Reserved Instances for a large number of Azure Resources, not just VMs.
Reservations can be aplied to a specific scope – that can be Subscription (single or multiple subscriptions), Resource Group or a single resource such as a VM, SQL Database or an App Service.
Once you click into any of the options on the Reservations blade, it will bring you into a list of available SKUs that you can purchase:
Another option to factor in is that Azure Reserved Instances can be use with Azure Hybrid Benefit, meaning you can use your on-premise Software Assurance-enabled Windows OS and SQL Server licences, which can bring your savings up to 80%! You can find out more about Azure Hybrid Benefit here, and get the full lowdown on Azure Reserved Instances here.
Conclusion
And thats a wrap on Azure Pricing models – you can see the cost savings you can make based on what your workloads are. Hope you enjoyed this post, until next time!
Its Day 7 of my 100 Days of Cloud journey and in todays post, I’m going to do the same thing I did for the last 2 days … except again, differently.
That’s right dear reader, today is the third and final post in what I’ve decided to call the “Azure Virtual Machine Deployment Trilogy”. It has a nice ring to it, doesn’t it? I wonder who’ll play me in the lead role once the movie rights get picked up ……
Anyway, back to reality. Over the last 2 days, we’re now fully up to speed in what we’re trying to achieve here. Day 5 dealt with deploying via the Azure Portal, Day 6 dealt with PowerShell deployment and the various parameters, inputs and in some cases “gotchas” that we needed to be aware of.
Some Checks and Housekeeping
Before I go any further, if you recall I was going to check Cost Management to see if my deployments are generating any costs (Actual or Forecast) or alerts that were set up in Day 2. And yes they are:
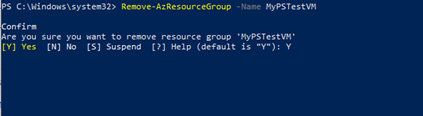
So I’m going to delete the entire Resource Group from the default “MyPSTestVM” deployment as I don’t want to keep paying for it:
Remove-AzResourceGroup -Name MyPSTestVM
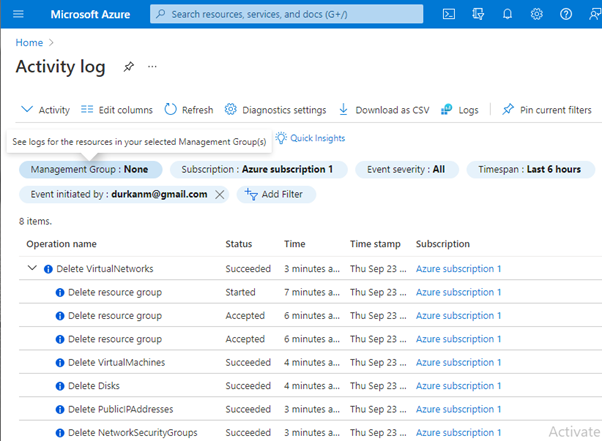
This takes a few minutes (so don’t worry if the PowerShell prompt just sits there. Don’t forget, deleting the resource group deletes all of the Resources it contains. After a few minutes, I’ll check the Activity Log in the Portal and it confirms that the RG and all resources have been deleted:
ARM Templates
Today, we’re moving on to Azure Resource Manager (or ARM) Templates. In Day 1, I prepared the environment by installing Visual Studio Code and installing the ARM Tools. So let’s dive in and see what we can do with ARM templates.
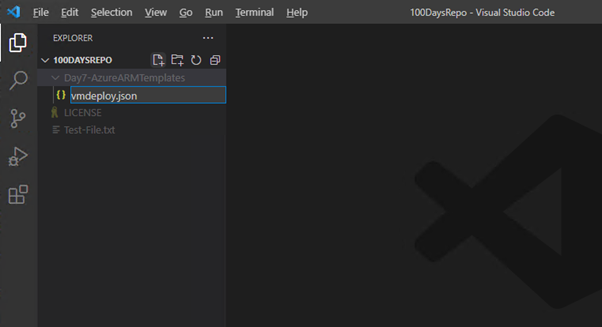
I open Visual Studio Code on my machine, and as you can see I’m in my 100DaysRepo that I created and merged from GitHub. I’m going to create a new folder by clicking the “New Folder” button, and call it “Day7-AzureARMTemplates”:
Next, I’m going to create a new file within that folder, and call it “vmdeploy.json”
OK, so that’s my file. Now, I notice that the filename has brackets before it and is highlighted in green:
This is because I have the ARM Extension installed, and Visual Studio Code is recognizing this file as a JSON file.
A quick word on JSON — ARM Templates are JavaScript Object Notation (JSON) files that define the infrastructure and configuration for your project or deployment via code. This uses declarative syntax, and contains the following sections:
The template has the following sections:
Parameters — Provide values during deployment that allow the same template to be used with different environments.
Variables — Define values that are reused in your templates. They can be constructed from parameter values.
User-defined functions — Create customized functions that simplify your template.
Resources — Specify the resources to deploy.
Outputs — Return values from the deployed resources.
For a more detailed explanation, I’ll refer you to Microsoft’s official documentation found here.
Back to Visual Studio Code — in my new file, I type the word “arm”, and this is what happens:
I select the first option for “Azure Resource Manager (ARM) Template” and press enter. And this is what I get:
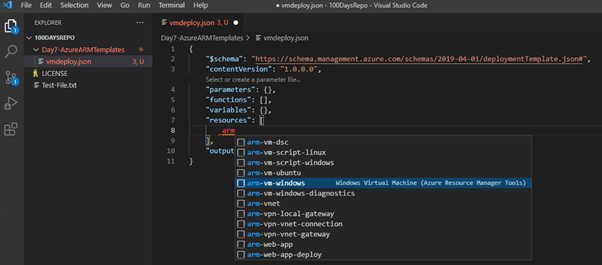
This is a standard JSON template that contains the options that I described above. But nothing about Azure yet though, so how can I deploy a Virtual Machine (or anything for that matter). In the “Resources” section, I’ll do a “CRLF” or “Return” to create a new line, and type in the word “arm again”:
Oh hello …. As I can see if I scroll through this list, there are multiple different deployments that can be used with ARM templates. However, I’ll scroll down and find “arm-vm-windows” and select that:
And when that happens, I get confronted with a wall of text that seems to go on and on and on …. :
170 lines in total! Can’t I just go back to the Portal or that one line PowerShell please?
No, I can’t. Because if I look really closely, its all broken up into sections that are easy to read. See the first 3 sections? Storage, Public IP Addresses and Network Security Groups. I’ve done that before! And in each of those sections, it contains things I recognize from our Portal and PowerShell posts, like Storage SKU, and Open Port ranges.
Further down, I see options for Virtual Network, Subnet, Network Interface, and Virtual Machine. All again with the same sets of parameters and options that were available in both previous posts:
The other thing I’m seeing is that the word “windowsVM1” is highlighted across the entire JSON. That’s because this is the default. And if I wanted to, I could deploy this as is into my Azure Subscription and it would do exactly the same as the short “New-AzVM” command did — it will create any resources that do not already exist using this naming convention. I’ll leave this in place for the purposes of the Demo, but would advise you to change this using your own company or personal naming convention prior to deployment.
The only thing that this won’t create is a Resource Group — I need to use either PowerShell or Azure CLI to do this. I’ll run the PowerShell command to do this:
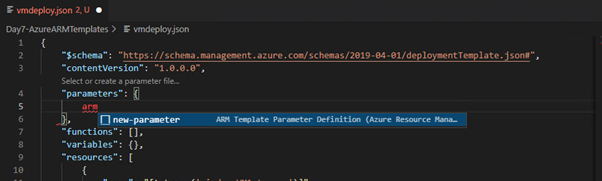
One final thing I’m going to do is create a parameter for the Admin Password for the VM so that it prompts us during deployment to enter it. So back at the top of the template in the “parameters” section, I’ll do a return and type “arm”:
This gives me a dropdown to create a parameter. When I click on that, it gives me the layout to create the parameter:
I’ll change the parameter name to “adminPassword”, and also change the description:
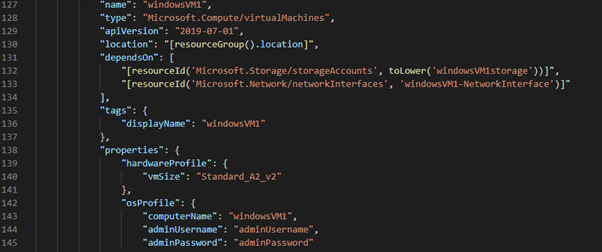
Now, I need to scroll down and find the “adminPassword” in the resource section, and its under the Virtual Machines resource.
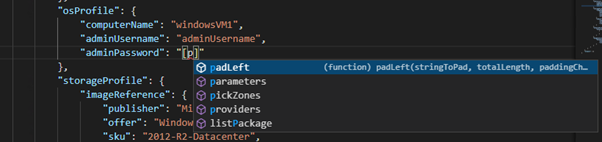
I’m going to delete the “adminPassword” description and call my parameter. To do this, I create square brackets [] and enter the letter “p”. As I can see, this gives me options to pick from and “parameters” is one of them:
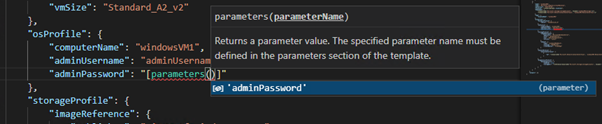
Once this is in, I then put in regular brackets (), and this gives me a list of the parameters I have defined. And this gives me the adminPassword parameter to accept here:
OK, so that’s my template file ready, isn’t it? Well, it is and we can deploy like this, but unless I go hunting in the portal for the PublicIPAddress, I’m not going to know where to connect to. To get around this, I’ll go down to the bottom of the template and create an Output to output the PuclicIPAddress to the screen. I do a return and type “arm”:
And this gives me new JSON format.
I’ll change “output1” to “PublicIPAddress”. In the “value” field, I start with square brackets [] and enter “r” and select “reference”:
Now, I need some regular brackets () and this gives me another list — I need to select “resourceId” from this list:
I now need another set of regular brackets (), and this now gives me a list where I can select the PublicIPAddress Type (or any other resource type if I wish):
The “resourceId” combines the resource type and name. So I need to put a comma after the type (still within the regular brackets), and this finds the name of my PublicIPAddress from the json:
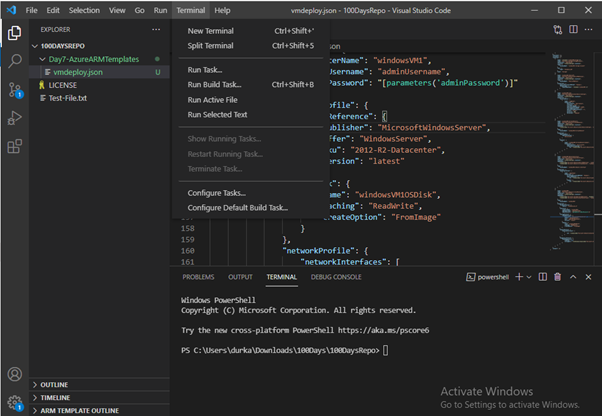
And that’s it! I can save this and go to PowerShell to deploy. Or I can do this from within Visual Studio Code by click the “Terminal” menu and selecting “New Terminal”. This will open a PowerShell Terminal at the bottom of the screen, and it defaults to the folder location of our Repository:
OK, so lets deploy. Instead of using “New-AzVM” as I did in the PowerShell post, I need to use “New-AzResourceGroupDeployment” command instead as I’m deploying directly to an existing ResourceGroup:
OK, so this time I have another failure, but its associated with the output that I created:
But the deployment did work as I can see the resources available in the Portal:
Hmmm, need to work out what’s gone wrong here. Its not exactly gone “wrong” as the deployment was successful, but I’d like to have this working fully without errors…..
So have scrabbled around this for a while, I finally worked out what was wrong (and its the lack of programmer in me that was at fault).
Firstly, the “outputs” section — I can’t just call this “PublicIPAddress” as that’s what the error was saying. So I tried calling it “publicIP” and this seems to have worked. From the official Microsoft documentation, the “outputs” name value needs to be a valid JavaScript identifier. I don’t have a list of accepted values and can’t find it anywhere, so if anyone does come across it, please drop a link into a comment and I’ll update the post!
Secondly, for the resource identifier, I needed to output a string value as this is what the output was expecting. So I needed to add “.dnsSettings.fqdn” to then end of the resourceId.
So the entire outputs section now looks like this:
And when I run the deployment again, everything now works and it outputs the DNSName of my VM to connect to.
So lets try it:
And it connects!
In this instance, I’m just going to delete all resources immediately by running
Remove-AzResourceGroup -Name MyExampleARMRG
Final thing I need to do in Visual Studio Code is Commit and Push my changes into Github (See Day 1 for details). It important to do this with all of the projects you undertake as its means it reusable.
And that’s how to deploy an Azure VM using ARM templates! ARM templates are powerful and can be used not for just Virtual Machines, but any type of Azure Deployment.
I hope you enjoyed this post (despite the hiccups!). Until next time!!
Its Day 6 of my 100 Days of Cloud journey, and today I’m going to do the same thing as I did yesterday ….. Except differently.
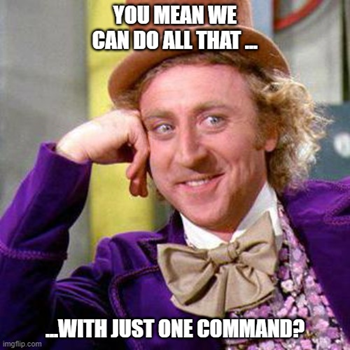
In Day 5, I deployed a Virtual Machine into Azure using the Portal, and tried to explain the process along the way. Today I’m going to follow the same process using PowerShell, meaning what took endless clicks (and scrolling on your part dear reader) can now be done with just one command.
That’s right Mr. Wonka, just one command will do it all. There’s a lot of options we need to be aware of though, so let’s jump into PowerShell and take a look.
I’ll open PowerShell and connect to my Azure Account using
Connect-AzAccount
The command I need to run here is
New-AzVM
Similarly, I can run
Get-AzVM
to see what VM’s are in our Subscription, so let’s run that first:
That shows me the VM I created yesterday in the Portal. This gives me a clue about parameters I need to use in order to create my new VM. As with all PowerShell Modules, there is extensive help available, so I’ll run the
get-help New-AzVM
command to see the options and parameters I can use:
Good lord …. That’s a lot of information. And when it flashes up on the screen like that in a wall of text, it can seem a bit intimidating. However, some key things to look for here.
Firstly, under “SYNTAX”, I can see the list of parameters we can feed into “New-AzVM”. These will look familiar to us as it’s exactly what I used to create the VM in the Portal. If I take the first 2 parameters alone, these are familiar to me:
I know what my Resource Group name is, as I created that using PowerShell during Day 3. I also know that my location is “northeurope”, as if I scroll up I see that outputted in “Get-AzVM”.
So effectively, the command I would use here for this portion of the PowerShell Command is this:
Secondly, if I look at the “REMARKS” section there are other commands I can run, one of which will give me examples! Lets run that and see what it returns:
I can see there are a number of examples there, but the first one is just asking for a Name parameter for the VM, and my credentials? Surely it can’t be that easy? Lets try — I’m going to run this with a “-Verbose” switch so we can get some output:
I get a prompt for credentials — what I need to provide here is the Local Admin credentials I want to use on the VM. I provide this and click OK:
Hold on a second, I didn’t tell it to do any of this! But eventually after a few minutes it finishes:
The reason this created without any parameters or input is that Azure uses a set of default values when it doesn’t receive any input. Based on the name of the VM, Azure creates a Resource Group, Virtual Network, Disk, Network Interface and a Network Security Group. These are all created in the East US location, use the most Standard VM Size profile, the most Standard OS (which is Windows Server 2016 Datacenter), and a Premium Locally Redundant SSD. If I run
Get-AzVM
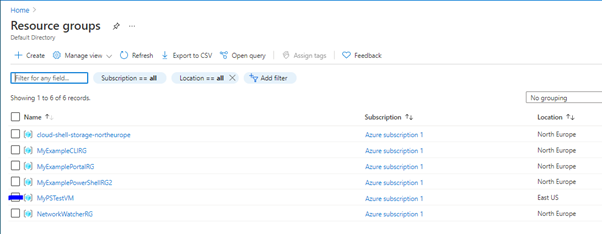
And check the Portal, there’s the new Resource Group:
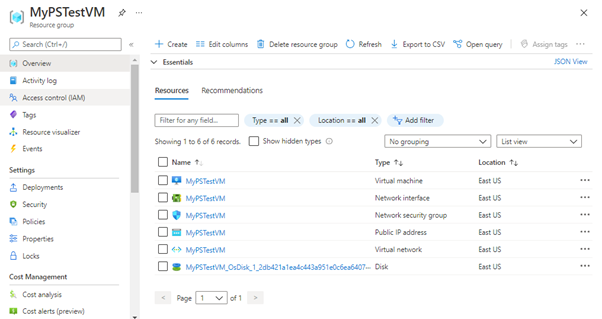
And if I click into that, there’s all my resources:
This is why it’s important to understand the parameters and provide them correctly so that the Virtual Machine we create is the one we want. If I check that machine in the Azure Pricing Calculator, along with a Windows License and the SSD, it’s going to cost me nearly €160 per month.
Thanks for the defaults Microsoft, but as this is for the purposes of testing, I’m going to dele ……
No, wait, I’m not. I’m going to leave it running for a few hours to see if it generates some data in Cost Management and some Budget Alerts (I’ll report back on this in the next post!).
So moving forward, what I now want to do is create my new VM in the correct Resource Group using the options that I want. And if I look at the “-Verbose” output that I received when I created the first VM, its gives me a guide as to what parameters and options I want to have. So, What I want to do is specify the following options:
Resource Group — MyExamplePowerShellRG2
Location — northeurope
Name — MyPowerShellVM (This is the name of the VM in the portal, not the local Computer name)
AddressPrefix — “10.30.0.0/16” (This is for the Virtual network)
SubnetName — PSVMSubnet
SubnetAddressPrefix — “10.30.30.0/24”
PublicIPAddressName — PSPublicIP
DomainNameLabel — psvm001md (This is the local
SecurityGroupName — PSVMNSG
OpenPorts — 3389 (We can change this in the NSG later, but this is for RDP Connectivity, or SSH for Linux)
ImageName — “Win2016DataCenter”
Size — “Standard_B2s” (This is the VM Size. A full list can be found here)
OSDiskDeleteOption — Delete (This specifies whether the OS Disk is deleted or detached and retained when the VM is deleted. Options are Delete, Detach)
If I reference the “get-help” for the command again, or indeed the official Microsoft Docs article for the “New-AzVM” command, we can see these are only a few of the options available to use, but are probably the most common ones. So with those options, my PowerShell command should look like this:
Again, I’m adding a “-Verbose” and clicking enter:
And it’s done. So let’s run “Get-AzVM” to see if it created successfully:
Yep, all looking good there. So lets check the Portal now:
All looking good there! So now let’s get a connection to my VM:
And I’m in. Like yesterday, I’ll turn off RDP Access via the NSG just for extra security.
Now, let’s delete the VM. I’ll run
get-help Remove-AzVM
to check the options:
OK, so all I need is the Resource Group and the VM Name it seems. From the output to “Get-AzVM” above, the name of my VM is “MyPowerShellVM”. So I’ll run:
And if we read the error, it’s because there’s a lock on the Resource Group which we put there on Day 3 when we created it! So we need to remove that first by running:
And now, lets try running our “Remove-AzVM” command again:
And this time worked successfully. Let’s check the Portal:
And I see that both the Virtual Machine and the Disk have been deleted.
And that’s the PowerShell Method! For the next day, I’m going to delve into ARM Templates as promised to show how they can automate this process even further.
Welcome to Day 5 of 100 Days of Cloud. It’s the one you’ve all been waiting for! Yes, that’s right, today I’M ACTUALLY GOING TO DEPLOY SOMETHING!!! The prep work was important, but now it’s time to get down to the nuts and bolts and deploy some resources.
What I’ve tried to do up to now has to show the multiple different ways we can manage Azure (Portal/PowerShell/CLI). I haven’t touched on ARM Templates yes, but that’s going to be Day 6. Today, I’m going to deploy a virtual machine in the Azure Portal only. While the Portal is the more long-winded, clickety-click way of doing things, it’s also the most informative way to start off deploying in Azure, as you go through the Steps one-by-one and can see exactly what’s happening from both an options and a Cost Perspective.
I hope to be able to demonstrate over the coming days how to deploy a number of Virtual Machines to our Resource Groups that we created in Day 2 using all of the methods available, be able to see how this affects both Actual and Forecasted budgets that were set up in Day 3 (and hopefully get some alerts to generate), and to then apply some different types of RBAC Assignments that we talked about in Day 4 to see how the different assignments affect the rights users have over the Resource Groups and Resources.
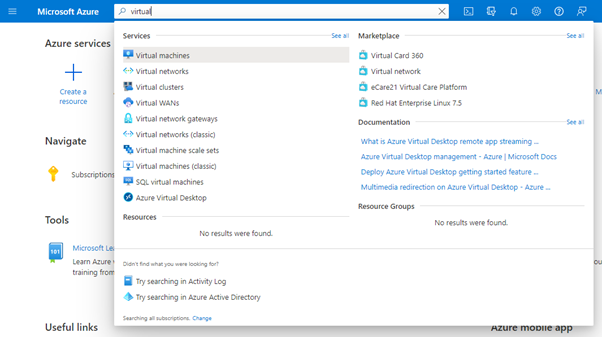
Let’s jump into the Azure Portal and get started. Search for “Virtual Machines” in the search bar, and click to open the Virtual Machines window:
I can see that there are no Virtual Machines active in my Subscription. Click on the “Create” button and select “Virtual Machine” to get started:
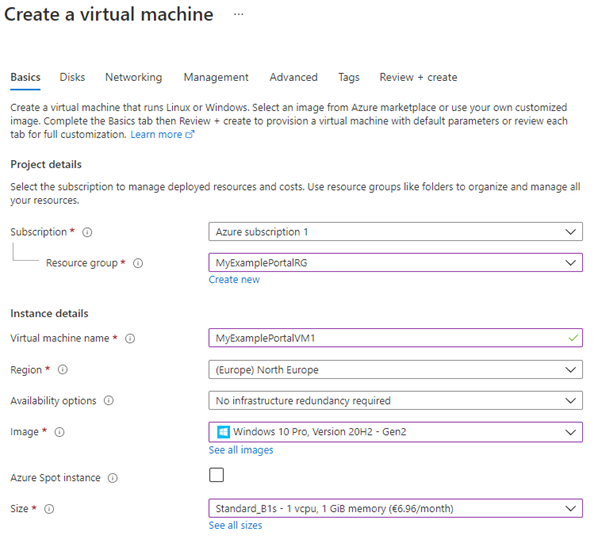
Basics
This opens the “Basics” tab. Here under “Project Details”, I’ll select the Resource Group where I want the Virtual Machine to be created in. I created the “MyExamplePortalRG” during Day 2.
Next in the “Instance Details” section, I need to provide the following:
Virtual Machine Name — this can be anything, but needs to be both authentic in your subscription and easily identifiable.
Region — The VM is automatically placed in North Europe as this is where the Resource Group is located.
Availability Options — there are 3 options we can select here:
No infrastructure redundancy required — this will be a standalone VM with no redundancy
2. Availability Zone — you can have replicated copies of the VM running in different datacenters within the same Azure region
3. Availability Set — This is a logical grouping of 2 or more VMs that allows Azure to understand how your application is built for redundancy. The VMs are isolated across different Fault Domains (Racks/Data Center/Storage/Network) and Update Domains (Updates are staged to occur at different times across the set, thus ensuring the availability of the Application/VM).
Image — this is the Operating System I want to run. I need to have a license for the OS I want to use if required
Azure Spot Instance — this is unused Azure Instances that can be used at a discounted rate. Not suitable for Production workloads
Size — this is the Size of the VM. As we can see, there are multiple options with different price ranges available (and even more if we click “See all sizes”), all based on the amount of vCPUs and Memory we need
By the end of this section, I now have these options:
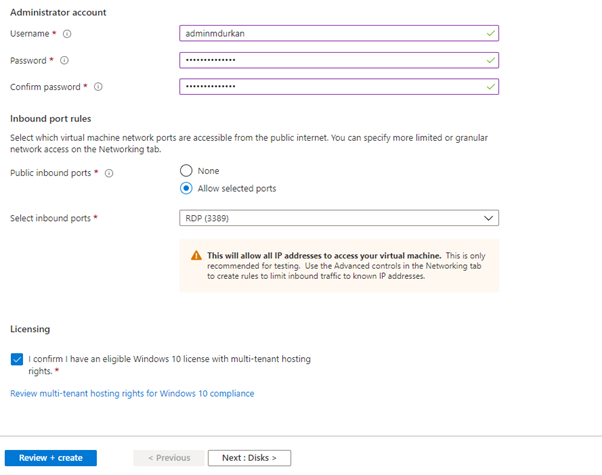
In the next sections, we need to fill in the following:
Administrator Username and Password
Inbound ports that we want to have open to the machine — in an ideal world, we would have an Azure Bastion host to use a jump box to connect to your VMs. For now, we’ll leave RDP (3389) open.
Licensing — this asked you to confirm that you have a license for your OS of choice.
Now click on the “Next: Disks >” button and we’ll move on to Disks!
Disks
There are just 2 options on the Disks Page:
OS Disk Type — this can be a HDD or SSD, and can also be Locally or Zone redundant. We can see all types and explanations when we hit the drop-down:
Encryption Type — Azure encrypts all Storage by default. We can choose to use the Default Azure Provided Encryption, our own managed key or a mixture of both:
We can also select additional disks if required by your VM. Now we have the required options selected, we can move on to Networking:
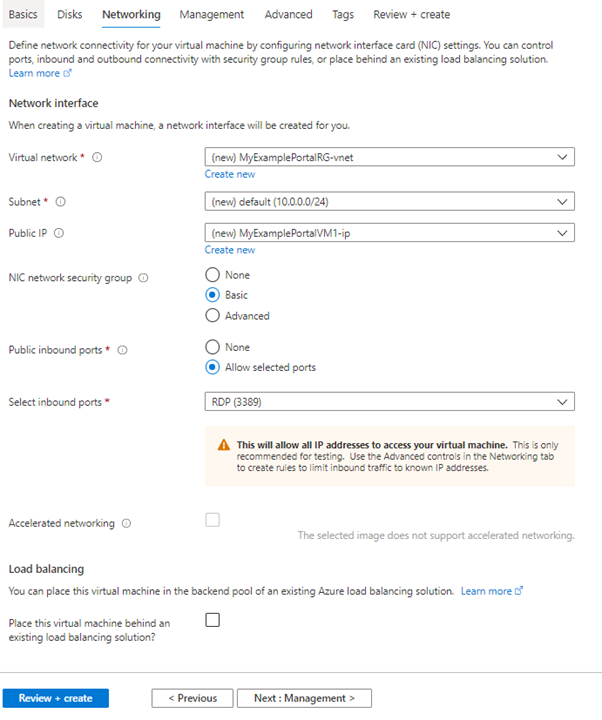
Networking
On the Networking Tab, we define Virtual Networks, subnets and IP’s for use with our Virtual Machine. As we can see, Azure will create a new Virtual Network, Subnet and Public IP Address based on the name of our resource group. We can also define Public Inbound Ports, Network Security Groups and Load Balancing. I’m going to deal with this in future posts on Networking and Security.
For now, we’re just going to take the defaults here and move on to Management.
Management
Management allows us to configure management and monitoring options for our VM, such as:
Boot Diagnostics — used to diagnose boot failures
Identity — used to grant RBAC permissions to System-Managed Identities using Credentials stored in Azure KeyVault
Azure AD Authentication — used on-prem AD credentials to log in, enforce MFA, or enable RBAC Roles
Auto-Shutdown — configures the VM to automatically shut down daily.
Patching
As this is a test VM, I’m going to keep the default options (which doesn’t use any of these features apart from patching), but it’s useful to know these options are available.
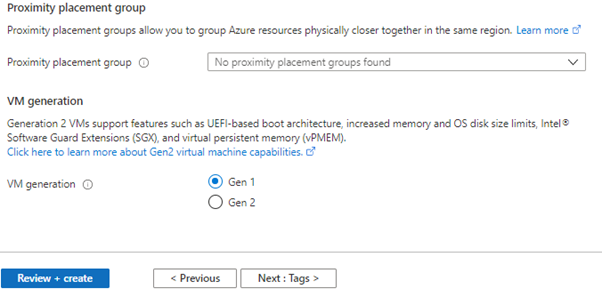
Advanced
The Advanced tab allows us to specify scripts, agents or applications to add to the VM automatically. We can also specify the VM Generation to use:
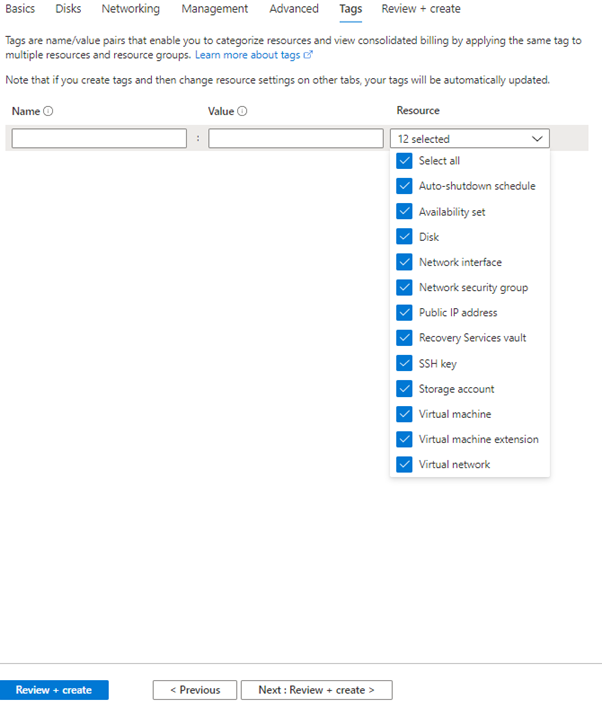
Tags
The Tags tab allows us to apply Name/Value Pair Tags to specific resources within the VM. This may be used for the likes of billing to apply different tags to different groups of resources. For example, I could add tags to the following:
Tag VMNetGRP could be applied to Network Interface, Public IP Address and Virtual Network
Tag VMTagGRP could be applied to Auto-Shutdown and Virtual machine
Tag VMStrGRP could be applied to Disk and Storage Account
We’re finished all of our options here, so now lets move on to Review + Create.
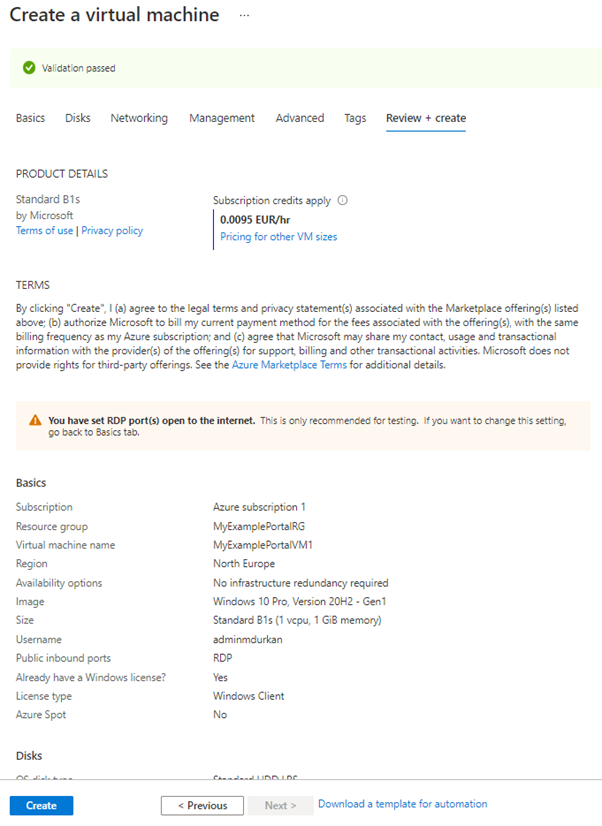
Review + Create
This page gives me a final list of all the options I selected throughout the process, including pricing. Note that at the bottom of the page, it also gives us an option to “Download a template for automation”. This is important and is absolutely something you should do, as it does exactly what it says — provides us with a JSON template for automating the deploying of this exact same type of VM if we wish to deploy another one:
Lets click Create and see what happens:
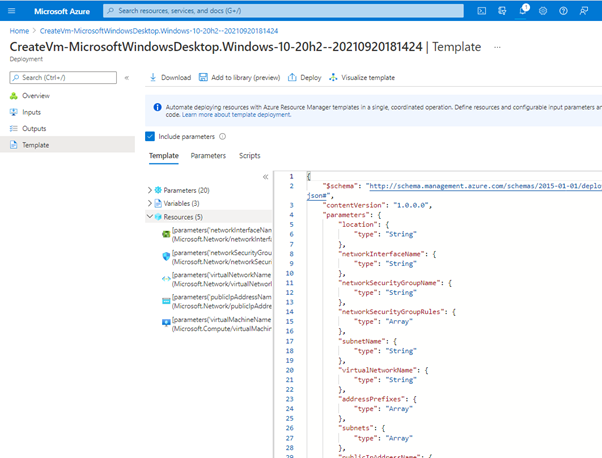
We can see that Azure creates each component of the Virtual Machine (Storage, Virtual Network, IP, and the VM itself) one by one. We’ll eventually get an alert to say when it’s completed. If you had forgotten to download the automation template on the previous page, no problem — click on the Template menu which gives us the template in JSON format for download:
We’ll look more at JSON in the next post, where we’ll use Visual Studio Code to view this and make changes if required.
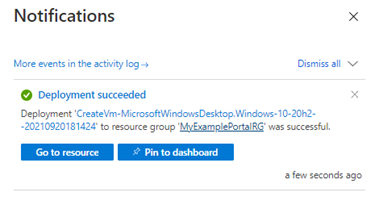
The Finished Product!
Finally, an alert to say the deployment succeeded:
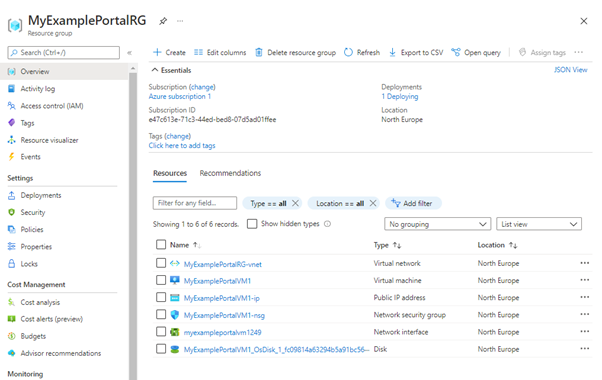
Now, let’s jump into our Resource Group, and we can see all of our resources are available:
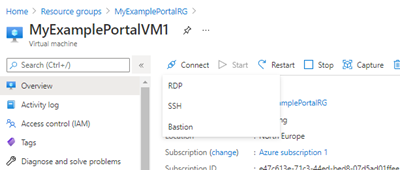
We click into the VM to look at the settings:
Let’s click on the “Connect” button — this will give us the option to use RDP, SSH or Bastion. I’ll choose RDP:
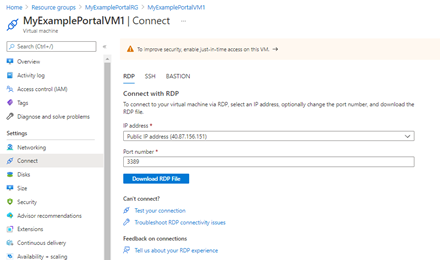
And this will give us a link to download an RDP File:
Click Connect:
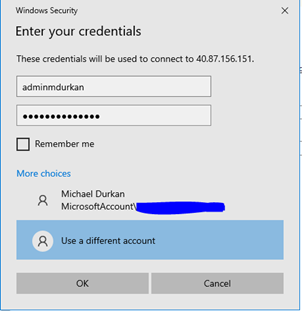
I get prompted for credentials:
And I’m in!!
Final thing to do here — because this is a Test-VM, I’m going to disable RDP for Security reasons. So in the portal, I go back into the Virtual Machine. On the Menu at the side, I click “Networking”. This brings me into the Network Security Group for the VM:
I can see that RDP is set to Allow, so I’m going to click on “Allow” in the Action Column, and set the RDP policy to “Deny”:
Now, I’ll try to connect to the VM again:
Exactly what I wanted to see.
Conclusion
And that is how we create a Virtual Machine in the Azure Portal. Next time, I’m going to do this all again, but this time using Azure PowerShell, and the JSON template that I downloaded. I’ll also come back into Cost Management to see how this VM affects my Budget.